Category Archives: Technical

What’s e-new? How green is my computer?

For most of us our computer – be it a laptop or desktop, Mac or PC – will be one of our biggest purchases. This article by Andy Coulson looks at how we can make the best choice environmentally when making that purchasing decision.

Clearly this is an absolute minefield, as it covers so many areas: how easy it is to recycle, power usage, how environmentally sound the manufacturing process is (eg, use of toxic chemicals), how employees are treated and how ethical the materials used are (eg, rare materials from conflict zones or produced under poor working conditions). Given the limited nature of the article I’m going to concentrate on issues around buying for long-term use and recyclability. However, my research has highlighted how difficult it is to get useful information on this topic.

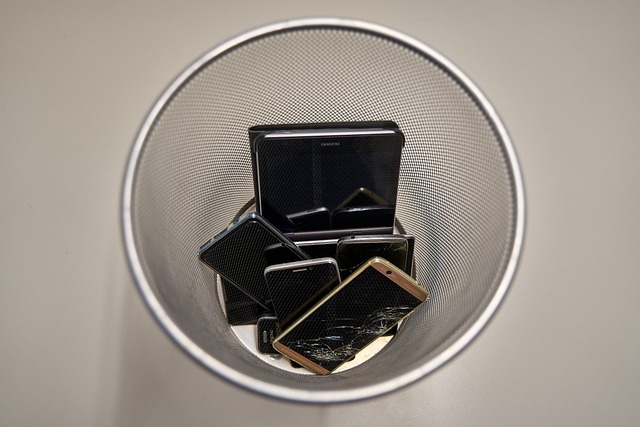
I’ve written before about the difficulty of disposing of electronics in a sustainable way (Editing Matters, September/October 2018). The Waste Electrical and Electronic Equipment (WEEE) Regulations 2013 set out disposal requirements for electrical equipment, but don’t really help us when making purchasing choices as they focus on what happens once the equipment is in the waste stream. But as I mentioned in the earlier article, there are charities and companies that specialise in reusing or recycling old equipment.

Reducing and repairing

One of the first things to consider with IT equipment purchases is whether that equipment actually needs to be replaced. Most computers can have additional memory and hard drives installed, both of which can be cost-effective solutions for a machine that doesn’t seem to be as functional as before. As I’ve written about before, a slow machine can often be a sign that some basic maintenance and management of the software is needed. If you don’t want to do this yourself, it is well worth finding and cultivating someone who can help. There are many small IT support companies and individuals who do a brilliant job, and you’ll be supporting another local business.

One good example of an IT device designed to maximise its lifespan is the Fairphone. The company’s approach is to make a phone that is modular so that you can replace, for example, the battery or the camera module easily at home, thus extending the lifespan of the phone. It also sells spare parts and provides repair tutorials. In addition, Fairphone uses responsibly sourced materials and partners with manufacturers who have safe working conditions and pay fairly.

Reuse and refurbishment

When you get to the point of needing to replace a machine, a refurbished model may be one option. ‘Refurbished’ can cover many things, but essentially if the box has been opened after leaving the manufacturer the contents cannot be sold as new. This could range from a return or a cancelled order (meaning the machine is like new), or a cosmetic scratch, through to a computer with a minor manufacturing fault.

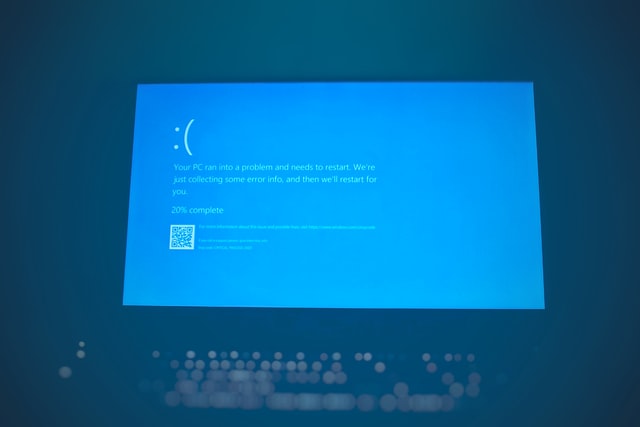
Companies such as Apple, Dell and Lenovo produce millions of computers each year. Among those, there are some that will fail quality control. Modern manufacturing is a very accurate process, and often these faulty computers can be brought up to standard easily. For example, the components are soldered to the circuit board inside. Occasionally you can get a bubble in the hot solder and this can mean a chip pin doesn’t have a good connection. Something like this is easily fixed with a hot soldering iron. In such a complex piece of equipment there are lots of places where an issue can crop up, but these can be resolved relatively easily.

If you search for ‘refurbished Mac’ or ‘refurbished PC’ you will find a number of specialists dealing in these, including the manufacturers themselves. Many companies will sell manufacturer-refurbished products. These machines are significantly cheaper than new, and come with a reasonable manufacturer’s warranty. You can also buy third-party refurbishments, and while these can also be good, you do need to do your research and check on the terms of the warranty.

Replacement

Understandably, many people will be uncomfortable with adding an element of risk into their decisions, and will want to buy new. How do you make a good decision from an environmental viewpoint? As I mentioned at the start, there are a lot of factors involved in that decision, and often a distinct shortage of information to help you make it.

Two certification systems that can help are TCO and EPEAT, although they tend to focus on the major suppliers like Apple, Dell and Lenovo because of the cost involved. For example, TCO covers a range of areas that products are measured against: conflict materials, social responsibility, hazardous substances, electronic waste and the circular economy. I’m going to focus on the last two of these here.

Electronic waste is a topic I’ve talked about before, and it links closely to the idea of a circular economy approach. Currently, we largely operate in a linear economy. We use new materials (eg, mined metals rather than recycled) to make things and then dump them when they are finished with. A circular economy approach embeds the idea of keeping things in circulation for as long as possible through repair, reuse and recycling. Companies embracing this approach will do things like:

  • ensuring spares and repair information are available
  • having recycling pathways, allowing materials like metals to be recovered and reused
  • offering buy-back and take-back schemes for upgrading, so materials can be recovered and recycled
  • utilising standards, such as USB-C, to minimise the number and type of cables needed, and
  • creating durable products.

A TCO-certified laptop will have information available about criteria such as how many battery charge cycles you can expect from the battery, and the percentage of recycled plastic used in the machine. However, trying to find this information when you buy is very difficult. For example, Ebuyer lists the certification in the product specification, but you’ll have to trawl the internet to see what that means.

What to do?

The long and short of this is that it is very difficult to make a well-informed choice. So my conclusion is really to maximise the use of what you have and dispose of old equipment responsibly, so it can, hopefully, be recycled. When you replace a machine, ask the awkward questions about environmental aspects of the machine and perhaps consider buying refurbished.

Ethical Consumer and Mossy Earth both have useful guides if you want to read further.

About Andy Coulson

Andy Coulson is a reformed engineer and primary teacher, and a Professional Member of CIEP. He is a copyeditor and proofreader specialising In STEM subjects and odd formats like LaTeX.


About the CIEP

The Chartered Institute of Editing and Proofreading (CIEP) is a non-profit body promoting excellence in English language editing. We set and demonstrate editorial standards, and we are a community, training hub and support network for editorial professionals – the people who work to make text accurate, clear and fit for purpose.

Find out more about:


Photo credits: green laptop by cloudlynx; e-waste  by Volker Glätsch, both on Pixabay.

Posted by Abi Saffrey, CIEP blog coordinator.

The views expressed here do not necessarily reflect those of the CIEP.

What’s e-new? Technology terminology

Of bits, nerds and cookies

Computing has added many words to our vernacular, as well as bending the meanings of others and repurposing them. This article explores the roots of some common terms we take for granted or might have been bemused by.

Acronyms, abbreviations and portmanteaus

Computer terminology loves acronyms, abbreviations and portmanteaus for their ability to create a simpler term from something more long-winded. Your computer is bristling with these – disks are connected by USB (Universal Serial Bus) or SATA (Serial Advanced Technology Attachment); data is copied into RAM (random-access memory); the images reach your monitor via an HDMI (high-definition multimedia interface) connector, and data is sent around in bits (binary digits).

Many acronyms and abbreviations come from people’s names. For example the RSA algorithm, which is at the heart of most security on the internet, is named after its authors: Rivest, Shamir and Adleman. Meanwhile the Linux operating system takes its name from its original author, Linus Torvalds, who wrote it as a version of Unix.

Technology has often relied on abbreviations for practical reasons. In the early days of text messages, abbreviations were essential to fit a short message length with limited typing capability. Early computing systems used modems to connect to the internet, and transmission speeds were slow (remember the fun of waiting for an image to download with a modem?), so abbreviations slimmed down messages. This has carried over into social media today. One example pertinent to editors is TL;DR, which means ‘too long; don’t read’. Perhaps we should reclaim this as NAE – needs an editor.

Inventions

Some words are complete inventions. For some reason, customer support seems to provide a rich seam of these. Maybe this says something about the job? Two examples are PEBKAC (problem exists between chair and keyboard) and the error code Id10t (I’ll leave you to figure that one out for yourself). Terms for the user seem to be a common theme – perhaps this confirms the stereotype of computer people not always being people people! My favourite has to be ‘wetware’ or ‘liveware’, which interfaces more or less neatly with the hardware and software.

Repurposing

Repurposing or flexing the meaning of language has always happened, and the terminology of technology is no different. Many of the most common terms have come to us via this route.

One good example is the term ‘surf’, as in ‘surfing the internet’. One of the first uses in the computing context was in 1992. Before that the term for the practice of riding on boards on waves can potentially be traced back to 15th-century Hawaii. In the 20th century surfing became more popular in the US, especially in 1960s California. It seems to be around the 1980s that some new uses started to appear – ‘van surfing’ (dancing on a van roof); ‘train surfing’ (riding on the roof of a train) and then ‘channel surfing’ (hopping from channel to channel using a TV remote control). I suspect it was a short hop for Silicon Valley to borrow and adopt the term from there.

Your average computer geek’s (originally meaning ‘fool’ or ‘freak’ in Middle Low German, but has become a slang term for a slightly obsessive enthusiast) reading matter often draws inspiration from some odd sources. Nerd, another term for the stereotypical slightly obsessive computer person, appears to come from the Dr. Seuss book If I Ran the Zoo. Cookie, a term for a small packet of information passed between a web browser and web server, came from ‘magic cookies’ used by programmers, which in turn has its roots in fortune cookies, as it is a small container for information.

Often history has had a hand in the repurposing of words. Patch is a good example of this. The term is now used to describe a series of changes to computer code to fix problems or improve the code. If you look at the update history on your computer, you can often see references to patches. This comes from the time when paper tapes or punched cards were used to put information into computers. When you needed to change a program, you had to cut out part of the tape and patch in a new bit. Meanwhile ‘bug’, used to describe an error in computer code, is often wrongly attributed to Second World War computing pioneer Grace Hopper, who tracked down a problem to a moth caught in one of the computer’s relays (a sort of mechanical switch). She taped it into the logbook for the computer with the word ‘bug!’ written next to it. However there are earlier records of bug being used to describe defects in mechanical systems as far back as the 1870s, and Thomas Edison certainly used the term in his notes.

Problems

Some computing terminology has, like any language, acquired problematic terms. Recently I worked on a computing book that referred heavily to the ‘master–slave system’. This term refers to a computing system (or part of one) where one piece of equipment or component has a controlling (master) function. The term is decades old, and a recent article in Wired found that in 1976 67,000 US patents used it. Unfortunately, this means it is deeply embedded in many technologies, despite being rooted in unacceptable practices and discriminatory language.

In the book I worked on this led to a lot of discussion, as the term is so well understood that really it needs an industry-wide agreement on what to use instead. Fortunately the company whose technology the book was about was happy to implement its own approach, using ‘leader’ and ‘follower’ instead.

The issue raises a lot of questions within the industry, highlighting yet another area in society that suffers from a lack of diversity. Wired’s article on this, ‘Tech Confronts Its Use of the Labels “Master” and “Slave”’, is an interesting insight into why changes like this take so long.

As you can see, like any new innovation, technology has adopted, stolen, repurposed and occasionally mangled existing language in order to describe itself. And these new words have then been incorporated into more general English usage, often with further repurposing.

About Andy Coulson

Andy Coulson is a reformed engineer and primary teacher, and a Professional Member of CIEP. He is a copyeditor and proofreader specialising In STEM subjects and odd formats like LaTeX.


About the CIEP

The Chartered Institute of Editing and Proofreading (CIEP) is a non-profit body promoting excellence in English language editing. We set and demonstrate editorial standards, and we are a community, training hub and support network for editorial professionals – the people who work to make text accurate, clear and fit for purpose.

Find out more about:


Photo credits: cookies by Jason Jarrach; surfer by Jeremy Bishop, both on Unsplash.

Posted by Abi Saffrey, CIEP blog coordinator.

The views expressed here do not necessarily reflect those of the CIEP.

A new CMOS style sheet for PerfectIt users

PerfectIt users asked for a CMOS style sheet, and PerfectIt has delivered!

Exciting news – from 10 August 2021, PerfectIt will include a style sheet for the Chicago Manual of Style (CMOS) for all PerfectIt users, whether on PC or Mac. I think this addition to the program will make many PerfectIt users very happy! The style is an official product that the CMOS team has created for use in PerfectIt.

A valuable tool for editors

In case you are yet to discover PerfectIt, it is one of the best tools available for improving the speed and quality of editing in MS Word. PerfectIt arrived on the scene about 12 years ago as a consistency checker, picking up things such as ‘centre’ and ‘center’, ‘Client’ and ‘client’, ‘8’ and ‘eight’. The program flags these inconsistencies and prompts the user to decide whether to make changes and which option to choose. Over the years, PerfectIt’s capabilities and usefulness have increased. For example, the program now fixes basic formatting issues and can create lists of abbreviations and comments as quick, discrete tasks.

The power of style sheets

Using PerfectIt’s built-in style sheets takes the program to another level because it picks up not just inconsistencies in a document but also deviations from the chosen style. The program has style sheets for different spellings (eg Australian, Canadian and US) and organisations (eg European Union, United Nations and World Health Organization). All style sheets are available in both the PC and Mac versions, although anyone using the PC version of PerfectIt has the added benefit of being able to modify those style sheets or even create their own.

Online style guides

When I first started editing, looking up something in a style guide meant finding the book, consulting the table of contents or the index, then scanning a particular page to find the relevant advice. Today, editors can generally consult an online style guide, making the process much quicker and easier. CMOS was a trailblazer in this regard, with an online version first available in 2006. In Australia, we lacked a local online style guide until recently, when (like buses) three came along at once!

Now, imagine that the power of the online version of CMOS could be combined with that of PerfectIt. Well, that’s exactly what is now on offer for PerfectIt, with an integrated product that shows both the relevant advice from CMOS and the appropriate portion of the manual. This product is available to anyone who is running PerfectIt 5 (the latest version of the program) on a PC or Mac and has a subscription to CMOS Online (although only those using the PC version will be able to customise the style sheet).

PerfectIt + CMOS in action

To investigate the new feature, I ran PerfectIt on a test document, selecting the CMOS style sheet. The first thing it finds is under the ‘Hyphenation of Words’ test, and the sidebar tells me that a word appears with and without a hyphen:

If I want to know more, I simply click on ‘See more from CMOS 7.83’ and, hey presto, the relevant section of CMOS appears (I can scroll down to read the complete section):

The beauty of this system is the seamless link between PerfectIt and CMOS, which allows me to access the relevant advice without leaving my Word document.

In another example, under the test ‘Spelling Variations’, PerfectIt picks up the use of ‘focussed’ and gives this summary:

As above, I can click ‘See more from CMOS 7.1’ to see this particular entry from the manual:

You’ll notice that some of the text is red – those are active links that take me directly to the websites. Some quotes from CMOS text contain links to other parts of the manual; again, these appear in red and take you into the online CMOS.

A highly detailed style sheet

Looking behind the scenes (via the ‘Style Sheets’ section of the PerfectIt tab), we can see what makes up this CMOS style sheet. The first page explains that the style supplements the 17th edition of CMOS and is designed to help users to apply the style and learn how it works.

Clicking on ‘Always find’ in the Style Sheet Editor provides a list of the tests that PerfectIt runs for this style sheet. The list is more extensive than for previous style sheets. For example, in the case of hyphenation, the WHO style sheet has the categories ‘Hyphenation of Phrases’ and ‘Hyphenation of Words’, whereas the CMOS style sheet has those two categories plus numerous subgroups. It also has multiple subgroups under ‘Preferred Spelling’:

If we investigate one of those subgroups, ‘Hyphenation of Age Terms’, we can see where the notes that appear in the style sheet come from:

The text under ‘Instructions’ in the list above is what appears in the sidebar (directly under the name of the test) when PerfectIt is running. This level of detail makes the CMOS style sheet extremely useful.

Congratulations to the team

Having been involved with the various iterations of PerfectIt’s WHO style sheet, I’m aware of the work that’s involved in developing the program’s style sheets. I can only imagine how much harder it must have been to take this to the next level by adding links to CMOS, and I congratulate PerfectIt and CMOS on a job well done. I’d love to see this approach extended to other style guides.

PerfectIt is a fabulous tool for editors, and the addition of the CMOS style sheet has taken it to a whole new level.

Disclosure

The author received a one-year subscription to PerfectIt and CMOS in return for writing this review.

About Dr Hilary Cadman

Dr Hilary Cadman is an established technical editor and trainer. She is passionate about helping fellow editors to save time and improve the quality of their work by becoming confident with technology. She runs online introductory and advanced courses in PerfectIt. Find out more at: cadmantraining.com

New to PerfectIt? Try taking one of Hilary’s online, self-paced PerfectIt courses. CIEP members receive a 25% discount on all Cadman Training courses.

Log in to CIEP as a member > Training > Promoted courses > Cadman Training


About the CIEP

The Chartered Institute of Editing and Proofreading (CIEP) is a non-profit body promoting excellence in English language editing. We set and demonstrate editorial standards, and we are a community, training hub and support network for editorial professionals – the people who work to make text accurate, clear and fit for purpose.

Find out more about:


Posted by Liz Jones, information team editor.

The views expressed here do not necessarily reflect those of the CIEP.

What’s e-new? How to be your own IT department

This article by Andy Coulson, for the regular What’s e-new? column in members’ newsletter The Edit, looks at how to cope when things go wrong with your technical set-up, from initial troubleshooting to simple fixes, and where to look for more help and advice.

The article covers:

  • Backing up before you start
  • Being methodical
  • The power of the off button
  • Diagnostic tools.

As self-employed professionals, we have to wear a number of hats. One of the least popular and worst fitting is the IT hat. Let’s face it, for most of us faced with IT problems the challenge is avoiding a rapid descent into playing laptop frisbee. But there is a lot you can do to resolve IT problems for yourself and build your confidence and skills in tackling those in future.

Before you start

If you read no further, please, please, please take this one thing on board. Back up all your important files regularly. Also, do it before you try making changes to your system. If you have Microsoft 365 and Windows 10 this should be automatic for a lot of your documents, but here’s how to do it: https://support.microsoft.com/en-us/office/back-up-your-documents-pictures-and-desktop-folders-with-onedrive-d61a7930-a6fb-4b95-b28a-6552e77c3057. If you use a Mac, it is a little more complex: https://techcommunity.microsoft.com/t5/office-for-mac/how-to-use-onedrive-for-backup-on-mac/m-p/29589. Both Mac (Time Machine) and Windows (Backup/File history in settings) have good internal backup systems that also back up the Windows or MacOS. Take a little time to learn how to use them, buy an external disk drive and set them to automatically back up on a regular basis.

When you have a problem with IT there are typically three areas: simple hardware, like a loose plug, covered below in ‘Be methodical’; simple (often inexplicable!) software issues, covered in ‘The power of the off button’; and more complex problems, covered in ‘IT A&E’.

1. Be methodical

When a problem occurs, you need to step away for a moment and be really methodical about it. Say your printer isn’t working. The first port of call in the absence of any other clues (such as a message on screen) is to check physical things: Is it switched on? Is the power plugged in? If it uses a cable to connect to the computer, is that plugged in? At both ends? You don’t need to know much about computers to check these things – you need to look carefully, wiggle plugs to make sure they are fully pushed in, and follow cables to make sure the right ones are plugged in. But the point is to be methodical and thorough.

2. The power of the off button

If a program appears not to be working then closing and restarting it is a good starting point. If the program has frozen, then in Windows, press Ctrl, Shift and Esc at the same time. This causes Task Manager to pop up, and from here you can right-click on the frozen application and select ‘End task’ to close it. On a Mac you use the Option, Command and Esc keys, select the app in the Force Quit Applications window, and then click on ‘Force Quit’. If you then reopen the application, it should run normally.

If this doesn’t work then try restarting the computer. I’m always slightly concerned by how often turning something off and back on is a solution to software issues, but it is nevertheless a fairly reliable method. This can cure some apparently serious issues. For example, if I try and do a reboot on my laptop, I get an alarming-looking blue screen saying ‘Do you want to start Windows in Safe Mode?’ when it restarts after shutting down. With a little help from Google I quickly realised a) this was not a drastic problem, and b) I couldn’t fix it easily, and if I simply used the power button to switch off and then start up again all was OK.

A related solution worth trying if you are having Word issues in Microsoft 365 is to use the repair function. In Windows 10 if you go to ‘Settings’, then ‘Apps’ and find Microsoft 365, click on ‘Modify’ and you will get a pop-up that prompts for a ‘Quick repair’ or ‘Online repair’. Try a Quick repair, and if this doesn’t work run the Online repair (but be prepared to be patient).

3. IT A&E

If you have an error message or make no headway with the earlier fixes, then you need to try some diagnostics to get to the bottom of things.

Google is one of the simplest diagnostic tools to use. If you have an error message, search for the text and any error number in Google. For Windows and Word issues it will often have answers from Microsoft’s knowledge base near the top. These can sometimes be a bit techy, but they are generally accurate and safe. As you get away from Microsoft and Apple’s pages be prepared to be cynical and critical about where the information comes from, as there are bad sites out there. (For example, I would trust a reputable technology site or magazines like Tech Republic or ComputerWorld over a random post on Reddit.)

Device drivers (the software that speaks to the hardware) have a reputation for being a source of problems. With Windows 10 these are generally updated automatically, but occasionally a manual install can resolve a problem. This windowscentral.com article – windowscentral.com/how-properly-update-device-drivers-windows-10#page1 – can guide you through the various options in the order in which you should use them. If you can use the first method, it will be the safest as it uses drivers that Microsoft has tested.

Both Microsoft and Apple provide inbuilt diagnostic tools that can help to identify issues, particularly in hardware. For example, Windows has a number of these tools:

  • Task Manager – Run this using Ctrl-Shift-Esc to see what software is running and how much memory and CPU effort it is using. This can help you spot programs that are doing something odd (for example using a lot of CPU %).
  • Performance Monitor – This can give you an idea about what might be slowing your PC down. You can find it under the ‘Windows Administrative Tools’ section in the Start menu. You can also see something similar under the Performance tab in Task Manager.
  • Reliability Monitor – This is quite well-hidden, but it allows you to visualise how reliable your system is and get historical access to error messages. The easiest way to find it is to search for ‘Reliability history’ in ‘Settings’.
  • Windows Disk Management – This can flag potential issues with disks. This is under the ‘Windows Administrative Tools’ section in the Start menu.

As you go along, it is worth keeping notes on things you fix, preferably not on the computer. This will help by reminding you of what you have done, so you can fix things that happen again. It’s also a good thing to look back over and realise how much you have learned.

Finally, it is worth finding a local computer repair person and building a relationship with them for the times when you can’t fix it yourself.

Summing up

The article has looked at:

  • The importance of backing up files before performing fixes
  • Where to start with diagnosing and fixing problems
  • Simple fixes
  • Finding out more about problems
  • Where to go for more help

What else is e-new?

Andy has written many articles demystifying software and technology. Check out:

About Andy Coulson

Andy Coulson is a reformed engineer and primary teacher, and a Professional Member of CIEP. He is a copyeditor and proofreader specialising In STEM subjects and odd formats like LaTeX.


About the CIEP

The Chartered Institute of Editing and Proofreading (CIEP) is a non-profit body promoting excellence in English language editing. We set and demonstrate editorial standards, and we are a community, training hub and support network for editorial professionals – the people who work to make text accurate, clear and fit for purpose.

Find out more about:


Photo credits: dog desktop support by Pavel Herceg; blue screen by Joshua Hoehne, both on Unsplash.

Posted by Abi Saffrey, CIEP blog coordinator.

The views expressed here do not necessarily reflect those of the CIEP.

What’s e-new? Passwords

By Andy Coulson

Passwords … We all have dozens and dozens of them. But how many of you have not changed the default password on something you’ve bought, or use the same password for lots of things? If so, you are not alone – the National Cyber Security Centre (NCSC) found that ‘Less than half [of people surveyed] do not always use a strong, separate password for their main email account’. The NCSC did a large survey in 2019, and the summary of the results makes interesting reading.

So, what can you do about this? The NCSC has a list of six key actions:

  • Use a strong and separate password for your email.
  • Create strong passwords using three random words.
  • Save your passwords in your browser.
  • Turn on two-factor authentication (2FA).
  • Update your devices.
  • Back up your data.

This is a good list to work through, and I’ve discussed some of these before, but I’m going to dig into others a little deeper.

Strong and separate

Ideally, you should have a different password for each login. But, like me, I bet you have some types of account that you use the same password for. However, I don’t do this for important things, like banking or email. The NCSC highlights having a different password for your email as being the one to start with. The next problem becomes how to remember all these different passwords, and I’ll pick up on that with password managers, below.

So, what is a good password? You’ve probably seen a password security meter on some sites, where the password is rated from poor/weak to good/strong as you type it. Can you think what gets you into the strong category? Broadly, it’s more characters – the longer the better.

But it’s a little more complicated than that. You need to avoid repeated or sequential characters (like ‘aaa’ or ‘123’) in the password, as these weaken it. It is also crucial to avoid personal information – your name, parts of your address, date of birth, family members’ names and so on – as part of the password.

So where does that get us? ‘B7meapofngh04psnf’ is a strong password, but is a bit tricky to remember, so I’ll let you into a little secret. Most of the time, three or four random words as a phrase will create a really secure password. For example, the password at the start of the para is considered very strong, but so is ‘CanteloupeRiverArtichoke’. Which is easier to remember?

Many sites ask for a mix of upper- and lower-case letters, numbers and symbols. Where sites or apps require this, you can always add a symbol and number to a phrase, such as ‘CanteloupeRiverArtichoke+3’.

So, our four takeaways from this are:

  1. Use separate passwords for at least email and banking, but preferably all your accounts.
  2. Make passwords long and as random as you can.
  3. Don’t use personal information, repetition or sequences in passwords.
  4. If you need to remember a password, use a three- or four-word random phrase.

Testing and checking passwords

Before I dive into this, a word of warning … If you are going to put a password into something, make very sure you know what you are putting it into. It would be very easy to run a ‘check my password’ scam website! However, the sites listed here are, to the best of my knowledge, safe and legitimate. I mention potentially compromised passwords below. This does not mean that someone is misusing the password, it just means that there has been data stolen from somewhere that potentially contains that information. Often these thefts are so large that many passwords are not used, so if your password is ‘potentially compromised’, simply take action and change it as soon as you find out.

First of all, if you use Google there is a built-in password check-up. If you go to your Google account online you will likely see this on the home page. If you click on ‘Take action’, it will highlight passwords potentially compromised in data breaches. You can then go and change those. It will also flag weak passwords and those used on multiple accounts.

Another good resource is ‘have I been pwned’, which sounds rather spammy, but is a highly regarded source of information about data breaches. You can use the site to check if your accounts have been affected by a data breach.

Finally, many websites have a password strength checker that allows you to get a sense of how good your password is. However, if you want to play around with ideas there is a good checker on the bitwarden site (bitwarden is one of the password managers discussed below). This also gives you an idea of how long a typical modern password cracker tool would take to work this out.

Managing your passwords

Many security experts suggest using a password manager to hold your passwords. These are software packages that keep your passwords in a highly encrypted online store, allowing you to use the passwords and logins across devices – so on your laptop, phone and tablet. Essentially you need to remember one, very strong, password to access all your accounts, but each account can then have a different, very strong password. That master password is never stored on the provider’s computer, so even if they are hacked the hacker only accesses the encrypted gobbledygook. Needless to say, your one password needs to be one you can remember, and it needs to be kept safe!

The NCSC article mentioned earlier explains that most modern browsers (Google Chrome, Apple Safari, Microsoft Edge and Mozilla Firefox) have a built-in password manager. These work well, but it is worth spending a little time understanding the limitations of these. I’m especially impressed with Firefox’s Lockwise, though I’d rather use a separate password manager as it spreads the risk around.

There are a number of well-regarded standalone password managers on the market that provide similar features and a mix of free and paid-for versions. You need to be looking, at a minimum, for end-to-end encryption (this means your passwords are never available as plain text – they are always scrambled except on your device); cross-platform applications (ie you can use them on your laptop, tablet and phone) and secure password generators. Most of them also offer (but you may have to pay for) options such as secure sharing, which allows you and a partner to both have access to a shared account or service, in case, for example, one of you falls ill. I use one called bitwarden, but other well-known packages are LastPass, 1password, KeePass and Dashlane. Dropbox has just added a password manager to some of its paid plans.

2FA – a further level of security

2FA is short for ‘two-factor authentication’. You may be familiar with this from your bank; banks have upgraded their security in the last year or so. This is where, after entering your password, you need to enter a code that is texted or emailed to you, so you use two factors to log in. They often use your phone for one of the factors, as you often have it on you and this means it is more likely to be you.

Many services support using 2FA, including Google and most of the password managers. If you can use 2FA to secure key tools and services it is worth doing, as it makes hacking your accounts even harder.

Good luck and stay safe out there!

Andy Coulson is a reformed engineer and primary teacher, and a Professional Member of CIEP. He is a copyeditor and proofreader specialising In STEM subjects and odd formats like LaTeX.


In previous What’s e-new articles, Andy has covered accounting, working efficiently in Microsoft Word, Word’s Editor, and useful online resources related to fixing computers, managing time and keeping fit.


Photo credits: padlocks by Georg Bommeli; purple artichokes by Joanna Kosinska, both on Unsplash

Posted by Abi Saffrey, CIEP blog coordinator.

The views expressed here do not necessarily reflect those of the CIEP.

Making the most of Microsoft Word

By Alison Shakspeare

It’s a fierce world out there, particularly for freelancers, and freelance editors need to make the most of every second when their hourly income rate depends on it.

Although ‘other software is available’, Microsoft’s Word is still the go-to writing program across the English-speaking world. Therefore, maximum familiarity and minimum ineptitude have got to be good things – and those are on offer through the CIEP’s Word for Practical Editing course.

I’ve been using Word since expensive new IBM PCs were gingerly invested in by my then-employers. There was no money for training and an infant worldwide web, so when you had a query it was a case of wading through cumbersome, incomprehensible manuals or picking the brains of those who’d been using it for longer. So, over the years I’ve gradually absorbed and researched ways and means of improving my knowledge and use of this ever-updating, universal software – but it’s amazing what you fail to pick up on if you jog along on your old familiar track.

You can tell the course has been written by practising editors because it acknowledges the numerous approaches to editing tasks. Therefore you don’t feel that there is only one way to use the program or to find and use the tools. The course uses screencasts as well as documentation, so you can absorb the information in the way that suits your brain best. And when you’ve finished you end up with the study notes, exercises, model answers and a range of useful resource downloads to refer back to.

What Word for Practical Editing is not is a beginner’s guide to using Word. You do have to be a user, and you do have to know your way around the basic conventions and tools, or you’ll find yourself floundering in a sea of unfamiliar terms.

What Word for Practical Editing does do, which may be unexpected, is widen your knowledge of working in the editing world in a business-like manner and of dealing with clients.

Whether you use a PC or a Mac, this course is for you if you want to:

  • extend your knowledge on approaching a project, beginning with the client brief before you approach the Word manuscript and tips on setting up the program and its tools, and different ways of viewing it
  • improve your ability to find errors and inconsistencies – not only are you told how to use the inbuilt Find & Replace (F&R), Spelling & Grammar and Macro tools and are referred to some great add-in programs, but you are also given a useful list of common errors any editor needs to be sure they are clearing up
  • clearly communicate your findings with your client – from checking the compatibility of your Word versions, to being sure that what you receive matches the brief, to different ways of showing Track Changes; you are also given useful templates for a stylesheet, an invoice and a feedback form
  • check that you are using styles and templates as effectively as possible – there are several layers to using these universal bugbears, and if every Word user were sent a copy of this information the air might be less blue
  • widen your knowledge of shortcuts – and you can download a useful list of them to keep referring to until they become second nature
  • gain insights on archiving and CPD, because jobs aren’t always done with once you’ve sent off the edited Word doc.

I will probably not end up using all the shortcuts the course introduced me to, even though they save on keyboard time and could even ward off RSI, but I’ve certainly expanded my knowledge of what Word offers and tightened up my use of it – and therefore increased my hourly income.

What more could you want?

Alison Shakspeare came to editing after a career in arts marketing and research for leading national and regional organisations. Her client base has expanded as her skillset has grown from basic copyediting to offering design and layout services. She truly enjoys the CPD she gains from working with academics, business organisations and a growing number of self-publishing authors.


Photo credit: Love to learn by Tim Mossholder on Unsplash

Posted by Abi Saffrey, CIEP blog coordinator.

The views expressed here do not necessarily reflect those of the CIEP.

What’s e-new? 21 for 2021

By Andy Coulson

In keeping with the theme of ‘Practical tools to boost your business’, I’ve come up with a list of 21 tech tips for 2021. These are all things I’ve tried and tested myself.

1. Have a system

This is the single most important tip of the lot. Find a system to organise and manage your work that works for you, and use it. It doesn’t matter if it’s a notebook and pen or a complex program. Keeping good records and knowing what you have done and what you still have to do saves you time and effort (and stress!). Some of the tools below will help with that.

Word

2. Learn Word

I suspect that for most of us, Word is our most-used tool. Within this there are lots of really useful smaller tools that can help you edit faster and more efficiently. Tools like styles, templates and wildcard Find and Replace can all help. Take some time to learn how to use these – the CIEP offers a ‘Word for Practical Editing’ course that covers them. Also, look into customising Word’s various autocorrect and autoformat options, which can save you a lot of time and heartache.

3. Macros

While we’re on the subject of Word, macros are another timesaver. These allow you to automate certain actions, so a couple of keystrokes can run a series of actions that would normally take multiple keystrokes. Karen Cox and Paul Beverley both gave excellent presentations on the subject at this year’s CIEP conference. Paul’s ‘Starting Macros but Slowly’ video on YouTube is a good place to start.

4. PerfectIt

Staying with Word, PerfectIt is an add-on that allows you to check consistency and apply style rules to documents. It comes with a number of good style files, but you will benefit from investing time in learning how to edit and customise these. Daniel Heuman also gave a useful presentation on customising PerfectIt at the CIEP conference. Intelligent Editing’s website, the PerfectIt Users Facebook group and the CIEP forums are also good resources.

Office

5. Learn Excel

I’m guessing you bought Microsoft Office to get Word? But it also means you have access to other programs that you may not be using to their full extent. Take Excel – it lets you do lots of things involving numbers or data. You can manage your accounts, keep lists of jobs and record the time and quantity of work involved. Maya Berger’s presentation at this year’s CIEP conference was a great introduction to this. Excel’s in-built help with formulas walks you through using them, allowing you to experiment.

6. OneDrive

With Office you also get access to Microsoft’s OneDrive online cloud storage. Some of my clients have expressed concerns about the terms and conditions on other cloud storage services, but so far OneDrive seems to be a broadly accepted solution. I use this to back up all my files, and it has an easy-to-use share feature that allows you to share a folder with a client. This is a reliable way to return finished files – simply right-click on the file or folder, click ‘Share’ and then send the file or copy a link and send that via email.

7. Windows App Explorer/Mac App Store

Just as on your phone or tablet, the major computer operating systems now tend to have an App Store. It is well worth having a poke around in these, as there are often some little gems available.

8. OneNote

One such gem (although it can be a real Marmite application!) is OneNote. This is available as an app or as part of the Microsoft 365 subscription. It is a digital note-taking app that allows you to capture freeform notes. On a tablet it supports freehand drawings, too. I’ve used it as an alternative to a pad for making notes as I work.

Clipboard tools and text expanders

9. ClipX

ClipX is a small, free clipboard expander. It lets you access a list of your most recent clipboard entries and reuse them. It also supports add-ins, one such being Stickies, which is an editable list of sticky items that you can paste in. I use that for common tags or comments when I have to tag a file.

10. TextExpander

Text expanders take a short key sequence and expand them into a longer piece of text, eg typing ‘\pfa’ might expand into ‘please find attached the requested file’. TextExpander works across the programs on your computer and allows you to build a library of replacements and retain formatting.

11. Phrase Express

Phrase Express is an alternative to TextExpander. It seems to be aimed at corporates with multiple users, but is still very usable on a single machine.

Time

12. toggl track

The recently rebranded toggl track is probably the best-known time tracker. The website, browser plug-in and app allow quick and easy time tracking. You can group these by project and customer, and break projects into smaller steps (eg by chapter). The free version is very usable, and the paid plans can also handle billing.

13. Harvest

Harvest is another time-tracking app, but is more focused on billing. It has a free trial period, but after that it is paid for.

14. RescueTime

RescueTime tracks your time in the background and allows you to see where you have spent the time on your computer and your phone. It is intended to help you manage your computer time and see where your time-wasters are. I find it helpful as a back-up to toggl track. If I forget to start a timer, RescueTime can tell me I spent five hours on Word, for example.

15. Pomodoro

Pomodoro is a productivity technique that involves breaking your work up into chunks (typically 25 minutes) with short breaks between. This is supposed to help with focus, but I use it from time to time just to remind myself to get up and move. There are many good apps to support this, but look out for ones where you can adjust the times to suit you. Search for Pomodoro timers in your search engine or app store.

16. Break timers

Break timers encourage you to step away from the screen for a bit. There are many options available. I like Workrave, which is free, configurable and features sheep.

Dictionaries

17. Lexico/OED

We all need a dictionary, and the OED recently created a free version called Lexico. It uses the same interface as the full subscription product, so it remains easy to use. (The full product is often available through your local library.) You can also access other dictionaries online for free, such as Collins and Merriam-Webster.

PDFs

18. PDFCandy

I’ve talked about PDFCandy before. I think it creates the cleanest, most accurate Word files from a PDF of any of the tools I’ve tried, even with multi-column magazine layouts. The web-based tool is free to use.

Organisation tools

19. Todoist

If you like using to-do lists to organise yourself, then Todoist is my favourite tool to manage these. It will work on a computer or on a phone or tablet (and will sync across platforms) and has both free and paid for versions.

20. ClickUp

ClickUp is my organisation tool of choice. It has quite a steep learning curve because it is very flexible. It enables you to capture information about your jobs and organise and present that in a lot of different ways. I use it mainly for tracking progress, record keeping and planning my availability.

21. Explore!

Many of the tools mentioned are free, have a free version or allow a trial period. It is worth experimenting with tools to see if they can improve your system. Always try and run them together with your existing, tried-and-trusted system while you test them out.

Andy Coulson is a reformed engineer and primary teacher, and a Professional Member of CIEP. He is a copyeditor and proofreader specialising In STEM subjects and odd formats like LaTeX.


‘What’s e-new?’ was a regular column in the SfEP’s magazine for members, Editing Matters. The column has moved onto the blog until its new home on the CIEP website is ready.

Members can browse the Editing Matters back catalogue through the Members’ Area.


Photo credits: partially open laptop by Tianyi Ma; hourglass by NeONBRAND, both on Unsplash

Posted by Abi Saffrey, CIEP blog coordinator.

The views expressed here do not necessarily reflect those of the CIEP.

What’s e-new? Free and easy accounting with QuickFile

By Andy Coulson

A machine for making paper receipts on a yellow backgroundAccounts are a fundamental part of your business, but like many people, I loathe doing them. For a long time, I’ve used Excel and an accountant to deal with mine, but have been exploring accounting packages for some time. I experimented with FreeAgent, which offers a discount to CIEP members, and found it clear and easy to use, but eventually gave up on it because I found it really fiddly to pay myself. My accountant sorts my payroll, but FreeAgent seems to insist I run payroll, or else have to go through a real rubbing my tummy while patting my head process to record it. I suspect that if you are a sole trader or happy to run the integrated payroll this would be easy (ie you are not trying to bend things to your will!).

This led to me discovering QuickFile, a largely free, UK-based accounting package. QuickFile doesn’t include payroll, so I can simply add the salary and categorise it as a PAYE salary payment, which I find simpler. I can leave payroll to the accountant. I say largely free because you won’t pay anything if you have fewer than 1,000 ledger transactions per accounting year. There are also some optional chargeable items, like open banking links that enable you to auto-update your accounts from your bank. This costs a very reasonable £15 per year.

The initial setup of QuickFile is very straightforward. You add details of yourself (and your company if you need to), set up your bank accounts and the opening balance for when you want to start using QuickFile, and you can get started. You can then manually import bank transactions and set up open banking feeds if you wish.

Like most other accounting packages, QuickFile is built around a dashboard. This gives you a quick, clear overview of what is coming into and out of your business and quick access to your bank accounts.

Invoicing and purchasing

Invoicing within the system is straightforward. You can customise your invoices around a number of templates, allowing you to add your own branding to invoices. The system allows you to create your invoices or estimates and have a nice clear ‘Draft’ stamp on them until they are ready to send. The system also includes client management, so you can build a database of the people and organisations you invoice, making repeat invoicing simple. There is an option to import clients from a spreadsheet, and the program has guidance on how to do this, but you will need to have a bit of skill with .csv files in spreadsheets to use it. Once your invoice is ready, you can send it from within the system using a customisable email. Your invoice list then gives you access to all your invoices with clear amber (sent), green (paid) and red (late) status flags. An outstanding invoices report allows you to keep track of these, and you can also set up automatic reminders for when an invoice goes over its due date.

Purchases are similarly easy to manage. You can enter these as one-offs or as recurring – for example, my hosting costs are paid monthly, so I set up a recurring payment each month for these. You can also enter them retrospectively (I’m sure I heard my accountant tut there) via the bank account screen, so that you enter the details when the purchase is paid for. While this is perhaps not good practice, it is simpler when you have a small number of outgoings. Like many other packages, it allows you to scan receipts straight into the system or import them, and the freely available app enables you to scan these on the go. As with invoices, you can build a list of suppliers.

Somebody using a credit card to make a transaction on a laptop.Reports and support

Reconciling everything with your bank account is a chore that I don’t think anyone likes, but QuickFile keeps the pain to a minimum. Clicking through to your bank account gives you a list of transactions with money in, money out, a running balance, status, space to add notes, and a search tool to find similar transactions. The status shows in red until a transaction is tagged. Clicking on this gives you a short menu with the main types of transaction. Clicking through on, say, ‘Payment to a supplier’ or ‘Payment to a customer’ will attempt to find a matching purchase order or invoice, allowing you to reconcile quickly and flag these as paid.

QuickFile also has a comprehensive set of reports, allowing you to produce everything you need for year end, tax and VAT (should you need it).

The system has comprehensive community-based support that provides quick, helpful answers to most problems. This works something like the CIEP forums, with users and support staff from the company involved. There is also a good online knowledge base that covers a lot of common items and has some ‘get you started’ guides. These are really well-written and have been helpful to get me into using the system.

QuickFile provides a professional, easy-to-use accounting system for small businesses. The fact that it is largely free is astounding. Looking into the pricing structure for more than 1,000 transactions annually, the £45 + VAT per year cost looks remarkably good value. If the system isn’t right for you, you can export your data to import into another system, so I would recommend you look at QuickFile as an alternative to other online accounting systems.

Headshot of Andy CoulsonAndy Coulson is a reformed engineer and primary teacher, and a Professional Member of CIEP. He is a copyeditor and proofreader specialising In STEM subjects and odd formats like LaTeX.


‘What’s e-new?’ was a regular column in the SfEP’s magazine for members, Editing Matters. The column has moved onto the blog until its new home on the CIEP website is ready.

Members can browse the Editing Matters back catalogue through the Members’ Area.


Photo credits: Accounting calculator by StellrWeb; paying online by rupixen.com, both on Unsplash.

Posted by Abi Saffrey, CIEP blog coordinator.

The views expressed here do not necessarily reflect those of the CIEP.

26 tips for planning, writing and editing a glossary

By Hazel Bird

an open bookGlossaries are commonly found in a huge variety of publications, from textbooks to technical reports and from encyclopedias to essays. A good glossary can serve a number of purposes that benefit both writers and readers:

  • provide a quick reference to key concepts
  • avoid the need to duplicate definitions of key concepts in multiple locations
  • increase the accessibility of a text and thereby avoid alienating less knowledgeable readers
  • enhance the experience of more knowledgeable readers by avoiding cluttering a text with what may (to them) be basic definitions
  • help groups of co-authors to write consistently on a topic.

But a good glossary is too often an afterthought – thrown together at the end of the writing process with little consideration of how it can help to underpin a text and amplify its authority.

This post looks at how to plan, write and edit a glossary that will enhance a text and be helpful to readers. But first, a post on glossaries would be remiss if it didn’t include its own glossary:

DefinitionThe part of a glossary that tells readers what a term means.
EntryOften used to refer to a term and its associated definition as a whole.
GlossThe verb form of glossary. If you gloss a term, you provide a definition of it.
GlossaryA list of definitions of technical terms used in a text.
TermA word deemed to be of sufficient importance or complexity to require an entry in the glossary.
TextThe larger body of words of which the glossary is a part (eg a book).

It’s worth saying that although the stages below can be a helpful way of dividing up work on a glossary, it makes sense to keep all the stages in mind at all times. For example, it doesn’t hurt to decide your preference on capitalisation during the planning stage. And, equally, there’s no point developing a comprehensive plan if the writer(s) and editor(s) then ignore it!

Planning your glossary

A good glossary is based on a well-planned strategy. Questions to consider when planning a glossary include the following:

1. Why are you considering providing a glossary? Would the text genuinely benefit from a glossary as an added help to the reader? Or would the glossary primarily serve to cover up uneven, unclear or incomplete writing that would be better amended before seriously considering how a glossary would fit in?

2. What level(s) of knowledge do you expect your readers to have? Do you need to gloss basic terms or only the more advanced?

3. What level of detail do you want your definitions to have? It can help to set a nominal word or line limit.

4. If your text has multiple chapters, will you have one central glossary or chapter-specific glossaries? If you prefer a central glossary, do the chapters use the same terminology or will any revisions be required to standardise terms that will appear in the glossary?

5. If your text has multiple authors or topics, how will you ensure consistency between their glossaries? Would it be helpful to provide a few sample glossary entries (taking account of the suggestions for writing and editing below)?

6. Will the glossary be allowed to define abbreviations or will these appear in a separate list? For example, if your text talks about JSON, do you want to have (a) a glossary entry that provides the full form (JavaScript Object Notation) and then talks a bit about its use in software development, (b) an entry in a separate list of abbreviations that simply provides the full form or (c) both?

7. Will cross-referencing between glossary terms be allowed (or required)? For example, the glossary of glossaries at the start of this post uses italics to cross-reference to other entries. This lets readers know a term is explained elsewhere in the glossary (and often means you can be more economical in your definitions).

8. Where will the glossary appear and how will readers access it? Common schemes include: (a) simple standalone glossary with no links to the text, (b) standalone glossary with hyperlinks and/or special formatting (e.g. colour or bold) on glossary terms in the text and (c) glossary entries on the same pages as their associated terms (common in textbooks). Which would be most suitable for your text?

9. How will readers know your glossary exists? Will you put a note at the start of the text (or even at the start of each chapter or section, if your text has subdivisions)? What will be the best balance between making information easily accessible and avoiding clutter? You can’t assume that readers will understand that bold (for example) means that there is a glossary and that the bold word is glossed within it – you have to tell them what the bold means.

Writing your glossary

Once you have a solid plan to work from, you can actually start writing your glossary (or ask your contributors to submit entries to you). Following are some do’s and don’ts of glossary writing:

10. Do consider how your terms are actually used in the text. There’s no point having a glossary term for ‘information architecture’ if the text only ever refers to ‘architecture’.

11. Do use parallel structure. For example, will you start definitions with ‘X is an …’ or just ‘An …’? This issue is connected with presentation too: usually, the longer form is only necessary if you plan to run the glossary terms into the definitions. For example:

Agile  A method of software development that occurs in stages, with the product evolving as the project progresses. (Separated style)

Agile is a method of software development that occurs in stages, with the product evolving as the project progresses. (Run-on style)

12. Do think about the grammatical forms of words. For example, it might look inconsistent to have a definition for ‘coder’ (noun) alongside one for ‘developing’ (verb). Unless there’s a good reason, it might read better to choose either ‘coder’ and ‘developer’ or ‘coding’ and ‘developing’.

13. Don’t use the word in the definition – usually. Sometimes it works, where you decide to explicitly re-state the term in the definition for grammatical reasons (as I did above in my definition of ‘gloss’). But usually it’s bad practice as it assumes knowledge on the part of your readers that they might not have. For example, you might include the following definition:

software development  Using computer code to develop digital applications and infrastructure.

Here, you’d only really have glossed ‘software’ and you’d be assuming your readers know what ‘develop(ment)’ means in the context of computing.

14. Don’t make the definition so complicated that the reader has to look it up to understand it. (Or, if you need to use technical terms, consider defining them elsewhere within the glossary and including cross-references – see point 7 above.)

15. Don’t include Wikipedia content (or similar) – anyone can do an internet search for a generic Wikipedia definition. Glossaries add value for the reader by framing each term in a way that is nuanced to reflect the content of your text.

16. Don’t quote other sources in your definitions, unless they offer uniquely relevant perspectives or you have a special reason for doing so. This can reduce the sense of authoritativeness of your text.

17. Don’t repeat definitions from the text. Readers will be frustrated if they go to the glossary in search of further explanation and just find what they’ve already read.

a cluttered, compact office environmentEditing your glossary

Glossary editing often takes place over multiple stages. First, the person who wrote the glossary (or who is collating it from multiple contributors) checks that the content is suitable and that there are no glaring holes or inconsistencies of approach. Then, another person (often a copyeditor or proofreader) conducts a more zoomed-in check to sculpt the glossary into its final form. Each will likely need to look at the following points to some degree:

18. Does the glossary adhere to each point of the plan? If not, is the divergence acceptable (perhaps something has changed since you created the plan) or do you need to adjust the entries?

19. Is the coverage logical, consistent and comprehensive? For example, have all terms of the same type been included? (So, if you’ve glossed XML, you’ll probably want to gloss HTML too if your text uses both terms.) Are there any often-used terms that are not glossed but should be? If one of the glossary’s functions is to gloss little-used terms to avoid cluttering the text with explanations, have all of these been identified?

20. Will your alphabetisation be intuitive to readers? For example, will your readers expect to find a general explanation of the syntax used in computer coding under ‘language’ or ‘programming language’?

21. Do you need any ‘see’ entries? If readers might look for the same term under two different phrases, you could choose to include both. For example, you could have a definition of the term ‘language’ but also cross-reference to it further down as follows:

language  Words and other notation used according to a pre-defined structure to create computer programs.

programming language  see language

22. Is every term in the glossary actually used in the text? See also points 10 and 12.

23. Have the glossary terms been indicated in the text where applicable (see point 8)? And are you doing this on every occurrence of each term or only (for example) at first use in the text or chapter?

24. Is the punctuation consistent? For example, will your definitions end with a full stop? This may depend on the length of the definitions. Single-sentence glossaries can end with nothing, but multiple-sentence glossaries usually look best with full stops. If you have a mixture, it’s best to be consistent and include full stops for all of them.

25. Is the capitalisation consistent? Will you capitalise all of your glossary terms (eg ‘Debugging’ and ‘Python’) or only proper nouns (eg ‘debugging’, but ‘Python’)?

26. Does each definition read well and follow whatever spelling and other stylistic conventions have been used in the main text? When they think about what goes into editing a glossary, many people jump straight to this point. But, in reality, it’s just the last item in a long list of other considerations.

Planning, writing and editing a good glossary is a complex and time-consuming process. Throwing together a glossary at the last moment is a wasted opportunity and may even detract from the reader’s experience – for example, by raising expectations that are not met (eg because the glossary is of poor quality and isn’t tailored to the text) or creating frustration (eg if the glossary is difficult to access or navigate, or equivalent terms are not glossed).

Thinking about your glossary from the start of the creation process will make it an integrated and cohesive part of your text, and enhance the text’s value and authority for your readers.

Hazel Bird standing outside by a wallHazel Bird is a project manager, copyeditor and proofreader who has happily edited glossaries that followed all of these tips and others that followed none. She regularly works on computing books (hence the examples above) but also edits widely across business, public sector and academic publishing.


Have you seen our recent focus paper by David Crystal on why it’s worth using a professional editor? It’s one of CIEP’s many fact sheets and focus papers for editorial and publishing professionals.


Photo credits: Open book by by Jonas Jacobsson; Software development by Hack Capital, both on Unsplash

Posted by Abi Saffrey, CIEP blog coordinator.

The views expressed here do not necessarily reflect those of the CIEP.

What’s e-new? The efficient guide to Word

By Andy Coulson

This issue of The Edit has a theme of working efficiently, so let’s take a look at how we can persuade every editor’s favourite tech tool to work efficiently.

1. Keyboard shortcuts

Keyboard shortcuts are a great little time saver. Think about what you do when you use a mouse – you move it about to try to line up a pointer on a (small) target. You then click and, depending on what you want to do, perhaps repeat this two or more times to get to your command. But with a shortcut you press two or three keys together, and away you go. ‘How-To Geek’ has a really good list.

You don’t have to accept Microsoft’s default choices, either. If you go to Options > Customize Ribbon you’ll see an option at the bottom to customise keyboard shortcuts. This allows you to set up shortcuts for any commands. You can also allocate shortcuts to macros (see below).

2. Styles

Styles offer you a way to quickly format elements of the document. However, they can be a bit fiddly to use. In Word 365, the styles appear in the Home ribbon, as well as in the Quick Access Toolbar at the top. Often you’ll find you use the styles already in the document, and you simply apply them by putting your cursor in the block of text you want to style and then clicking the style name.

But, what do you do when a client says ‘make file A look like file B’? Word has a mechanism to copy styles between documents, but it’s well hidden. You can add the Developer tab to the ribbon, which you do by going into File > Options > Customize Ribbon and selecting ‘Developer’ from the list on the left. Make sure ‘Main Tabs’ is selected at the top of the list on the right and then click ‘Add’.

In the Developer tab, click on ‘Document Templates’, and then ‘Organizer’ in the ‘Templates’ tab of the pop-up box. You will see two lists. The one on the left should have the file name of your current document underneath. On the right-hand one, click ‘Close File’, and this will clear the list, then change to ‘Open File’. Click on it and select the template or document you want to import from. You can then simply select the styles you want and click the ‘Copy’ button to import these to your document.

3. Wildcards

If you use Find and Replace, learning to use wildcards will transform your searching. These allow you to look for patterns rather than specific words. For example, ‘?ed’ tells Word to find ‘ed’ preceded by any other single character, so it would find ‘red’, ‘bed’, ‘Red’ or ‘Bed’ and so on. This can get complicated, but it can also be a real time saver. One of my favourite applications is cleaning up question numbering in textbooks where I can’t use auto-numbering. Here, searching for ‘([0-9]{1,2})\)^s’ and replacing with ‘\1^t’ would change one- or two-digit numbering like this: ‘1.<space>’ to ‘1<tab>’.

There are an awful lot of options, and one place to find help on these is Jack Lyon’s Wildcard Cookbook for Microsoft Word, which is available as a PDF ebook. I have it open in my ebook reader most of the time I’m editing in Word. Geoff Hart’s Effective Onscreen Editing also has a chapter on making the most of Find and Replace.

4. Macros

Macros are short programs that build on the capabilities of Word. They often link together a number of functions within Word to achieve a more complex task, be that something which finds information about the document, changes what you have selected or makes global changes.

Many of you will be aware of Paul Beverley and his macros, and I can’t suggest a better way in to macros than Paul’s Macros by the tourist route. This is a really good introduction to using macros, and will lead you to Paul’s amazing macro library. Once you get into using these you can really start saving time on your work in Word.

Among my favourites are DocAlyse, which runs a range of tests on a document to flag the types of issues it may have; WhatChar, which identifies any character; SpellingErrorLister, which creates a list of potential spelling errors; and HyphenAlyse, which identifies the frequency of hyphenated words (and their non-hyphenated equivalents) and checks common prefixes.

The CIEP has also produced a fact sheet about getting started with macros.

5. Add-ins

Add-ins go a step further than macros. They are programs that work within Word to add more functions. Many of you will have heard of PerfectIt, and this is a good example. PerfectIt will check consistency in the document in a way that Word’s tools simply can’t. You can install stylesheets to suit particular clients (or create your own). I recently had a job using Chicago style (CMOS), and through the forums (thanks, Hilary Cadman!) found a ready-built one that was a big help.

PerfectIt is not the only add-in you can use. I’ve talked about ClipX before, which is an add-in to Windows rather than Word. It’s a clipboard expander that allows you to see the last 25 entries in your clipboard, so you can reuse them. I’ve just discovered it too has add-ins and one, Stickies, maintains a constant list of entries. I use this a lot when I’m manually tagging a file, so I can quickly insert tags.

6. Learn Word

I’ve saved this for last, but perhaps it should be first. Invest some time in learning to use Word to its full potential, as it will repay you time and again. Many of the things above are rooted in a knowledge of how best to use Word. As you get more familiar with Word you’ll be able to customise your set-up, helping you to use it more efficiently. A great resource to help with this is the CIEP course Editing with Word. This will give you a good introduction to many of the things I’ve talked about above.

Andy Coulson is a reformed engineer and primary teacher, and a Professional Member of CIEP. He is a copyeditor and proofreader specialising In STEM subjects and odd formats like LaTeX.


‘What’s e-new?’ was a regular column in the SfEP’s magazine for members, Editing Matters. The column has moved onto the blog until its new home on the CIEP website is ready.

Members can browse the Editing Matters back catalogue through the Members’ Area.


Photo credits: keyboard – Halacious; tourist map – pixpoetry, both on Unsplash

Proofread by Emma Easy, Intermediate Member.
Posted by Abi Saffrey, CIEP blog coordinator.

The views expressed here do not necessarily reflect those of the CIEP.