We asked five editors to give us their views on how they think AI might affect their work in the future (while acknowledging that none of them owns a crystal ball). Here are their thoughts…

 Hazel Bird
Back in January, I wrote on The Wordstitch Blog that I don’t believe AI will ever replace human editors – and (spoiler alert) AI agreed with me. Nothing I’ve seen since then has changed my opinion.
I certainly think AI will have an impact by shifting how editors work. I suspect there will be a natural migration away from the less judgement-based work of ‘error checking’ towards the more nuanced, involved work of refining and enhancing text (although this doesn’t necessarily mean that I think traditional proofreaders will be out of a job; proofreading is about much more than ‘error checking’ and requires intensely refined judgement at a point in the editorial workflow where the scope for changes is often very limited).
Overall, in the long term I believe AI will have a positive (or at worst neutral) effect on our work. I believe it will do this by allowing us to be more efficient and thereby freeing us up to provide more of the gloriously messy human mix of spontaneity and personal experience that leads to great creative collaborations (remember: ChatGPT et al. cannot truly create; all they can do is predict based on what they have learned from text that already exists).
My view is that the most important thing for us to do as editors is to educate ourselves about AI. If you’re like me, reading about its new (and ever-increasing) capabilities involves a lot of mental flinching. But it’s important to set aside this fear and learn how to work with AI. If we ignore its possibilities, we only increase our chances of being replaced. In contrast, if we make it a part of our team, we might just gain a whole new lease of life in our respective businesses. We might be able to focus more on the meaningful editing we love, supported by our very own AI-powered editorial assistant.
Most of all I believe that, when it comes to the quintessentially human activity of communication, ultimately humans will always prefer to work with other humans.
Sue Littleford
AI reminds me of the early days of Covid. We all know we’re facing something big – so big it may even be an existential threat (especially for editorial professionals) – and so we all want answers, but those answers simply don’t exist, yet. We have to wait for things to unfold, but as we’re so closely affected, we’re grappling at the margins of knowledge and speculation to try to get ahead of the curve.
My own view is that AI as an editing tool is, at present, pretty poor in my niche (scholarly humanities and social sciences). At present. As I write, the news has come that ChatGPT can now access the internet. Not great – it’s a move from inventing ‘facts’ to melding together an almighty mess, as it still won’t be able to distinguish between fake news, error, unfounded opinion and truth. People can’t! I imagine it will improve quickly but not so far as to replace us editors. Computers were, and are, pretty dumb things and language is a hugely complex thing to codify. The learning they do through AI is just following patterns – but who knows what trawling the internet will add to their output? Regulation will be essential.
However, AI bots will help unconfident writers, for whom getting a simple message across simply and clearly is important, rather than literary style. I suspect they’ll be better at utilitarian language than at artistry. I also suspect there’ll be a rise in mediocre writing, as people accept AI’s input without the ability to judge it for themselves and be selective.
Accordingly, I’m ensuring my marketing efforts remain focused on the quality end of the client base, targeting people and organisations who understand that AI isn’t an easy, cheap replacement for the human mind.
I’ll be asking clients about their AI policies and thinking about what additional clauses to include in my own T&Cs.
 John Ingamells
At the CIEP conference, a colleague said that he had experimented with ChatGPT.
His conclusion was that it was ‘good, but not great’. This immediately brought to mind the instruction I well remember from my first proofreading course – the idea of learning when things are ‘good enough’. We would all love to produce perfect work every time. But often budgets and time constraints lead us to that ‘good enough’ conclusion.
It struck me that this could well be the niche that AI fills for the foreseeable future. The polished prose of literary fiction, the pinpoint accuracy needed in legal and commercial material – these are things that will probably be beyond AI for some time to come. But the world of ‘good enough’ is surely there for the taking. So much content nowadays is produced to tight deadlines and is only expected to have a short shelf life. Being able to get something usable far more quickly is bound to be attractive to a lot of people. How much of that sort of material is currently being put through editors and proofreaders is open to debate. So the impact on our profession may not be as bad as some fear. But the need for us all to demonstrate the value of our work and how it is worth paying for will only increase. Perhaps on our websites we now don’t just need a ‘Services I offer’ tab, but a ‘Services I offer that AI can’t’ tab as well!
Erin Brenner
I run Right Touch Editing, an agency primarily serving small and mid-sized organisations. Our clients produce reports, marketing materials, and similar business-related copy, and they generally don’t have devoted writers on staff. Many projects are written collectively by staffers who have a lot of other tasks to do every day.
It’s easy to see how AI tools can help them get these projects done. They can brainstorm, outline, and write rough drafts quickly with the right prompts. And the output can be helpful – up to a point. We’ve all heard stories of AI tools making up details. They’re mediocre at best when it comes to writing and editing, even with well-written prompts.
But this is where my team and I come in. As the writing experts for our clients, we’re key to understanding these tools and using them successfully. We can help clients use these time-saving tools to get the results they’re looking for. I see us performing heavier-than-usual edits on copy that AI has helped produce. Being aware of its weaknesses means we can edit for those weaknesses. For those clients with a little more budget, we can work directly with an AI tool to develop the content and then revise and edit it to a professional standard.
These tools aren’t going away. Of course, we need to be wary, ensuring that we’re using them ethically, but we can’t ignore them. By becoming the experts on how and when to use AI tools, we can guide our clients to better, more ethical usage.
 Andrew Hodges
Overall, I’m excited about generative AI’s possibilities but angry at how authors’ and artists’ work (including my own book) has been exploited in datasets to train them. Better protections for authors must be established. But generative AI (when developed responsibly) could save lots of time on copyedits by creating macros and doing jobs like reference list formatting etc.
In the medium term, I expect a small drop in the number of human editors needed, as more work will involve reviewing AI-assisted edits. I expect this will happen quickly for proofreading of PDF proofs.
Since I set up my business, I’ve been shifting to doing more developmental editing and coaching and less line editing and copyediting. I guess editorial consulting will be less directly affected by generative AI than, say, proofreading, light copyediting or translation. Whatever kind of editing people do, I expect editors who include human connection in their workflows will continue to flourish. Electric massage chairs didn’t make regular massages obsolete.
The most exciting aspect for me is how these new technologies may change our expectations. This reminds me of Ruth Schwartz Cowan’s argument about how the invention of labour-saving household devices like the vacuum cleaner didn’t ultimately end up saving people time. Alongside the new inventions came raised standards and expectations of cleanliness. When new technologies emerge, there’s a social reconfiguring and a new balance is found. This is happening with generative AI: in the space of a few months, it became obvious when ChatGPT had been used to write a blog or social media post, and I started interpreting a smooth, correctly spelled post or email with that signature ChatGPT voice differently. Who knows, there could be an increased focus on solving structural problems with manuscripts if generative AI takes care of some of the sentence-level issues. It’s impossible to predict!
 About the CIEP
The Chartered Institute of Editing and Proofreading (CIEP) is a non-profit body promoting excellence in English language editing. We set and demonstrate editorial standards, and we are a community, training hub and support network for editorial professionals – the people who work to make text accurate, clear and fit for purpose.
Find out more about:
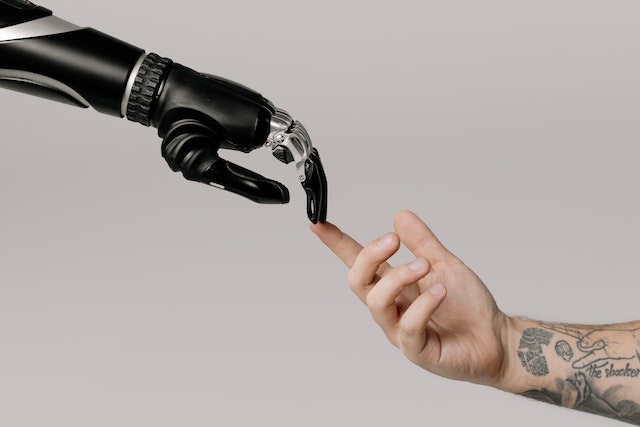
Photo credits: artificial brain by geralt on Pixabay; human and robot hands by cottonbro on Pexels.
Posted by Sue McLoughlin, blog assistant.
The views expressed here do not necessarily reflect those of the CIEP.