Category Archives: Talking tech

Talking tech: Note-taking

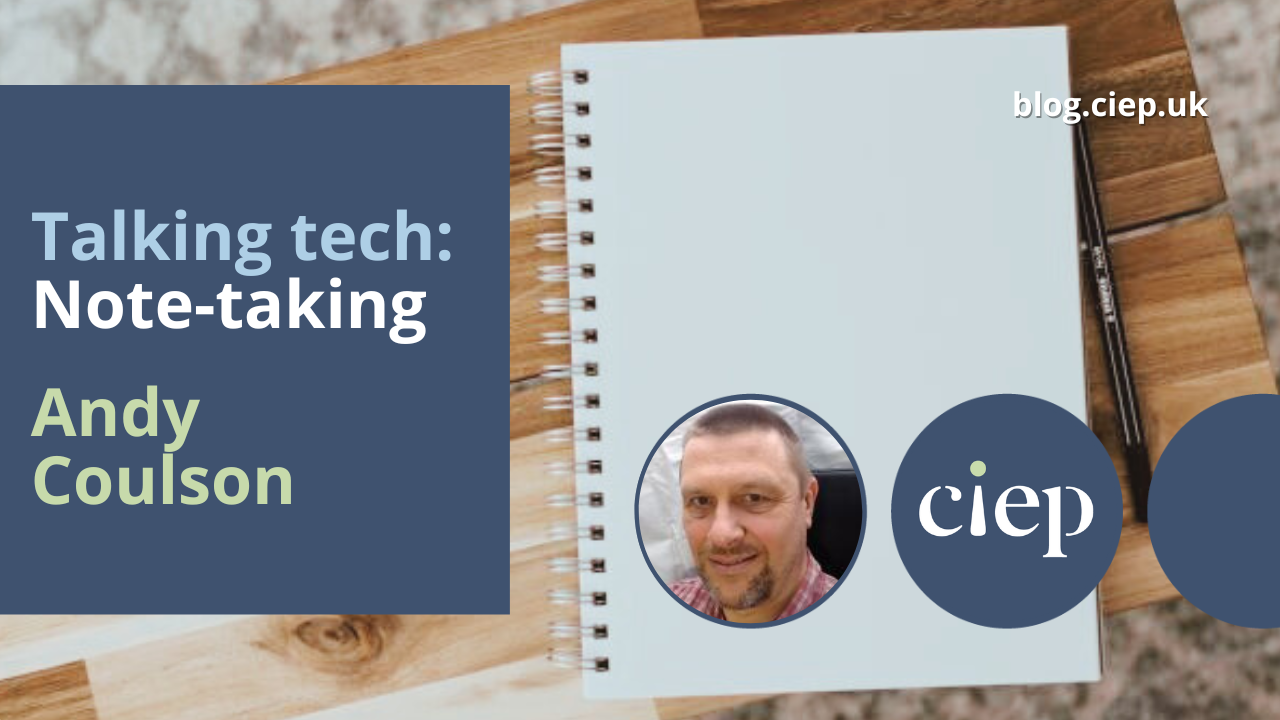
A key part of any training and CPD we undertake is taking notes that we can look back on for reference. But which is best: good old pen and paper, or modern apps? Andy Coulson contrasts and compares.

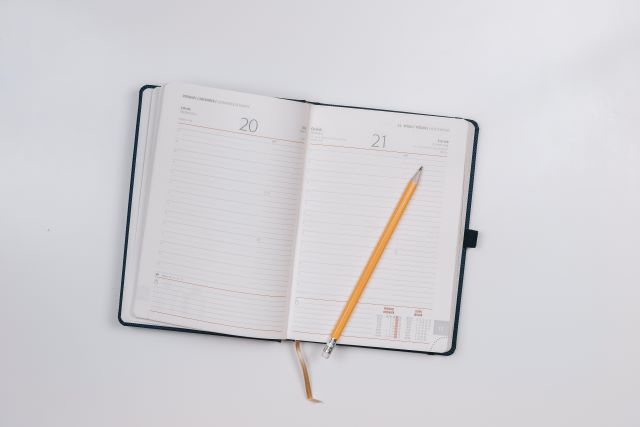
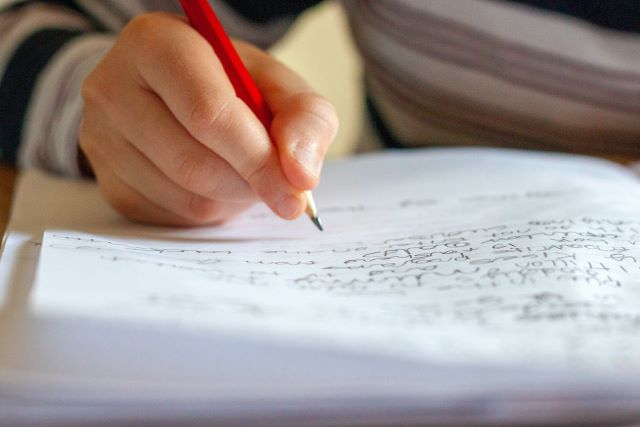
I am an unashamed paper note-taker. There is something about using paper and a pen or pencil that just feels better. I think the physical action of writing is a part of it: research in education and psychology suggests there is a link between handwriting and memory formation. There is certainly research around the cognitive benefits of handwritten note-taking (for example, Mueller and Oppenheimer’s ‘The Pen Is Mightier Than the Keyboard: Advantages of Longhand Over Laptop Note Taking’). I’ve tried various digital solutions and they just don’t quite cut it for me, but they might be preferred by some.

Why make notes?

Note-taking is a key study skill students use to record key information about a topic and create something they can then review and learn from. Many university websites offer good note-taking guides, for example the University of Reading and the Open University. Cornell University goes a step further and has its own note-taking system, summarised here.

All these have a few things in common: notes are short-form text, summarising key points to act as reminders; they should ask or stimulate questions about the topic; and they should allow the student to accurately review the material later.

Paper notes: The pros and cons

I think one of the things that I like about paper notes is that they don’t have to have a fixed structure: if they capture the key information in a way that allows you to understand and recall it, then they work. Handwritten notes can include marking up or annotating printouts (for example, with a highlighter or marginal notes); creating a structured outline using nested bullets, diagrams, tables and graphs, and mind maps or spider diagrams; or mostly graphical approaches like Sketchnotes. If you are anything like me, your notes end up with a mix of different things – sometimes a doodle or sketch catches an idea, and sometimes words are enough.

While handwritten notes have an advantage in helping us to understand and remember what we are learning, organising them can be more difficult. The more formal and structured systems, such as Cornell’s, encourage you to review and rewrite notes to help understand and retain the information. Using paper this is a slow job, but again it is all helping the information sink into your brain – it is a part of the learning process. By contrast, we have got used to storing everything and quickly searching for it with reasonable accuracy in the digital world. So, do the digital alternatives offer us a real advantage by managing the organisation?

Handwriting: note-taking

The digital app alternatives

Three popular digital note-taking apps are Microsoft’s OneNote, Google Keep and Evernote. The first two are freely available with a Windows, Office or a Google account. Evernote has a feature-limited free version, and paid versions with varying degrees of sophistication. All three of them also have mobile apps that link to the desktop or web app, allowing you to sync your notes across devices. I’ve used both Evernote and OneNote and they are both very comprehensive programs. They do slightly different jobs, but there is a big crossover in the middle.

Evernote is particularly good at grabbing content from sources such as web pages and, with a paid plan, you can add markup to these. Information is organised as pages, referred to as ‘notes’, that can be grouped in notebooks and linked. When you create notes there are a lot of templates you can use, including a Cornell Notes-specific one. In a note, you can add text or images, and a wide variety of other material. The editing screen is quite similar to Word or Google Docs, with material added in a linear up/down fashion as you would in Word. There are also features to create checklists and a link to Google Calendar, allowing Evernote to work as a capable task manager as well as a note manager.

OneNote supports most of the same features as Evernote. One big difference is the much more freeform way that you can add things to a note (or ‘section’ in OneNote terminology) where blocks of text or images are not fixed in a linear flow like they are in Word. For example, when you add text to a page, say a paragraph or bullet list, you add it as a box. These boxes can be moved around on the page in relation to each other, making the structure of your notes very easy to reorganise. There are a lot of quick formatting options that help you to highlight and flag elements in the text, such as ‘tickable’ to-do list bullets, highlighted styles for definitions or things to remember for later, and icons for phone numbers or email addresses.

By contrast, Google Keep is a much simpler app and to my mind is more like a digital block of sticky notes. You create text notes with a more limited range of features, including embedding images. The clever bit is that you can add labels like those Gmail uses, to group and organise those notes.

Keyboard: note-taking

I think OneNote gets closest to the flexibility of handwritten notes, and I can imagine that with a tablet and stylus it gets even closer. However, I don’t think any of these quite replace the functionality and convenience of a pad and pen; for me, at least.

As I mentioned earlier, part of the learning process is to review and perhaps rewrite your notes. Perhaps a hybrid option is to treat that rewrite as a good point to digitise your notes, particularly if you want them to be digitally searchable in future.

A reMarkable solution?

There is one more technical solution that might offer the best of both worlds. The reMarkable tablet aims to provide a paper-like experience on a digital tablet. It incorporates handwriting recognition so handwritten text can be converted to computer text, allowing it to be searched. The reMarkable system uses a folder system, just like your PC or Mac, and can sync documents with popular file storage services like Google Drive. There is also a desktop program that allows you to access and organise all your notes on your PC or Mac. The downside is of course the cost (around £300), but it is comparable to a mid-range phone or tablet, and this could be a really useful tool for many people.

About Andy Coulson

Andy CoulsonAndy Coulson is a reformed engineer and primary teacher, and a Professional Member of the CIEP. He is a copyeditor and proofreader specialising in STEM subjects and odd formats like LaTeX.


About the CIEP

The Chartered Institute of Editing and Proofreading (CIEP) is a non-profit body promoting excellence in English language editing. We set and demonstrate editorial standards, and we are a community, training hub and support network for editorial professionals – the people who work to make text accurate, clear and fit for purpose.

Find out more about:


Photo credits: header image by Kelly Sikkema, handwriting by Eleni Koureas, computer keyboard by Sergi Kabrera on Unsplash.

Posted by Belinda Hodder, blog assistant.

The views expressed here do not necessarily reflect those of the CIEP.

Talking tech: Collaboration tools

Following on from his informative piece about how we can use apps like Todoist to help us with the publishing process, Andy Coulson expands his research to collaboration tools, investigating how they can help us in finding work and integrating ourselves into project teams.

We have been working with collaboration tools for years – arguably chalkboards and flipcharts were ‘collaboration tools’. However, by using the web and cloud services, modern collaboration tools have changed and expanded this practice enormously, so you no longer need to be in the same physical space as your colleagues and/or clients. And the ability of computers to store and search information adds even more functionality to them.

Collaboration tools are an increasingly important part of remote working, allowing people to work together to share information on a common goal or project. For us freelancers, these tools allow us to become a part of the team in a way we have not been able to do as easily in the past, so learning to use them effectively as part of ongoing CPD is becoming useful for finding work – and if you come across a client who uses collaboration tools to run projects and you are already using them, then you have given yourself an advantage.

With so many of these tools about, clearly you cannot be an expert in them all – so it is important to step back and think about what job you might be using the tool for; some clients might also have preferred collaboration tools and may offer training. When I am looking at this sort of tool, I have found it useful to think about them in terms of the core job they have been built around doing. For example, Todoist is a to-do list manager at heart, but has plenty of collaborative features that would allow you to organise the workload of a team and manage information about those tasks. For the purposes of this piece, I am going to use three very broad categories: storage and editing tools; communication tools; and task and project management tools.

Storage and editing tools

Many of you will have used Microsoft’s OneDrive, Dropbox or Google Drive to store files online, but they also allow you to share those files. Google Drive takes this a step further, giving you access to a word processor, spreadsheet and presentation tool so you can work with others on a document. I’ve had a few projects where the style sheet or tracking spreadsheet has been in Google Drive and several people have been working on it in real time, so you are consistently looking at up-to-date information – one of the benefits of online collaboration tools.

One feature of Google Drive I particularly like is the suggesting mode. On a recent job, I was asked to add to the style sheet in suggesting mode as I made styling decisions. These changes then get adopted or rejected by the editorial managers. It proved to be an effective way of handling style queries.

Some of you will also have come across Microsoft’s SharePoint, which is a full document management system. SharePoint offers more advanced features than OneDrive and offers a much higher level of security to manage access and create work groups. It also allows you to create and edit directly using the cloud-based versions of the Office 365 tools and, as with Google Drive, you can edit collaboratively.

These storage and editing tools are probably the most familiar for us as editors, and the easiest to get to grips with. Most of us use Office, and will have some OneDrive storage bundled with that – so this, and by extension SharePoint, should have familiar features. Google Drive is quite user-friendly, but there is still a bit of a learning curve as you work out how to do various tasks. The systems described here are sufficiently common that there is lots of good support and guidance out there: just ask Google!

Person on a video conference call

Communication tools

Many of us have grown used to a range of communication-based collaboration tools, such as Zoom and Teams, since the pandemic. These use video, voice or text and can be used between individuals or with groups. I suspect the use of these types of tools will increase for freelancers, so they are an important group of tools to get familiar with. The two examples below – Teams and Slack – are both supported well by resources online.

Teams is part of the Windows infrastructure and is integrated into Windows 11. It aims to be a ‘teamwork platform’ by linking into other Microsoft tools like 365 and Outlook, so you have one place where you are working with others. It uses channels to create structure, so for a given project you will join a particular channel. Within this you can then have access to information – such as files, folders, calendars, chat channels, video conferencing – that relate directly to the project. This ability to create project-related online environments quickly and easily is one of the reasons collaboration tools have become so popular with businesses, and why, as freelancers, we need to be willing to learn to use them.

Like Teams, Slack organises information in channels, each of which has a group of users and focuses on a project or theme. Rather than traditional email, the main communication is via a messaging channel that can support quick ‘huddle’-type meetings using audio and video, and screen and file sharing.

Task and project management tools

Finally, I have looked at applications that are focused on managing tasks or projects, allowing a team to see what needs to be done and who is doing it. Three tools that exemplify the range available are Trello, Basecamp and Asana.

Trello is a useful tool for freelancers. Like my favourite task manager, Todoist, the collaborative features do not get in the way of its task management tools. Trello uses a kanban model of organising tasks where tasks (or ‘cards’ in Trello parlance) are moved between lists – typically to do, doing, done – giving you a quick visual overview of tasks. It includes lots of useful project management features such as calendar views, and you can attach files and notes to cards. In terms of collaboration, tasks can be allocated to team members, you can track progress and you can have conversations about tasks using comments. Trello’s boards can also be used to organise individual projects and focus on particular teams. It also supports ‘Power-ups’, which are integrations with other tools (such as Google Drive) to extend the capabilities of the system.

person using Trello on a laptop

Basecamp has a lot in common with Trello, but is built much more around supporting a team from the outset by enabling and organising communication between team members, and managing lots of projects within a small team. Each user has a dashboard that lets them see the projects they are involved with, their calendar and list of tasks. Clicking through to a project lets a user access Basecamp’s core tools: a message board (a bit like Slack’s threaded messages, focused on the project), a card table (similar to Trello’s boards, lists and cards), document and file storage space, to-dos, campfire (a space for more informal discussions and chats), and automatic check-ins (a way of quickly asking questions of a team; for example, doing quick status updates). Basecamp’s approach is built around making it easy for teams to organise their work and reducing the administrative overhead, which is what a good collaborative tool should do.

Asana offers a similar range of features to Basecamp but is focused on larger organisations. Describing itself as a ‘work management system’, it is intended to help juggle projects and routine work across a business. It has a lot of reporting features to support managers, as well as providing the Basecamp and Trello-type tools to allow individuals to organise their own work, or for a team to organise a project.

The range of collaboration tools and approaches clients take can be confusing, especially with so many available: so what do you do? I have found that although some do work well, many of them can feel very cumbersome for solely personal use. Using collaboration tools regularly, however, will help you to adapt if you are asked to use a particular tool as part of a project. Remember, though, the tools themselves build on good work habits: if you have those, then it doesn’t need too much change to adapt to using a different tool.

About Andy Coulson

Andy CoulsonAndy Coulson is a reformed engineer and primary teacher, and a Professional Member of the CIEP. He is a copyeditor and proofreader specialising in STEM subjects and odd formats like LaTeX.


About the CIEP

The Chartered Institute of Editing and Proofreading (CIEP) is a non-profit body promoting excellence in English language editing. We set and demonstrate editorial standards, and we are a community, training hub and support network for editorial professionals – the people who work to make text accurate, clear and fit for purpose.

Find out more about:


Photo credits: header image by Christine @ wocintechchat.com on Unsplash, person on a video conference call by Anna Shvets on Pexels, person using Trello on a laptop by cottonbro studio on Pexels.

Posted by Eleanor Smith, blog assistant.

The views expressed here do not necessarily reflect those of the CIEP.

Talking tech: The publishing process – getting personal

In this month’s Talking tech column, Andy Coulson shares the systems he uses to keep on top of his editorial work, from scheduling projects and organising to-do lists to tracking client and author queries.

This month’s theme for The Edit is ‘the publishing process’. Whenever I see the word ‘process’ I think of workflows and project management, which brings me to collaboration and communication. These are things that technology can be really helpful for (or completely sabotage).

We all need to manage a range of workflows with different clients and types of job, but these all have common elements. The ones that come to mind are managing workload; tracking work; and dealing with issues and communicating those to clients. We all need good systems to handle these and arguably our effectiveness as freelancers is down to how good these functions are. I’m going to give you a guided tour of my own system as a way of illustrating where technology helps with this and where it hinders.

I’ve got here by a process of evolution so I strongly recommend that whatever you do, you review it from time to time and be prepared to change it. My aim with these systems is to give myself clear visibility of my availability; to have a good understanding of the steps to complete a task, and where I am with those; to collect queries, manage circulating those and make sure I deal with the feedback; and to plan my working day around work and life commitments.

Availability: Can I fit this job in?

To keep track of my availability, typically over the next six months, I use Google Calendar. Everything gets chucked in here – holidays, dental appointments, possible jobs etc. I use different calendars for work and family stuff, and different colours for each. If you need some help in how to do this, this article covers Google Calendar and this one covers iCal on a Mac.

When I agree a potential job, I create a new calendar entry covering the expected dates. In the title I include the client contact details, which means I can easily find the original email if I need to contact them. The other thing I usually do is change the colour for the task. These colours relate to customers and are consistent with the colours I use in Toggl to track time.

Now I can use the calendar to see what I have on and what I have coming up. This lets me respond quickly to enquiries and changes in schedules, and also means I can confidently plan other areas of my life around work commitments. I know when I’ve got a busy week coming up, so don’t try and fit in a dental appointment.

Here I think a technological solution works really well. The multiple colours help me take in a range of information quickly. The multiple calendars allow me to filter information.

Diary: organising the publishing process

Planning: How do I do the job?

Once a job goes live, I start looking at it in a bit more detail. Generally, I need to break it down into manageable steps I can then track. This lets me see progress, which is good for my stress levels (usually), and means I can keep the client updated. The other benefit to this is that I can use my time flexibly as I can have a much more granular view of how long things are taking.

I use a to-do-list manager, as I tend to think in lists, but there are any number of other tools you could use to organise these tasks, such as board or card-based tools like Trello. My favourite is Todoist, which is available on Windows, Mac, iOS and Android. I like it because it lets me organise things in projects and tasks that I can split into smaller elements. I can add reminders and various flags and labels that let me sort and organise tasks.

I tend to keep some projects that I can dump one-off tasks in, which are often non-work related. For example, I have a ‘maintenance tasks’ project that all the jobs that need doing around the others get put in. I also have a ‘personal tasks’ project that can contain recurring tasks, like reminding me to check if I need to collect my son from school.

Each task within a larger job gets its own project. I can add project-specific details in the description, and add to these through comments as the job goes on. I split a job into tasks (where it’s relevant) and may even have sub-tasks if it proves necessary. The sub-tasks can be a good way of keeping track of things that are part completed, so if you have a chapter 3 edit task and you are waiting on queries you could create a sub-task of ‘deal with Ch3 queries’ before moving on to the next chapter.

Todoist is where I keep track of everything rather than keeping it inside my head. I think a technological solution here is really good. At this level of task management you get a lot of change, and have to manage lots of odds and ends of information.

One other advantage of using Todoist is it allows me to get information out of email. Email is a brilliant tool, but is utterly useless for storing information, and has a tendency to then create distractions from what you need to do. (Cal Newport’s A World Without Email: Reimagining Work in an Age of Communication Overload is an interesting exploration of this.) Even with the search capabilities of modern systems it is cumbersome to try to track bits of information in email. It is far better to add key information to the project in your task manager.

Organising the day-to-day

Here’s where technology and I part company. To plan my day, I use a pen and paper and do something called time-blocking. I have a square-gridded notepad and keep a weekly calendar with each day divided into hours. I then mark in my wife’s work commitments and any other fixed commitments that need working around. I can then plan in what I am going to do and when, drawn from the tasks in Todoist. I also include things like any plans to exercise, so there is a greater chance of me actually doing those. I do most of this in pencil so I can change the plan if things overrun or need to be moved. I tend to plan the next day at the end of each working day.

Taking time to do this on paper means I spend a little more time thinking about what I am going to do. This (hopefully) means I am being a bit more intentional about what I am choosing to do and reminds me it is all a choice, which helps to stop me stressing about things.

Office stationery: organising the publishing process

Keeping track of queries

Going back to the theme of not storing things in email, I’ve changed how I handle queries. Keeping track of queries is a really important task, especially on bigger jobs. I can’t begin to quantify the amount of time that I’ve wasted trying to find a project management tool that would handle all the things mentioned above and help manage queries, but I can’t find one that suits me.

My solution came out of a conversation on the forums about this. Abi Saffrey suggested using conditional formatting in Excel for ‘at-a-glance’ status on queries. For each job I have a queries spreadsheet with columns for the location of the query (I split this into file name, page/folio number and location description on the page so I can search for all the queries on a particular file), who it is for, status, date sent, date received, details of the query and the reply. The status column uses a list to select the status: draft, sent, received, re-queried, done. These have different colours, set by conditional formatting.

When I send out queries it doesn’t matter whether I send the Excel file, copy a couple of quick queries into an email, or share the Excel file on OneDrive, there is always one master copy of the Excel sheet that I keep updated with statuses and replies (copied from email if needed).

Bringing it all together

As I mentioned, I’ve never found the perfect tool to do it all; consequently, I use several tools that I’ve found I can make play nicely together with minimum effort. In addition to these I also use Toggl to track time and Quickfile to handle billing, invoices and accounting.

I think the trick with systems is to invest some time in thinking about what problems you want any system to solve. In this way you can research tools and decide what compromises and tweaks you can make. Hopefully this then means you end up with a system that works for you, rather than one you are trying to fit into.

About Andy Coulson

Andy CoulsonAndy Coulson is a reformed engineer and primary teacher, and a Professional Member of the CIEP. He is a copyeditor and proofreader specialising in STEM subjects and odd formats like LaTeX.


About the CIEP

The Chartered Institute of Editing and Proofreading (CIEP) is a non-profit body promoting excellence in English language editing. We set and demonstrate editorial standards, and we are a community, training hub and support network for editorial professionals – the people who work to make text accurate, clear and fit for purpose.

Find out more about:


Photo credits: header image by Tara Winstead on Pexels, diary by JESHOOTS.COM on Pexels, office stationery by Alex McCarthy on Pexels.

Posted by Belinda Hodder, blog assistant.

The views expressed here do not necessarily reflect those of the CIEP.

Talking tech: Maths editing

In this month’s Talking tech column, Andy Coulson looks at tools to input, edit and format maths.

This month The Edit is looking at educational publishing, a field I work in, specialising in maths, science and technology. One of the biggest headaches I come up against is dealing with maths. Why is it so difficult? Well, maths has a lot of rules around presentation – what should be italic, how things are positioned, strange symbols, symbols nested inside symbols, precise alignment of symbols between lines, and so on. In short, standard Word is not able, or indeed designed, to cope with this.

Because these rules matter to people who deal in maths, and a lot of these people are in educational publishing, there are tools available. The three main tools are Word Math Builder (the built-in equation tools in Word); MathType (a Word add-in) and LaTeX (a typesetting language popular with academic paper writers). I will look briefly at all three before doing a more in-depth comparison of Word Math Builder and MathType to highlight the features of these two tools for working with maths in Word.

Your maths toolbox

Word Math Builder is the in-built editor in Word, accessible through the ‘Equation’ menu in the ‘Insert’ ribbon (or using Alt+=). It allows you to enter maths in several ways – as predefined equations; by building them from the menus; or by drawing them or entering them using text-based UnicodeMath or LaTeX code. It integrates well with Word but uses its own format – Office Math Markup Language (OMML). This can lead to issues when trying to export the maths content to other programmes, such as InDesign.

MathType is a Word add-in to handle maths and chemical equations. It is a subscription product, costing about £40 to £50 per year depending on the type of subscription, but with a 30-day free trial. The different subscriptions allow the tool to be used across a range of different programs, including PowerPoint, Google Workspace and some learning management systems. I used the Office 365 version, which seems to have fewer options than some of those shown in the tutorials. The explanation of the different versions is definitely an area the software developer, Wiris, could be much clearer about.

MathType offers a lot of the same features that Math Builder does, but presents them in a different way. Most of my clients use Math Builder, but I think I have a slight preference for the way MathType allows you to build things – it just feels slightly easier to lay things out.

Two potential advantages of MathType are that, first, it creates equations in MathML, which is an agreed standard for representing maths – although it is not yet well implemented. In theory you should be able to create an equation in MathML, include it on a webpage and a web browser should then display it correctly. The second is that it will also export the equations as EPS (Postscript) files, which current versions of InDesign appear to play nicely with.

Maths equation: MathType

LaTeX is a different proposition from the other two as it is essentially a typesetting language and you work in a LaTeX editor rather than in Word. It is far more like working with HTML for web pages than a Word document. It can accommodate a vast range of mathematical and scientific styles and is very popular in the field of academic papers. One of the most common tools is an online editor called Overleaf, which has a free version and a subscription version. If you only use LaTeX occasionally then the free version may well be adequate, with the subscription version giving access to collaboration tools. I’m not going to dig deep into LaTeX here, but you can find out more through the introduction on the Overleaf site.

Comparing the tools

Let’s take a look at Math Builder and MathType. Both of these will work within Word and work in a similar way – you select components of an equation, like a pair of brackets, and then fill in the terms inside them. I’ll take you through the two interfaces below and look at the obvious way of using them – clicking on symbols – before looking at some of the other options.

Math Builder presents options as a ribbon, accessed from ‘Equation’ in the ‘Insert’ ribbon:

Math Builder ribbon

It groups symbols, like Greek letters or operators (+, = etc), in blocks in the middle and has a number of groups covering a range of uses. On the right of the ribbon are some of the common structures you find in maths, such as fractions, as a series of drop-down menus.

Using this approach, it is fairly easy to create mathematical material within a document. Math Builder makes it easy to create inline material, where the maths runs as part of the text, and display material where it is presented as a separate paragraph. You can also type a simple sum into Word without spaces, select it and press Alt+=, and the text is converted to a correctly spaced maths expression.

One feature Math Builder offers that MathType does not is prebuilt expressions (although some versions of MathType allow you to save created equations for reuse). There are a number of common expressions, like the area of a circle or Pythagoras’s theorem, that can be selected from the Equation dropdown at the left end of the ribbon.

MathType works slightly differently from Math Builder. When you launch it, a separate window pops up. Like Math Builder it offers a series of building blocks, accessed through tabs, to build mathematical expressions as well as commonly used symbols. I think MathType seems to offer a larger range of symbols than Math Builder.

MathType

One really neat function in MathType is the red contextual tab. Here you get different options depending on what you are doing. For example, you can add carries and strikethroughs to digits in a subtraction calculation, which I’ve not found a way of doing in Math Builder.

MathType also offers simpler ways to change the formatting of text, so it is easier to remove italics so a measurement remains correctly spaced but is formatted as non-italic. It is also easy to change text colour, something that can be really useful in textbooks to highlight particular digits in a calculation.

As well as the menu-based way of building an equation, both tools offer other ways of entering material. Both have a drawing input, so if you have a touchscreen you can draw your equation. I’ve been really impressed by how good the recognition is on both of these, even when you draw with a mouse.

Math Builder allows you to type in maths using LaTeX code or Unicode Maths autocorrect codes. If you already use LaTeX I can imagine this could be quite a quick way of adding material. The Unicode approach is probably also quite fast, but clearly has a learning curve to be able to learn the codes.

Which should I use?

The short answer to this would be whichever your client asks you to. However, if you have the choice, it is more complex. Both tools have a great range of features that probably cover most needs. I think MathType has more options to build equations, but Math Builder’s text input tools to use LaTeX or Unicode may allow you to work around some of these. That is an area I need to experiment with. As I mentioned above, my clients generally prefer Maths Builder and one in particular has some wizardry that helps with the importing into InDesign. The finished proofs rarely exhibit some of the layout issues people have described when bringing this into InDesign. While I like MathType I generally use Math Builder as it meets my clients’ needs and so I am more familiar with it now.


Thanks to Martin Payne and Rich Cutler for their input on InDesign.

About Andy Coulson

Andy CoulsonAndy Coulson is a reformed engineer and primary teacher, and a Professional Member of the CIEP. He is a copyeditor and proofreader specialising in STEM subjects and odd formats like LaTeX.


About the CIEP

The Chartered Institute of Editing and Proofreading (CIEP) is a non-profit body promoting excellence in English language editing. We set and demonstrate editorial standards, and we are a community, training hub and support network for editorial professionals – the people who work to make text accurate, clear and fit for purpose.

Find out more about:


Photo credits: header image by Thomas T, maths equations on blackboard by Artturi Jalli, both on Unsplash.

Posted by Belinda Hodder, blog assistant.

The views expressed here do not necessarily reflect those of the CIEP.

Talking tech: Clipboards

In this month’s Talking tech column, Andy Coulson looks at getting the most out of your clipboards. There’s more than one, for a start, and they include several tools and functions you might not have known about.

We all use the clipboard frequently: that useful little bit of temporary storage that allows you to copy a bit of text and repeatedly paste it into a document can often simplify repetitive jobs. However, a recent job that meant adding a lot of tags to the text to tell the typesetter how to style the paragraph, like <A> to flag that the current line is an A head, really highlighted the limitations of this and got me looking at whether there might be better ways to do things.

Office clipboard

Arrow in clipboard section of WordIn Windows there are in fact two clipboards if you use Office, as that has its own clipboard. The Office clipboard lets you review the last 24 items stored to it. You can access this by clicking on the little arrow in a box in the Clipboard section of the Home ribbon in Word (indicated by the red arrow here).

You then have a sidebar that gives you access to up to 24 items on the clipboard. You can click on these and paste them into your document. When you get to 24 items the next item you copy goes to the top of the list and the bottom item is removed from the list. This means if you are repeatedly using items then your regularly used items can drop off the bottom of the list. Closing all Office programs will also empty the Office clipboard, so if you are doing something like tagging, it is worth keeping a Word or Excel Window open to preserve your clipboard list.

If you are using the clipboard to rearrange text, there are a couple of ways of working around this problem by bypassing the clipboard and keeping its content intact. The first of these uses the mouse. Select the text to move with the mouse by left-clicking and dragging, then move the mouse to where you want to move the text, hold the Ctrl key and right-click once where you want the text to go. Your text will pop up in the new destination. You can also drag the selected text by keeping the left button pressed while moving to the new location.

The other tool is the spike (named after the old-fashioned spike often found on editors’ desks). This allows you to collect several bits of text from the document and put them elsewhere in the document, or in a new document. Imagine you need to rearrange some paragraphs, clipping lines from two or three places to create a new paragraph. Spike will paste all the items you collect as a single block of text, so you need to think about the order you collect the text in. The first item you clip will be the first item in the pasted text and so on. So, you select the first item and press Ctrl+F3. This cuts the item to the spike, but if you want to copy, just press Ctrl+Z after: the item is still on the spike, but remains in its original place too. When you have collected all the pieces you want, place the cursor where they are going (or open a new document) and press Ctrl+Shift+F3 to paste all the items.

Someone typing on a laptop

Windows clipboard

Windows also has a clipboard that operates in a semi-detached fashion from the Office clipboard. Historically this also had a clipboard history tool which disappeared at some point, but is now back in Windows 11. It can be enabled by going to Settings, System, Clipboard and turning ‘Clipboard history’ on at the top of the list. Ctrl+V will then bring up the Windows clipboard history.

You can paste directly from here into Word, and this material is saved even when your Office programs are closed. You will notice, if you have Office clipboard open, that the items copied from the Windows clipboard appear in the Office clipboard. This can be a bit confusing, and I’m not entirely sure about the rationale of having two clipboards – I’m assuming it is for compatibility with the Mac version of Word.

Windows 11 clipboard history

The Windows 11 clipboard history (shown here) has a couple of potentially useful tools. Firstly, you can see that there are various icons across the top. Perhaps the most relevant is the symbols one, second from the right. This is like the ‘Insert Symbol’ command, giving access to all the available symbols for the current font. The other is that you can pin items to the clipboard, by clicking on the little pin to the right of each item (24 in the list in the image is pinned). These are saved until you clear them and are saved in addition to the 24 items in the Windows clipboard, although if you paste into Word they will take up one of the 24 slots in the Office clipboard. You can use this as a way of saving regularly used items (like my tags) and bringing them back into the Office clipboard when you need them. You probably won’t be surprised to learn that there is a macro that does something similar, and I’ll touch on that below.

Useful macros

One particular macro, CopytoClipboard, was discussed on the forums here – contributed by James Baron with a bit of refinement from Paul Beverley. What this does is let you create a Word file and, with the Office clipboard sidebar open, it will populate the clipboard from the file. This is what I ended up using to tag my file. If things dropped off the bottom of the list, I could clear the clipboard and reload from the file. It meant I had a list of tags I could click on to insert, and could import with the correct formatting.

It is also worth looking at Paul’s FRedit macro (or Windows Find and Replace if there are only one or two patterns) to see if there is a pattern you can find to do the pasting or formatting for you. In my tagging example, if there had been numbered headings, you could potentially have searched for heading styles or the pattern of numbering and added the tags automatically. Even if that was only 90% correct in a long manuscript, that could still be a significant time-saving.

Clipboard extenders

Finally, there are various clipboard extender programs that add to the functionality of the clipboard. I have used ClipX in the past, but this hasn’t been updated for several years, so I wouldn’t recommend it. This allowed the clipboard to have more capacity as well as providing ‘stickies’, which were like the pinned items in the Windows 11 clipboard, but were presented in a really useful pop-up menu.

There are many others available, but going by most of the reviews, I have so far avoided trying any, as I think they may actually cause more issues than they solve. If anyone has tried any and rates them, please let me know in the comments, and we can perhaps have a round-up in a future column.

I realise I have not touched on the Mac clipboard, for which I apologise as a non-Mac user. However, the bit of reading around I have done suggests the situation on the Mac is similar. Again, if anyone would like to share their Mac experiences in the comments, we can perhaps revisit this.

To sum up, the clipboard is really several clipboards that operate in similar and overlapping ways. On Windows 11 with Office you have a number of tools for cutting, copying and pasting text that work pretty well. Things start to get a bit trickier if you have to copy and paste a larger number of items frequently – as in my tags example – where copying from another document each time is slow and creates a lot of wear and tear on your mouse hand. It is worth spending some time exploring whether there are better ways of doing this to improve your efficiency and look after your wrists.

About Andy Coulson

Andy CoulsonAndy Coulson is a reformed engineer and primary teacher, and a Professional Member of the CIEP. He is a copyeditor and proofreader specialising in STEM subjects and odd formats like LaTeX.


About the CIEP

The Chartered Institute of Editing and Proofreading (CIEP) is a non-profit body promoting excellence in English language editing. We set and demonstrate editorial standards, and we are a community, training hub and support network for editorial professionals – the people who work to make text accurate, clear and fit for purpose.

Find out more about:


Photo credits: header image by Pixabay, someone typing on a laptop by Breakingpic, both on Pexels.

Posted by Eleanor Smith, blog assistant.

The views expressed here do not necessarily reflect those of the CIEP.

Talking tech: Getting the best out of remote meeting tools

In this Talking tech column, Andy Coulson discusses what you can do to improve the quality of your video calls.

During the pandemic meeting up has meant using remote meeting tools like Zoom, Skype, Teams and FaceTime. We’ve all become used to using them to some extent, whether we like or loathe them. Here I’m going to look at some of the things we can all do to improve the quality of what others see and hear on a video call.

There are three things we have control over in a video call – our WiFi signal, what our camera sees and what our microphone hears. I’ll look in detail at each of these below; they are all simple, low (or no) cost and often don’t involve the technology at all.

WiFi

Using remote meeting tools for video calls or meetings relies on a good internet connection because video needs lots of bandwidth, and it needs be reliable. To start with I am assuming that the internet connection to your house or workplace is reliable. If it is not, talk to your supplier as they should be able to test it and possibly diagnose problems remotely. I’ve just had my supplier resolve a problem caused by a faulty extension socket in the house and they’ve been brilliant. I’ve also learned a bit more about my connection, which means I can hopefully get issues resolved more quickly in future when I speak to them.

If the connection is all OK then you need to ensure you have the best possible connection to the internet. Many of you will connect via a router (the box your supplier provides). One of the simplest ways of ensuring you have a good signal is to use a cabled connection. Most routers have some network connections on the rear and they often come with a cable. However, this does mean you need to be close to the router unless you want to buy long cables.

Next, if you are connecting via WiFi or using a mobile phone you need to make sure you have as strong a signal as possible. To do this you will need to experiment and move to different parts of the house. Different materials block these signals to different degrees, so where your phone or laptop is makes a huge difference. I live in a bit of a mobile phone dead zone, so there are only a few spots in the house where I get a good mobile signal, and two places half a metre apart can have enormously different signals. Your phone indicates the strength of WiFi and phone signals and your laptop will show the WiFi strength, so use these to find a good place to work with strong signals.

Person at desktop computer on a video call

Getting the best from the camera

Cameras on mobile phones and laptops are generally pretty good. The software behind them gets ever more sophisticated, but you can make the job easier by thinking about what will be in the camera’s view and how it will be lit.

One of the easiest things to do is to have as clean a background as you can. I often hang a sheet behind me or use a projector screen, as this gives a plain background. A plain background helps the camera to focus on you, because you are easier to pick out. This in turn helps with lighting, because if the camera can pick out your face easily it will try and make that look as good as it can by adjusting the brightness.

If you use a camera app (eg Camera in Windows) you can play around with backgrounds and see what works best. For the space I use I think a pale background works best, but you may find that something dark works better.

The other thing you can control is lighting, and this can make a huge difference. If you are near a window, the time of day and time of year also make a difference. For example, my office is in the attic and I sit with a Velux window above and behind my head. In the summer, when the sun is on that side of the house, I have to black that out; it is so bright that the camera struggles to make out my face. In the winter I sometimes use the sunshade blind and it doesn’t cause a problem, as the light is at a lower level. So, the first thing to look at is whether you have blinds or curtains that can control the natural light. Again, experiment before the call.

What you are after is even lighting of your face that is not so bright that it makes you squint. This means that ideally you want light from both sides of your face. For example, a couple of desk lamps would work, one on either side.

Try to avoid lighting just from above you, as it creates shadows that are not flattering! If you have no other option, it might be worth experimenting with either white paper or foil on your desk to try to reflect some light into those shadows.

I have a photographic reflector that I use (essentially a metre-wide foil circle with a rim that keeps it taut). I tuck this behind my monitor so two-thirds of it sticks out above and leans towards me. On a not-too-bright day I use a combination of my desk lamp and the light from the Velux window to bounce back off that and light my face.

Sound

Your microphone, like your camera, has sophisticated software behind it that helps to isolate your voice from other sounds. Generally, this is the default setting in most software, but you can help it along by making some good choices.

The first thing to think about is: how noisy is the room you are in? If it is noisy, can you move to a quieter room? (Apologies if you’ve just carefully crafted your lighting set-up!) There may be other things you can do like shutting doors or windows, too. The more noise you can exclude, the less work the software has to do to eliminate the noise and the clearer you will sound.

Once you are happy, open your remote work software and find the microphone settings. There is a microphone level indicator, which is a bar or series of dots that go up and down in response to what the microphone picks up. If you speak in your normal voice while facing the microphone this should bob up and down between about 50% and 90%. If the levels fall much outside this then the program may have a microphone volume or sensitivity control you can adjust. If not (for example in Skype) the system controls are used. In Windows this is in Settings > System > Sound. It is worth checking this before any call.

When you work from home and use video and audio calls, remember that you are not in a studio where everything is well controlled and consistent. The conditions at home (noise and lighting) will change from day to day and hour to hour, so you need to look at look at how things look and sound before a call. As I mentioned above, most of the things I’ve mentioned can be done for little or no cost. Have an experiment – and please share any tips of your own in the comments below or on the CIEP Forums.

About Andy Coulson

Andy Coulson is a reformed engineer and primary teacher, and a Professional Member of the CIEP. He is a copyeditor and proofreader specialising In STEM subjects and odd formats like LaTeX.


About the CIEP

The Chartered Institute of Editing and Proofreading (CIEP) is a non-profit body promoting excellence in English language editing. We set and demonstrate editorial standards, and we are a community, training hub and support network for editorial professionals – the people who work to make text accurate, clear and fit for purpose.

Find out more about:


Photo credits: header image by Kampus Production on Pexels, person on video call by Karolina Grabowska on Pexels.

Posted by Harriet Power, CIEP information commissioning editor.

The views expressed here do not necessarily reflect those of the CIEP.

Talking tech: Web editors – WYSIWYG or code?

In this Talking tech column, Andy Coulson discusses two types of web editing tools – WYSIWYG and code-based – designed for editing HTML (HyperText Markup Language) content on websites.

The October 2022 issue of member newsletter The Edit is about web editing, so I’m going to look at two types of web editing tools that are well suited to editing content on sites where the content is mainly in HTML (HyperText Markup Language). The content of a webpage is generally held as an HTML file. This is an unformatted (plain text) file that contains the text content and tags describing the function of the text (heading, paragraph, etc), which can then be used to format the text or potentially manipulate it. The tags appear in angle brackets, eg <H1>title</H1>.

However, the web has changed drastically over the last ten years or so and many websites don’t only use HTML. Most sites now separate out a lot of formatting information using CSS (cascading style sheets) files. Many sites also include JavaScript and other programming code to create interactive and dynamic elements on the page. When you are focusing on the content, not only can this be a distraction, but there is potentially a lot of scope to create problems. This is why, broadly, I am focusing on tools with good HTML support, although they can also deal with other files, such as CSS and active elements like JavaScript.

Many smaller websites are created using online website creator systems such as WordPress, Squarespace and Wix. These give you direct access to the content text, making for a simpler editing experience without losing access to the advanced features described above. They make extensive use of templates that can mask a lot of complexity. They will often offer the features I’ll describe in reviewing the two types of editor below. So it is worth checking if those have been used and if you can access the content through those systems.

Text or visual editing?

The two types of tool I am going to look at are code editors and WYSIWIG (what you see is what you get). I have picked two editors, one of each type, both of which are free. Most web developers will use commercial packages, such as Adobe’s Dreamweaver WYSIWYG editor, and code editors such as Eclipse and Microsoft’s Visual Studio, but for some basic text editing the following should provide sufficient tools to let you get started.

The code editor displays the HTML code, and to preview the webpage you need to view it in a browser. In contrast, a WYSIWYG editor gives you a live preview of the page as you edit. Many of these will provide templates to help you create a professional-looking website with minimal coding. Online web creators like WordPress and Wix also tend to offer these features. WYSIWYG editors often let you work directly on the graphical screen. For example, you can drag and drop an image onto a webpage and the editor will generate the appropriate code.

So, you might wonder, why would you use a code editor, particularly as WYSIWYG editors often incorporate a code editor? For me the answer is simplicity. Most code editors are smaller, simpler programs. There are fewer features, but that also means there are fewer to sort through to find what you want, and the learning curve can be less steep. The code editor, generally, uses less memory, which can still be an advantage even with today’s big memory machines. If you need to test the HTML files, you can do this with your web browser (or more probably web browsers, as things may work differently in Chrome and Firefox). Ultimately though, this will come down to personal choice.

None of the webpage editing tools (as far as I am aware) have features like Track Changes or comments. This means you will need to keep track of these separately. While you can add comments to HTML by enclosing them in ‘<!–’ and ‘–>’ tags, they are not that easy to see within the HTML file. Using these will depend on what your client needs.

Code: Notepad++

For this review I am going to use Notepad++, which is a very flexible general code editor with good HTML support. While this is not aimed purely at web editing, I think it is a clear and well-written program that is simply nice to use. It can be downloaded from here.

Screenshot from Notepad++

Notepad++ provides a relatively familiar interface to anyone who has used older versions (pre-ribbon) of Word. Much of the left-hand side of the menu and many of the buttons will be familiar too. The real strengths of a code editor are the features to help you read through the HTML (or other code) easily, such as code completion (where the editor recognises commands or tags as you type and completes them for you, reducing missed closing tags) and syntax highlighting (where tag names and the values associated with them are highlighted in different colours, allowing you to more easily read the text). Here I’ve used the Style Configurator in the Settings menu to tell the program this is HTML and select a colour scheme – for example, blue for tags and pale brown for text.

WYSIWYG: BlueGriffon

For this review I am using BlueGriffon, which you can download from here. It is based on the same rendering engine (the bit of software that turns the HTML and other code into a webpage) as the Firefox web browser.

BlueGriffon has a nice clean interface and typically opens with the webpage in WYSIWYG view. In the screenshot below, I have used the dual view that opens a code editor with the webpage view. You can work directly in the webpage view, so correcting spelling mistakes like ‘servive’ in the last line of ‘About Me’ is straightforward. As you move around the webpage view on the left, the elements are highlighted in the code editor.

Screenshot from BlueGriffon

Many of the basic formatting features are shown down the left-hand side of the screen and help you to add neatly formatted (and hence coded) content. Compared to Dreamweaver, BlueGriffon has a relatively simple interface and limited feature set. This can be an advantage, as in editing the content you will only need a small proportion of the features available.

I mentioned testing in different web browsers earlier, and one nice feature in BlueGriffon is the globe button on the toolbar. If you click on this it allows you to open the file using another application, typically a web browser. If you have maths or foreign language characters this is worth doing, as these are examples of things that will render differently on different browsers.

Summary

BlueGriffon is available on Windows, Mac and Linux, but Notepad++ is only available on Windows and Linux. There is an alternative, CotEditor, for Mac that offers similar features to Notepad++. All three of these are free to download, which makes them very practical for occasional use, but they also have sufficient features for more intensive use.

Quick tip: Site maps

Here’s a quick tip that may be useful when you are working with websites. If you need to check what pages a website contains you can create a site map. A site map can be used to help search engines understand your website, or for you to visualise the website’s structure. Essentially, it is a list of all the pages.

There are a number of site map generators on the internet; I have used xml-sitemaps.com. Here you enter the name of the homepage of the site and the system goes off and searches through all the branches of the website (or ‘crawls’ it, to use the technical term), generating a list of pages. You can then use this to check you have all the pages that need editing.

About Andy Coulson

Andy Coulson is a reformed engineer and primary teacher, and a Professional Member of the CIEP. He is a copyeditor and proofreader specialising In STEM subjects and odd formats like LaTeX.


About the CIEP

The Chartered Institute of Editing and Proofreading (CIEP) is a non-profit body promoting excellence in English language editing. We set and demonstrate editorial standards, and we are a community, training hub and support network for editorial professionals – the people who work to make text accurate, clear and fit for purpose.

Find out more about:


Photo credits: header image by publicarray on Pixabay, Notepad and BlueGriffon screenshots by Andy Coulson.

Posted by Harriet Power, CIEP information commissioning editor.

The views expressed here do not necessarily reflect those of the CIEP.

Talking tech: Scrivener

In this Talking tech column, Andy Coulson takes a closer look at the writing software Scrivener, and investigates how it might also be useful for development editors, especially in fiction.

Header image of pen and notepaperWith any writing, if you ask most people what tools they use, Microsoft Word is likely to be the first thing that comes to mind. However, Scrivener is a tool for writers that its developers describe as a tool that ‘combines all the tools you need to create a first draft’. I’m going to take a look at Scrivener and see what it does and whether it might be a useful tool for us as editors and proofreaders to consider.

Scrivener has been around since 2006 and the current version (3.0) is available for Windows, Mac and iOS. It combines a word processor, outliner and tools to manage research. While this might sound like your familiar Word environment it offers a different, more flexible and freeform way to organise your work. The ‘Getting Started’ document in Scrivener describes a number of scenarios, but one in particular that felt familiar to me was where you might produce some parts of a written piece quickly and easily, but struggle with others. The process of producing a draft then involves linking those bits that are clear and filling in the gaps and the more unclear bits. Scrivener allows you to develop a process that lets you capture and reorganise those bits in a way that would be far more difficult in Word.

Features

Screenshot from Scrivener showing the sidebar on the left and document in the middle

Scrivener projects are not just a text file like Word (although Word files are a bit more complex than that): they are a collection of files that Scrivener refers to as a project. You can decide on your own organising principle, but for this article I will use the model the ‘Getting Started’ document in Scrivener uses. The key element is the binder, the sidebar in the interface that has a stacked list of all the elements of the project, which you can see on the left of the screenshot above. The content you are writing all sits within a ‘Draft’ folder. Under this there are top-level folders for chapters, second-level folders for parts and then documents, some of which have subdocuments containing the text.

Breaking up a large writing task in this way also helps to support the writing process (or any long project) by giving you a smaller task to aim at. Scrivener includes further tools that build on this, like writing targets. These allow you to set a target word count for the whole draft and for each writing session, which can help with motivation. The model of breaking, say, a chapter into smaller files can also help as it allows you to see your progress more clearly. There is also a ‘Composition Mode’ that is very clean and sparse if you find the distraction-free approach helps with writing.

One of the big differences from Word is that you can associate synopses and notes with each document. The synopsis is always linked to the document, and this can be viewed in the Outline and Corkboard tools to allow you to get different overviews of your whole project. Notes can then be used to keep any ideas that don’t need to be in the text, such as problems you can’t fix or ideas you can’t immediately work on, or what one review described as ‘a random epiphany’.

Another feature is that you can add labels and statuses to documents. You can assign labels for a whole project and give them different colours. You can use virtually anything as a label, but ‘Getting Started’ gives the example of using this to record the character whose point of view a document is written from, to help with reviewing the structure of a story. A status is a simple text label, intended to keep track of the state of the text – ‘done’, ‘in progress’, ‘first draft’, etc.

Another potentially useful feature is Snapshots. This allows you to take a snapshot of a document at a particular moment in time. You can then compare the text (but not format) changes in this to the current version and see the differences. In Scrivener you will tend to work on smaller chunks of text than in Word, as you split the project into multiple documents, which means the compare function is much easier to use than the one in Word.

Person researching their writing project

Scrivener also allows you to keep all of your research material within the project for easy reference. This can be material created in Scrivener (the ‘Getting Started’ document has examples of character and location sheets as the references for those things in a story), Word documents, PDFs, images, and video or audio files. These are all organised within a research folder in the binder. There is also a handy scratchpad feature for making quick notes about, say, a website that you can then save within your project.

You may remember that at the start of this section I said all of your writing is stored in a ‘Draft’ folder. This is so that you can export (or ‘compile’, in Scrivener terminology) the finished draft into another format. Scrivener supports a range of output formats, including docx and pdf. You can mark different levels of file or folder as different section types, so clearly identify where chapters and parts break. When you compile you can add further options, like using a specific font, or sectional numbering, giving you a lot of control over the finished output. The Word docx output looks very accurate and retains styles accurately, both by name and in the style features.

All in all, this is a well-written program with a clean and reasonably easy-to-use interface, given the number of features it has. Looking at it with my writing hat on I can really see the advantages of it. In many ways it is a much nicer writing environment than the standard Word interface, offering a less cluttered feel. With a 30 days actual usage trial (in other words you can use it in full for 30 days, even if it takes six months to do that) and for $45 this offers writers a really good alternative tool.

Scrivener for editors?

From an editing point of view, Scrivener lacks a lot of Word’s tools. There is no Track Changes function (although Snapshots could be used in an ad-hoc way), no support for macros and no support for PerfectIt. There is a comments function that is similar to Word’s Modern Comments feature but is slightly quicker to use. Comments are tagged with the name of their author along with the time and date. However, you can’t reply to comments like you can in Word.

For most copyeditors and proofreaders, Scrivener probably isn’t going to be much help. However, you can at least be certain that if your author uses Scrivener, the Word file you get will be an accurate representation of what they have. It may also mean that the author has notes and research to hand that will make dealing with queries simpler.

For development editors Scrivener could be a different proposition. It could certainly cut down on some of the back and forth of clarifying issues within a manuscript if the research, notes and comments are all available to the development editor. I think you could also manage quite a bit of the communication about the manuscript within the Scrivener file, again helping you to organise and follow how it develops.

About Andy Coulson

Andy CoulsonAndy Coulson is a reformed engineer and primary teacher, and a Professional Member of CIEP. He is a copyeditor and proofreader specialising In STEM subjects and odd formats like LaTeX.


About the CIEP

The Chartered Institute of Editing and Proofreading (CIEP) is a non-profit body promoting excellence in English language editing. We set and demonstrate editorial standards, and we are a community, training hub and support network for editorial professionals – the people who work to make text accurate, clear and fit for purpose.

Find out more about:


Photo credits: desktop by Tobias Herrmann on Pixabay; researcher by StockSnap on Pixabay.

Posted by Harriet Power, CIEP information commissioning editor.

The views expressed here do not necessarily reflect those of the CIEP.

Talking tech: Can a machine use conscious language?

In this Talking tech column, Andy Coulson delves into the world of artificial intelligence to find out how it might be able to consider the use of conscious language or edit text in the future.

For this issue of The Edit my column is going to be a little different from normal. Usually, I try to highlight how technology can help you with the theme of the issue. This issue’s theme, conscious language, proves to be a bit of a challenge on that front. What I am going to do instead is to get the crystal ball out and do a bit of speculating about how technology might develop to help ensure more conscious language use.

Natural language processing

Natural language processing (NLP) is the term used to describe a field of computer science that covers developing computer systems to understand text and speech in a comparable way to a human. This is a branch of artificial intelligence (AI), and I will get into some more detail about that later. This enables tools like Google Translate or the digital assistants Siri or Alexa to work. This is the field from which any tools (or indeed our competitors!) will come that will be able to improve how conscious the language in a text is.

Just to simplify things (slightly) I am going to ignore speech and all the computational issues that speech recognition brings. Let us concentrate on text and look at how machines are taught to understand that and make decisions about how to respond to it. To date, a lot of the NLP development has focused more on teaching a machine to respond to some text, whereas what we are trying to think about is how a machine would understand and amend a text. Microsoft and Grammarly both use AI to help improve their editing tools, so you can be sure there are other tech companies experimenting with this.

While language is to a degree rule based, it is also full of subtleties and ambiguities. The rules allow tools like PerfectIt to work – we can describe and recognise patterns and so teach a machine to do this too. This only takes us so far, as NLP then needs to pick the text apart to find the meaning within it. It must undertake a range of tasks on the text to enable the computer to ‘understand’ it. These include:

  • Speech or grammatical tagging, where the computer figures out the role of each word. This would be where it would identify ‘make’ being used as a verb (make a jacket) rather than a noun (the make of jacket).
  • Recognising names, so it can identify a proper noun. It knows Lesley is likely to be someone’s name rather than a thing, so ‘picking Lesley up on the way’ can be interpreted in the right sense.
  • Resolving co-references, where it relates a pronoun to a previously named object, so it recognises that ‘she’ is ‘Kathy’ from a previous sentence. This task can also be involved with dealing with metaphors or idioms – recognising that someone who is cold may not want an extra jumper but might not be much fun to talk to.
  • Sentiment analysis, which is also known as opinion mining. Here the computer is attempting to recognise more hidden aspects of the text, such as whether the tone is positive or negative.

All of these, and other functions we would need in order to make judgements about how conscious the language used in a text is, do not lend themselves to rules. Rather, they rely on a knowledge of context and conventions. Acceptable language in a novel set in 1960s Alabama would be quite different from that used in a modern social sciences paper about the same city and its inhabitants, but understanding the context will frame and shape language choices.

How machines learn

So, we have realised we are not going to be able to fix this one with a clever macro. What sort of computation do we need? Step forward AI – a term that covers a number of fields that involve machines that mimic human intelligence. One of the main aspects of this that NLP uses is machine learning, a field of computing covering machines that learn a task or tasks through different approaches.

One of the best-known AI companies is Google’s DeepMind division. They have made a name for themselves by approaching AI from the perspective of learning to play games using machine learning. To understand how they have progressed in the field we need a bit of a history lesson.

In 1997 an IBM project called Deep Blue beat the then World Chess Champion, Garry Kasparov. What Deep Blue did was to search all possible moves in the game and then pick the best next move. What is different about DeepMind’s AlphaGo is that they had to follow a different approach, as the game of Go has so many more possible moves than chess. This version of AlphaGo used neural networks (a brain-like arrangement of computing elements with lots of connections between each element) to compare the best move from the current position and the likelihood of winning from that move, which gave a more efficient way of narrowing down the choice of moves. AlphaGo was trained by playing vast numbers of games of Go to improve its ability to select moves and predict its current chance of winning. Eventually, in 2016, it beat Lee Sedol, widely regarded as one of the best players of all time.

DeepMind have since developed AlphaGo further and, instead of playing against experienced players, it learns from scratch by playing against itself. It uses a technique called reinforcement learning, where the system tries to optimise a reward called a Q-value. It has been able to play and master various video games from scratch (the Atari benchmark). Here AlphaGo tries to gain positive awards (and avoid negative ones) by, for example, collecting a game’s currency or surviving for a certain amount of time. It can then use the information about what it did and what reward it received to alter its strategy and see if that improves the Q-value.

Why is this important? It shows a progression from a very controlled environment with a limited (although large) number of variables, to a more complex one (Go) and then to a more generalised one (more varied games). We are still not at the point where this could be applied to a problem (like our language one) with very few constraints, but this certainly shows a progression. The latest version, AlphaZero, has apparently taught itself chess from scratch to a world champion level in 24 hours.

This technique of using neural networks and reinforcement learning seems to me to offer the potential to create tools with a more subtle understanding of learning. One issue that can cause problems is that AI often uses huge datasets to train the systems, but using already acquired data can bring with it historical problems. Microsoft created an AI chatbot for Twitter called Tay, designed to mimic the speech patterns of a 19-year-old girl, which it did very well right up to the point it learned to be inflammatory and offensive and had to be shut down. Microsoft believe that the trolling the bot experienced taught it how to be offensive. Similarly, Amazon developed an AI system to shortlist job candidates, and this showed a distinct bias against women. Amazon tracked the problem down to an underlying bias in the training data.

Given the increasing pressure on social media companies to filter offensive content, platforms like YouTube and Facebook are undoubtedly trying to use AI to recognise problematic language, and some of this may lead to tools we can use to highlight issues. However, as editors and proofreaders we are looking to improve poor language choices and make it more conscious. Looking at how the Editor function in MS Word and Grammarly have developed, they certainly point to a way forward. While I am not convinced a machine is going to take my job for some time, I can certainly see where it could make progress. I think the challenge of issues like conscious language is that they have too many subtleties, and the human ability to make judgements about these, and even to have a productive discussion with an author about a passage, means a human editor will continue to be able to add something a machine cannot to a piece of writing, for the foreseeable future.

About Andy Coulson

Andy Coulson is a reformed engineer and primary teacher, and a Professional Member of CIEP. He is a copyeditor and proofreader specialising In STEM subjects and odd formats like LaTeX.


About the CIEP

The Chartered Institute of Editing and Proofreading (CIEP) is a non-profit body promoting excellence in English language editing. We set and demonstrate editorial standards, and we are a community, training hub and support network for editorial professionals – the people who work to make text accurate, clear and fit for purpose.

Find out more about:


Photo credits: chess by Bru-nO on Pixabay, robot by mohamed_hassan on Pixabay, Go by Elena Popova on Unsplash.

Posted by Harriet Power, CIEP information commissioning editor.

The views expressed here do not necessarily reflect those of the CIEP.

Talking tech: Find and Replace

In this latest Talking tech post, Andy Coulson looks at how Find and Replace can speed up editing and styling references.

In keeping with this month’s theme of references for The Edit, I’m going to take a look at how we can use one of Word’s most powerful in-built tools – wildcard Find and Replace. References have to conform to tight formatting rules, and these lend themselves to using wildcard Find and Replace to tidy them up. This is particularly handy if you have a paper that was written with one form of referencing that needs to be changed to a different one. I’ll give a brief introduction to wildcards, then share some examples that focus on the type of issues in references and finally I’ll take a quick look at using these with Paul Beverley’s FRedit macro and PerfectIt.

Before we get cracking, a word of warning. Many academic authors use reference management software like Mendeley to produce reference lists. This software manages the references outside of Word and links to the Word document. With Mendeley you see references as form fields in the document. If you make changes, the next time the document is opened with a connection to Mendeley the reference list and links are overwritten, losing your edits. If you think this is the case, make sure you clarify how your client wants references edited.

Find and Replace can also be a blunt instrument, so use it with care. While you are refining your search, work on a copy of your text. And don’t use ‘Replace All’ unless you are very clear what you are replacing. It is safer to step through the things being found by using the ‘Replace’ or ‘Find Next’ (if you want to leave something unchanged) buttons.

Wildcards

Word’s Find and Replace feature has a number of hidden extras. If you’ve not already found these, they can be revealed by clicking the ‘More’ button under the ‘Replace with:’ field.

This opens the menu shown below and, as we are going to look at wildcards, we need to check the ‘Use wildcards’ option.

So, what is a wildcard? It is simply a character that can be used to represent anything else. A very simple example is using the character ‘?’ in a wildcard search. If you have ‘Use wildcards’ selected, put ‘r?n’ in the ‘Find what:’ field and ‘ran’ in the ‘Replace with:’ field then press ‘Replace All’, you would replace all instances of ‘ron’, ‘run’, ‘ren’, etc with ‘ran’. The ‘?’ tells Word to find any letter, so it looks for the pattern ‘r’ followed by any letter, followed by ‘n’. This does require a little thought, because what you have now also done, potentially, is turn ‘iron’ into ‘iran’, and a ‘wren’ would become a ‘wran’.

Now that example should alert you to the problems with this, but this is a very simplistic example and to do something more useful we need to dive deeper. Wildcards allow you to specify more complex patterns in the text, and as we will see in the examples below we can do some quite complex searches, often with a little trickery.

As this is a (relatively) short article I’m not going to be able to go into all of the possibilities. The best way to learn how to use these is to experiment. If you want some help, there are a number of resources available:

Examples

Let’s have a look at a couple of reference-related examples in detail so we can see how these work. For the referencing gurus out there, I am going to omit some required information from the references for clarity and play a bit fast and loose with referencing styles.

Example 1: Initials in names

Different referencing systems use different conventions for citing authors’ names in the reference list. So, you may have Hartley, J.R. (APA style), Hartley JR (Vancouver style) or even J.R. Hartley. Usually a reference list will be (largely) consistent, so it has a pattern we can find and a pattern we can replace it with. We will start with these three references:

A.N. Author. (1986). Writing for beginners (2nd ed.). Jones Books

S. Editor. (2021). Editing for fun and profit (1st ed.). MyPub Ltd

I.S.B. Nash. (2007). Cataloguing books (3rd ed.). Big Books Inc.

With Find and Replace we need to break problems down into manageable chunks, and sometimes multiple searches, that can be implemented by Find and Replace. Let’s assume we need to change author-name style in the list to Vancouver. The first issue we can tackle is the structure of the author names – setting them after the surname.

To do this we use the ‘Find what:’ string¹

^013([A-Z.]@) ([A-z]@).

What this does is:

  1. Looks for a line break: ^013 (‘^’ tells Word the number following is a character code. Note that these are for Windows and may be different on a Mac. You can find a list of these in the Wildcard Cookbook and macro book mentioned above).
  2. Looks for one or more initials: ([A-Z.]@) – the round brackets are grouping together and are important when we come to replace things; the [A-Z.] looks for capital letters or a full stop and the @ tells Word to look for one or more occurrences of these. Note that there is a space after this term, like in the text.
  3. Now looks for a capitalised word: ([A-z]@) – a combination of upper- and lower-case letters.

Now we replace the surname first and the initials after using this ‘Replace with:’ string:

^p\2 \1

This replaces the text as follows:

  1. We put the line break back in: ^p – note that we are using a different code here. ‘Why?’ you may ask. Because Word …
  2. Next we put the surname in: \2 – the \2 tells Word to use the second item in round brackets, what we found with item 3 above.
  3. Finally, we add the initials back in after a space – \1 – using the first bracketed item we found in item 2 above.

This leaves us with:

Author A.N. (1986). Writing for beginners (2nd ed.). Jones Books

Editor S. (2021). Editing for fun and profit (1st ed.). MyPub Ltd

Nash I.S.B. (2007). Cataloguing books (3rd ed.). Big Books Inc.

Now we need to remove the extra full points. We have to do that in two steps, by taking out all the relevant full points and then adding back the one after the final name.

So, removing the full points we use this ‘Find what:’ string, which simply finds one capital letter followed by one full point.

([A-Z]).

We then put the capital letter back in using this ‘Replace with:’ string:

\1

This gives us:

Author AN (1986). Writing for beginners (2nd ed.). Jones Books

Editor S (2021). Editing for fun and profit (1st ed.). MyPub Ltd

Nash ISB (2007). Cataloguing books (3rd ed.). Big Books Inc.

Now we add the final full point back in before the bracket with the year. That bracket gives us a pattern we can identify to put the full point in the right place. So, we use the ‘Find what:’ string:

([A-Z]) \(

As before, the round brackets contain a string to find one capital letter; this is followed by a space and finally by \(. ‘What is that?’ you may ask. Well, we use brackets to create a sequence in the search string that we can return to later, so in wildcard searches round brackets (and a number of other symbols) work as commands. In order to refer to those symbols we need to escape it, which means adding a backslash in front, so \( finds an opening round bracket. We can then use the following ‘Replace with:’ string to add the full point.

\1. ^40

As before \1. adds the initial back with the full point and ^40 puts an open bracket back. Again, note the different way that replace refers to the character, but that’s just the way it works I’m afraid. This then gives us:

Author AN. (1986). Writing for beginners (2nd ed.). Jones Books

Editor S. (2021). Editing for fun and profit (1st ed.). MyPub Ltd

Nash ISB. (2007). Cataloguing books (3rd ed.). Big Books Inc.

Example 2: Adding styling

I realise this is not proper Vancouver referencing, but I want to show you how we can add styling using wildcards. In this example we will apply italics to the book titles. As before, we need a pattern to recognise which part is the book title. In this case we have the end of the year ‘). ’ and the start of the edition ‘ (’. However, in order to find the title we have to find more text, the two brackets before and after, which we don’t want in italics. This means we need to be a bit cunning!

To do this we use this ‘Find what:’ string:

(\). )([A-z .]@)(\([0-9])

  1. (\). ) finds a closing bracket \), followed by a period and a space and we want to keep those, so we group them.
  2. ([A-z .]@) looks for a mix of upper- and lower-case letters, spaces and full stops – our surname and initials.
  3. (\([0-9]) looks for an open bracket \( plus a number – the characters at the start of the edition.

If we then replace this with:

\1%%\2%%\3

we put %% before and after the characters of the title that we want to italicise:

Author AN. (1986). %%Writing for beginners %%(2nd ed.). Jones Books

Editor S. (2021). %%Editing for fun and profit %%(1st ed.). MyPub Ltd

Nash ISB. (2007). %%Cataloguing books %%(3rd ed.). Big Books Inc.

We now have the title clearly marked, so can then style that. We search for the modified title with %% before and after.

%%([A-z .]@)%%

We then replace that with just the title text, which we have put in round brackets, so \1 goes in the ‘Replace what:’ field. Before we replace this, we need to tell Word to italicise this text. If you tap on the ‘More’ button in the bottom left you will see a ‘Format’ button. Pressing on this pops up the menu shown below. If you select ‘Font’ the font dialogue box pops up and you can select ‘Italic’. You will also see ‘Font: Italic’ appears under the ‘Replace with:’ field.

Running that Find and Replace gives us our final list:

Author AN. (1986). Writing for beginners (2nd ed.). Jones Books

Editor S. (2021). Editing for fun and profit (1st ed.). MyPub Ltd

Nash ISB. (2007). Cataloguing books (3rd ed.). Big Books Inc.

Integrating with Macros and PerfectIt

Wildcard Find and Replace searches like this are real timesavers, but there’s no obvious way of saving these and using them again and again. There is a short history for both the ‘Find what:’ and ‘Replace with:’ fields if you click the down arrow at the right of each, but I don’t find this particularly helpful.

Both Paul Beverley’s FRedit macro and PerfectIt support using wildcards, so offer a way to reuse multiple Find and Replace searches. As the point of using things like macros and wildcards is to save you time sometimes the investment of time to set up those searches in a macro or PerfectIt may not add up compared to just running the searches. For example, I do some work on papers for academic journals that are about 6,000 words long. I get material for multiple different journals, so it is quicker for me to just use a few Find and Replace searches rather than setting up, say, FRedit. However, a book or multiple papers for the same journal would change that, and setting up FRedit or PerfectIt would then be worthwhile. Having said that, writing this has convinced me to create a file of Find and Replace searches I can refer back to. I will probably format this as a FRedit list so I can use these with that macro.

PerfectIt allows you to perform wildcard searches in the ‘Wildcard’ tab. This lets you use all the features of wildcards in Word Find and Replace and adds a couple of neat features. The first of these is that you can add an instruction or prompt that explains what the search is doing, because, as we saw above, patterns can crop up in unexpected places. The second of these is that you can add exceptions. PerfectIt’s manual page uses the example of apostrophes being added to numbers followed by ‘s’, so ‘we have 3s, 4s and 5s chosen’ is correct. However, if we talk about ‘Page 4’s content’ we need the apostrophe. We can make numbers after the word ‘Page’ an exception.

FRedit is a scripted version of Find and Replace, so runs multiple Find and Replace searches from a list. It uses all the forms in Word Find and Replace, but has a few little tweaks you need to use in the file of searches we set up. FRedit doesn’t present us with the dialogue boxes that Word Find and Replace does. So in the file we use ‘|’ to separate the ‘Find what:’ and ‘Replace with:’ terms on a line and add ‘~’ at the start of the line if we are using wildcards. We can also add formatting easily. I sometimes use FRedit to quickly highlight things so I can then take my time on a read-through to check the context. For example, if you have an app called Balance it needs capitalising, but if you also talk about keeping your balance it doesn’t, so you have a mix, but the context will determine which you use.

Hopefully this has given you some ideas and encouraged you to go and experiment. I can honestly say learning how to use wildcards and Find and Replace efficiently has helped speed up my editing enormously. Combining these with FRedit or PerfectIt speeds things up even more where you have longer pieces or house styles you use regularly.


1 Paul Beverley has flagged that while ‘[A-z]@’ will find any letter it does not pick up on accented letters. A better solution is ‘[A-Za-z]@’.

About Andy Coulson

Andy Coulson is a reformed engineer and primary teacher, and a Professional Member of CIEP. He is a copyeditor and proofreader specialising In STEM subjects and odd formats like LaTeX.


About the CIEP

The Chartered Institute of Editing and Proofreading (CIEP) is a non-profit body promoting excellence in English language editing. We set and demonstrate editorial standards, and we are a community, training hub and support network for editorial professionals – the people who work to make text accurate, clear and fit for purpose.

Find out more about:


Photo credits: magnifying glass by towfiqu barbhuiya on Canva, joker by Roy_Inove on Pixabay.

Posted by Harriet Power, CIEP information commissioning editor.

The views expressed here do not necessarily reflect those of the CIEP.