Category Archives: Working practices

Round-up: CIEP conference 2022

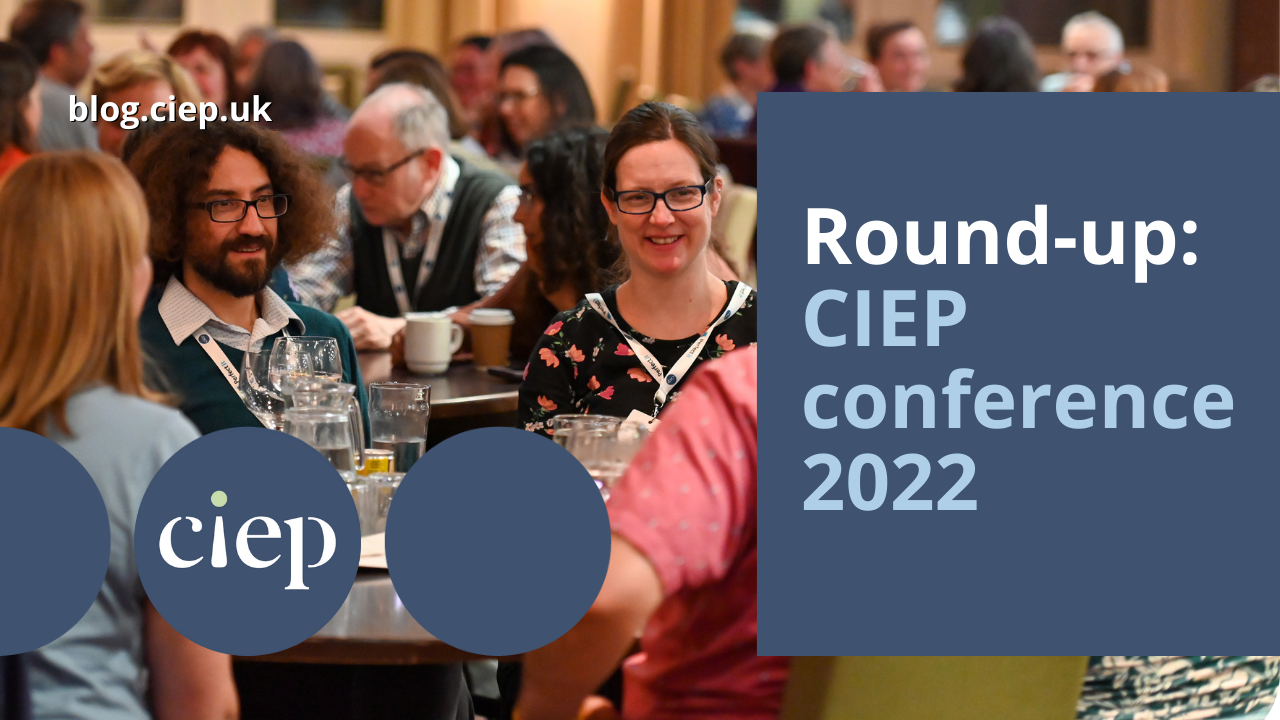
The CIEP’s 2022 hybrid conference, ‘Editing in a diverse world’, took place from 10 to 12 September at Kents Hill Park, Milton Keynes, and online. In this article we’ve gathered attendees’ reviews and reactions before, during and after the event, on social media and in individual blogs. Whether you made it to the conference in person or online, and even if you didn’t attend this time, we hope it gives you a sense of the news, learning, atmosphere and fun of #CIEP2022.

Before: Hashtag excitement

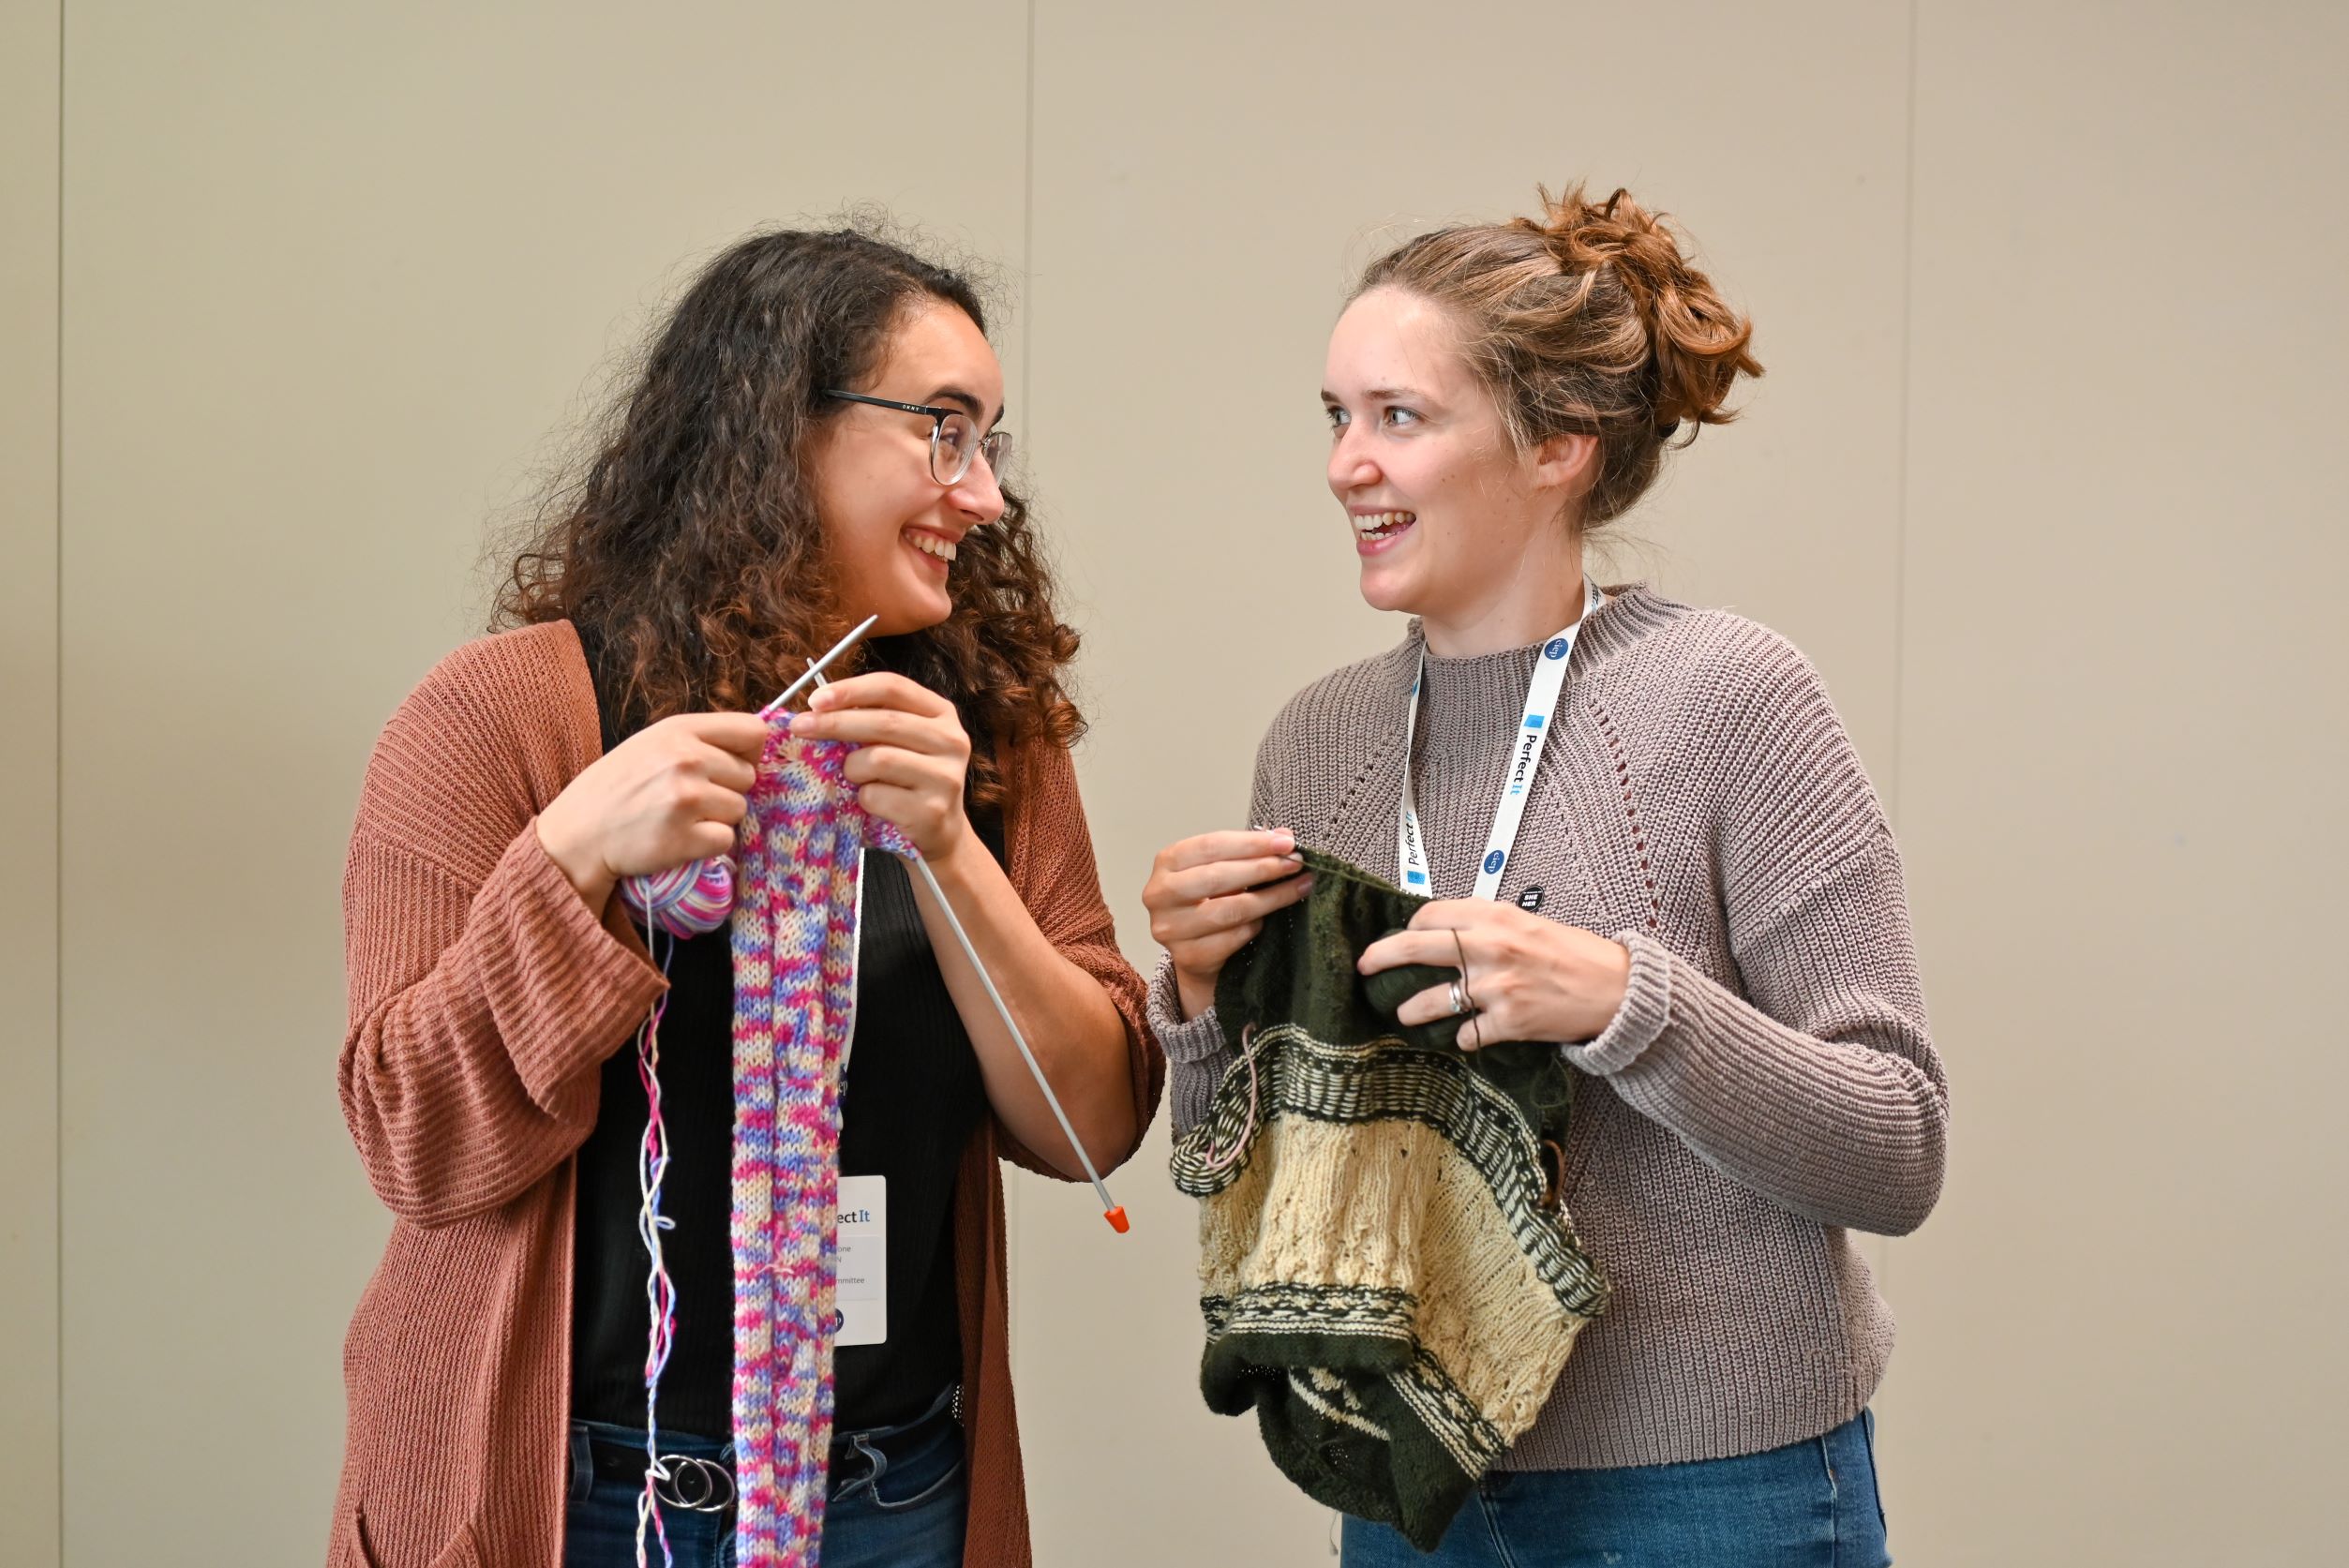
‘Less than two weeks until #CIEP2022! Who’s coming? Starting to feel very, very close indeed.’ On 29 August, CIEP chair Hugh Jackson (@JPS_Editing) informally kicked off conference proceedings with the first use of its Twitter hashtag. Others followed suit, posting before the event about matching fingernail varnish to business cards (@dinnydaethat), and how their knitting was looking (@AjEditorial) in preparation for a meeting of the CIEP’s Haber-dash-ers craft group.

The day before the conference, a fabulous time was wished to fellow editors (by @JillCucchi), and on Day 1 we got commentary on how journeys to Milton Keynes were going, whether that was on three trains (@GhughesEd) or a long, long car journey from Glasgow (@Jane_33South). On Day 2, one of the speakers, Professor Lynne Murphy (@lynneguist), announced she was on her way with: ‘Judging from the tweets, it looks like a very interesting conference so far!’ Conference director Beth Hamer (@BethHamer1) responded with ‘Looking forward to seeing you. We’re having a ball.’

During: ‘Viva hybrid conferences!’

There were two main strands of social media activity during the conference. One was by in-person delegates: LinkedIn commentary on proceedings and live tweeting. @ayesha_chari got a special mention by @The_CIEP social media central for her ‘exceptional live tweeting’, and she flawlessly relayed events until the very end of the conference and Ian McMillan’s plenary session, when she wrote: ‘Laughing too hard to live tweet or do anything else. (If this were in ink on paper, there’d be smudges from laughing tears.)’

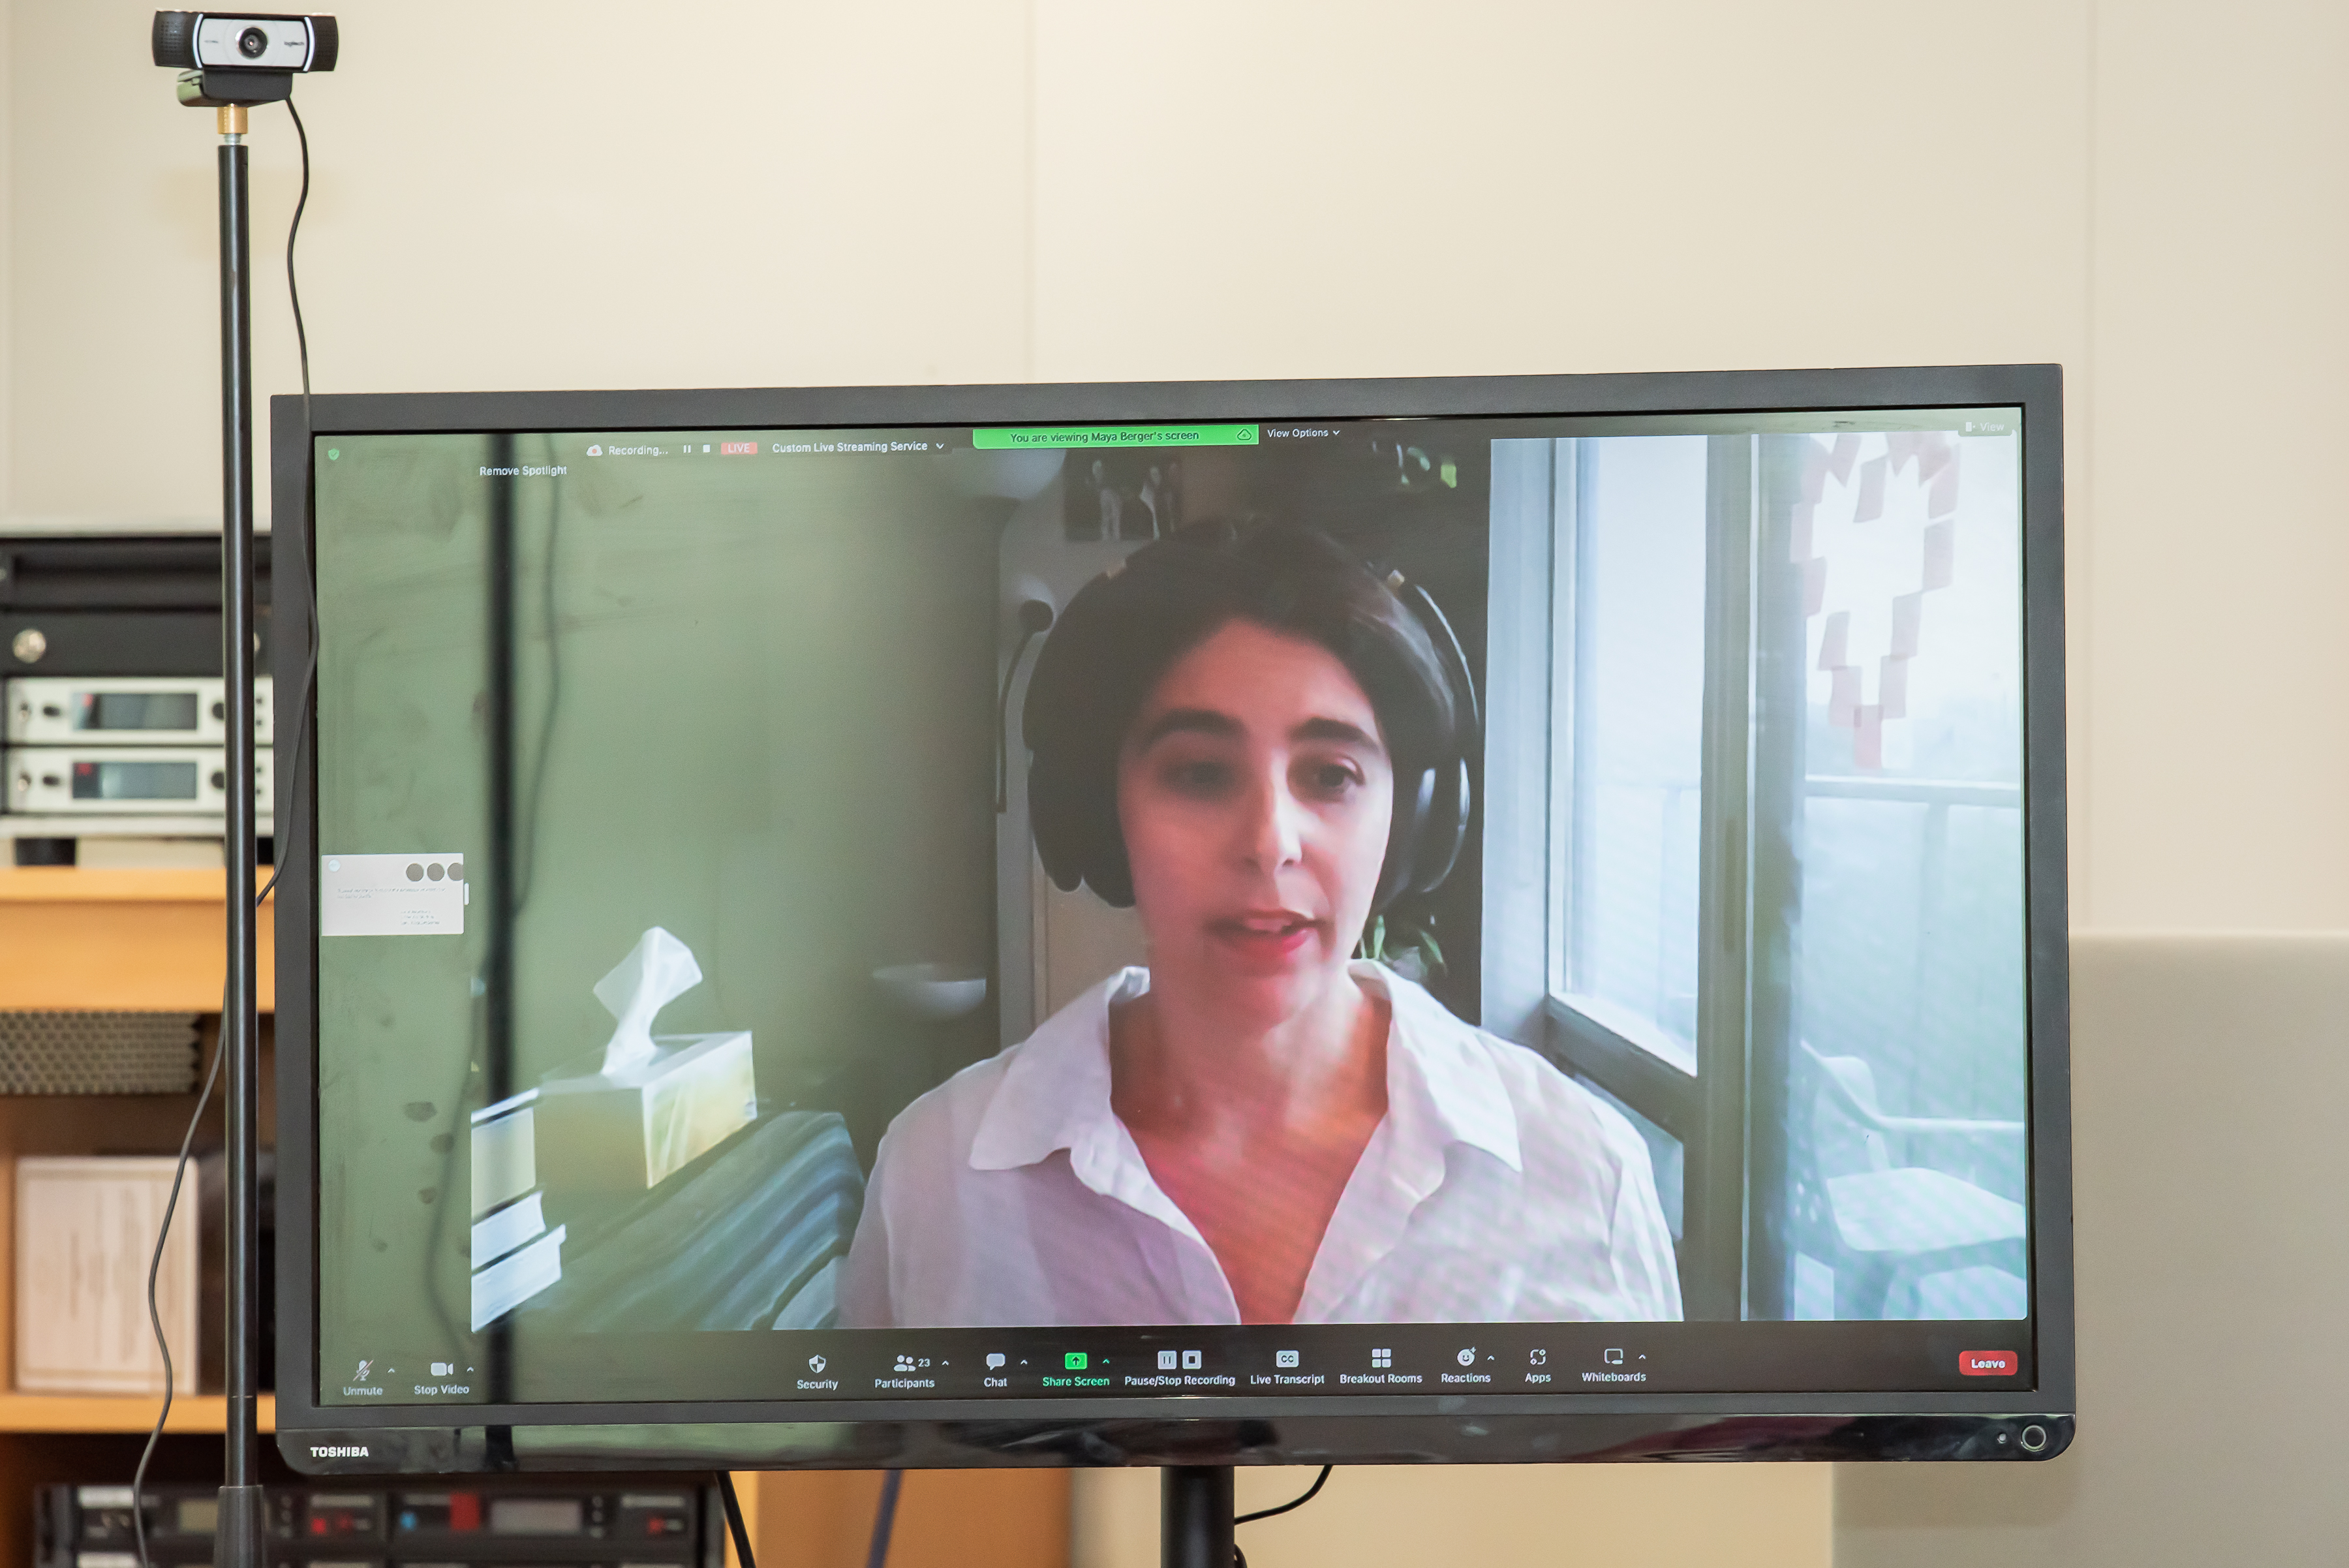
The other strand was from our online delegates. As in-person delegates wiped away tears of laughter in Milton Keynes, virtual delegate @akbea tweeted: ‘Sitting in my car outside a school in Wakefield listening to the wonderful @IMcMillan delivering the final talk of #ciep2022. Viva hybrid conferences!’ This parallel in-person/online experience enriched the conference for all the delegates, as questions and comments in sessions arrived through Zoom from remote attendees, and those at home got a taste of the live action through the video link-up. Some even took part remotely in the famous CIEP conference quiz on the Saturday night.

Social media gave us some insights into where and how people were consuming the conference. One delegate wrote on LinkedIn: ‘I’m thrilled I got to attend online so I could monitor my son’s Covid symptoms in-between sessions. Phew!’ @SaraKitaoji, in Australia, posted a picture of the tea she was drinking in order to stay awake: ‘The key to late night Zoom meetings: Japanese green tea. A cute cat cup helps, too. Enjoying more 3am–5am #networking sessions at #ciep2022.’

During these three days, because delegates were joining from everywhere in the globe, from the USA to India, from Germany to Thailand, it felt like a small world. As Hugh Jackson gave his closing address, @TrivediAalap, based in Canada, posted: ‘@The_CIEP transforms the definition of home. It is my home. Wherever, whenever.’ And just afterwards, @FreshLookEdit wrote: ‘So grateful the Spatial Chat was left open after the conference officially closed so the online peeps could linger a little longer. What an amazing weekend of fun, friendship, and learning. Thank you to all the organizers, volunteers, speakers, and delegates!’

After: Catching up and rounding up

After conferences, many attendees need time to review their time away and catch up on family time, sleep or relaxation. This year’s post-conference social media was heavy on tea, candles and TV. Some delegates were battling an earworm placed by Ian McMillan with his song about conferences, ‘Here come the lanyard people’.

The talk was also of catching up on sessions missed. A couple of weeks after the conference, @HelenSaltedit reported: ‘Just watched my first #CIEP2022 video (catching up with sessions I missed during @the_ciep conference).’ The videoed sessions kept giving, as did the learning points in them. On 18 October @TheClarityEditr wrote: ‘Inspired by Hester Higton’s #CIEP2022 session, I’ve FINALLY made some templates, updated SOPs and added space in my mega-spreadsheet to more systematically calculate project quotes.’

Two delegates wrote round-up blogs soon after the conference that transported us back to the whole experience. Even though her team came fourth in the quiz (down from first last year), Sue Littleford, who attended online, concluded her blog with an uplifting image: ‘The CIEP is the rising tide that lifts all editors’ boats, and at every conference I’m reminded of how proud I am to belong to it.’ Annie Deakins described her sixth CIEP/SfEP conference as ‘great company with fellow editorial colleagues, learning in the form of continuous professional development (CPD), and laughing … so much laughing!’ Sue and Annie also gave interesting reviews of some of the sessions, so be sure to catch their blogs.

The most lasting legacy from #CIEP2022? Even all the happy memories and invaluable lessons had a rival for the prize of what would stay with delegates longest. On 3 October, @ayesha_chari wrote on Twitter: ‘Omg! It’s back in my head! @The_CIEP conference goers, HELP replace the earworm please.’ What, this earworm: ‘Here come the lanyard people …’? Oops! Sorry.


About the CIEP

The Chartered Institute of Editing and Proofreading (CIEP) is a non-profit body promoting excellence in English language editing. We set and demonstrate editorial standards, and we are a community, training hub and support network for editorial professionals – the people who work to make text accurate, clear and fit for purpose.

Find out more about:


The editing workflow: Pre-editing tasks

In this blog post, three experienced editors explain what they do in between receiving a manuscript and properly getting stuck into editing the text. From running macros and styling headings, to checking references and making sure the brief is clear, tackling certain jobs before starting to edit the text can improve and speed up the whole editing process.

Hazel Bird

For me, the stage between receiving a manuscript and properly starting to copyedit the text is about two things: (1) ensuring I have a solid understanding of what the client needs me to do and (2) proactively identifying any problems within the manuscript so I can get started on fixing them straight away.

So, for step 1, I’ll do things like:

  • checking the manuscript matches what I was told to expect in terms of word count and components
  • checking I have all the necessary briefing materials and instructions from the client
  • checking I understand the context in which the project will be used (eg for an educational project, the level of qualification, the ability range of the students, where they will be geographically and any other resources they might use alongside this one)
  • reminding myself of the details of the agreed level of service and any special aspects of the work
  • getting in touch with whoever will be answering queries on the text (if they aren’t the client) to introduce myself and agree how the query process will be handled.

If there are any discrepancies, ambiguities or stumbling blocks, I’ll write back to the client straight away to open a discussion.

For step 2, I’ll start digging into the actual text but on a holistic, overarching basis. I have a load of macros that I run to clean up the formatting and highlight things I’ll need to check or fix later, during the in-depth edit. I’ll then style the text’s major headings so that they appear in the Navigation Pane in Word (I find this bird’s-eye view of the manuscript essential as it speeds me up and helps me to identify big-picture issues). At the same time, I’ll examine the structure and check it fits with any template or scheme I’ve been given by the client. Next I’ll run PerfectIt to fix some more style basics and begin to compile a style sheet with what I’ve found.

My final task within step 2 is to edit the references. A lot of my work is with clients whose authors don’t handle referencing every day, so I frequently find issues with reference completeness or even technical issues with the entire referencing system. Identifying such issues early on means there is time for everyone involved to discuss how to proceed in a relaxed manner, without time pressure. And, from an editing point of view, I find editing the main text goes so much more smoothly when I know the references are already spick and span.

The result of all of the above tasks is that once I get started on the main text, I should have minimised the number of surprises I’ll find and thus maximised the chance of the project being completed without hiccups and on time. I will also have fixed or flagged (to myself) as many routine, repetitive tasks as possible so that when I get into the actual line-by-line editing, I can devote the majority of my attention to flow, clarity, accuracy and whatever else the client wants me to refine – in other words, the parts of the editing where I can really add value.

Hester Higton

Exactly how I start work on a manuscript depends on the length: I’ll do things differently for a journal article and a lengthy book. But my rule for any project is to make sure that I’m batch-processing, so that I use my time as efficiently as possible.

If I’m working on an article for one of my regular journals, I’ll start by making sure that the file is saved using the correct template. Sometimes this will be one supplied by the client; if they don’t have a preferred one, I’ll use one of my own that eliminates all extraneous styles.

Then I’ll run FRedit. I have customised FRedit lists for all my repeat clients. These not only deal with the standard clean-up routines but also adapt the document to the preferred house style. I use different highlight colours to indicate aspects I want to check (such as unwanted changes in quotations) and I’ll run quickly through the document to pick these up. As I’m doing that, I’ll make sure that headings, displayed quotations and the like have the correct Word styles applied to them.

Next on my list is PerfectIt, which allows me to iron out remaining inconsistencies in the text. I use a Mac so I can’t customise my own style sheets, but the new Chicago style option has made my life a great deal easier!

After that, if the article uses author–date referencing I’ll cross-check citations and references, flagging missing entries in each direction. I’ll style the references list and either note missing information for the author or check it myself if I can do so quickly. If all the references are in notes, I will run a similar style check, editing the notes themselves at the same time.

Finally, I’ll look at the formatting of any tables and figure captions to make sure that they match the house style. I may well edit the captions at this point, but leave table content until I reach the relevant point in the text.

If I’m working on a book-length project that doesn’t have a fully defined style, I’ll start by running PerfectIt. That allows me to make decisions about spellings, capitalisation and hyphenation, all of which I note down on a word list which I’ll return to the client with the completed project. That’s followed by a more basic clean-up FRedit check. I’ll also format figure captions and tables throughout the book at this point. And if there’s a whole-book bibliography, I’ll check that and style it. But I’ll handle the notes separately for each chapter because it allows me to keep a sense of the subject matter in them when I’m working on the main text.

Katherine Kirk

The pre-editing stage is actually one of my favourite steps in the process, and I usually pair it with some great music to see me through. My whole pre-flight process takes about two to three hours, depending on the formatting and size of the document. I work mainly with novels from indie authors and small publishers, so I don’t have to worry too much about any references or missing figures and tables. Some publishers have their own template they want me to apply or some specific steps that they like me to take, but here’s what I do for most indie novels that come across my desk.

I start by reviewing our agreement and any extra notes the author has passed along, and I add them to the style sheet. I use a Word template for my style sheet that has all the options as dropdowns, and that saves loads of time.

The next thing I want to deal with is any bloat or formatting issues; these might affect how well the macros and PerfectIt run. I attach a Word template that has some basic styles for things like chapter titles, full-out first paragraphs, and scene breaks, as well as a font style for italics that shades the background a different colour (great for catching italic en rules!). Styling the chapter titles and scene breaks first makes it easy to find the first paragraphs, and check chapter numbering. Then I skim through for any other special things needing styling. I can set whatever is left (which should just be body text) in the correct style. The aesthetics of this template don’t really matter to the client; I use a typeface that is easy for me to read and makes errors like 1 vs l more obvious. I can revert all the typefaces to a basic Times New Roman at the end. I save this as ‘Working Copy – Styled’ just in case the next step goes horribly wrong …

Now that I’ve cleared up the clutter, I ‘Maggie’ the file (select all the text, then unselect the final pilcrow, and copy and paste it into a new document) to remove the extra unnecessary data Word has stored there. It can drastically reduce the file size and helps prevent Word weirdness like sudden jumps around the page or lines duplicating on the screen. If you’ve styled all the elements of the text properly beforehand, you shouldn’t lose any formatting, but be careful! That’s also why I do this as early as possible, rather than risk losing hours of work. I save this file as ‘Working Copy – Maggied’ so I can see if the file size has decreased, and if it’s all working smoothly, this becomes my working file.

I have a checklist of silent changes that I include in the style sheet. I usually start by doing some global replacements of things like two spaces to one, a hard return and tab to a paragraph break (^l^t to ^p), and two paragraph breaks to one (and repeat until all the extras are gone). Some authors like to make their Word documents look like the final book, and they might use extra paragraph breaks to start a chapter halfway down the page. This can cause problems later when the reader’s screen or printer’s paper size is different to what the author had, so it’s got to go!

I run analysis macros like ProperNounAlyse to catch misspelled character names, and I add them to the style sheet. I might also run HyphenAlyse and deal with any inconsistent hyphens in one big swoop. Then I run PerfectIt and work through it carefully, making note of decisions on my style sheet. I review any comments that might have been left in the text by the author, publisher or previous editors, mark them with a query if they still need to be dealt with, and remove the rest.

Finally, all systems are ready to go, and I launch into the main pass.


Resources

Sign up for the CIEP’s Efficient Editing course to learn more about how to approach an edit methodically and efficiently.

Check out the blog posts Making friends with macros and Two editors introduce their favourite macros to learn how to use macros before (or during) an edit.


About Hazel Bird

Hazel Bird runs a bespoke editorial service that sees the big-picture issues while pinpointing every little detail. She works with third sector and public sector organisations, publishers, businesses and non-fiction authors to deliver some of their most prestigious publications.

About Hester Higton

Hester Higton has been editing academic texts for publishers and authors since 2005. She’s also a tutor for the CIEP and currently its training director.

About Katherine Kirk

Katherine Kirk is a fiction editor who has lived all over the world, including China, South Korea, Ecuador, and Morocco, and she’s not done yet. She works on all types of fiction for adults, especially Science Fiction, Fantasy and Literary Fiction. She is a Professional Member of the CIEP.


About the CIEP

The Chartered Institute of Editing and Proofreading (CIEP) is a non-profit body promoting excellence in English language editing. We set and demonstrate editorial standards, and we are a community, training hub and support network for editorial professionals – the people who work to make text accurate, clear and fit for purpose.

Find out more about:


Photo credits: brick wall by Tim Mossholder, glasses on keyboard by Sly, coffee by Engin Akyurt, all on Pixabay.

Posted by Harriet Power, CIEP information commissioning editor.

The views expressed here do not necessarily reflect those of the CIEP

Top tips for non-Word working

Editors may be most familiar with Microsoft Word and Adobe Acrobat but clients are increasingly publishing content on other platforms, such as Google Docs and content management systems (CMS). Hannah Sapunor-Davis demystifies some of these newer ways of working.

First, a bit of context: I don’t work on books, and I don’t work with typical publishers. I primarily work with designers, non-profits, business owners and digital publishing agencies. I find myself more often in Adobe, Google Docs, various content management systems (CMS) and product information management (PIM) systems than in Word.

So I wanted to share some insight into how working on non-Word platforms might change up your regular editing routines. I won’t go into detail about how the functionality and tools differ. There are lots of tutorials online for that, and it really depends on what platform you’re using, what updates have happened, and, maybe most importantly, how your client uses the platform.

But most of all, I’m here to tell you that stepping outside of the Word bubble is nothing to fear.

Real-time collaboration

Real-time collaboration is great when you need to put two heads together on a project. This can be especially helpful when you need to test functionality with a client, or when you are giving feedback in a live call. For some non-publishers, documenting changes and versions is not as important as the finished product. I found the real-time feature helpful when walking a client through edits to a webpage. We were able to come up with some new text and make changes together.

On the flip side, it can get messy quickly. A clear communication system is necessary to mitigate confusion about who should be doing what and when. In a CMS, this might be in the form of changing a status field from ‘Editing in progress’ to ‘Editing complete’, for example. For other platforms, like Google Docs, this might be communicated through an email or Slack message to the client to signal I have finished my review.

Working in the cloud

The obvious upside of working in the cloud is that you can work from most locations and most devices, as long as you have a stable WiFi connection. In the past, this has meant that I did not have to schlep my computer along with me on a trip because I knew I had access to a computer and WiFi at my destination. Even better, working in the cloud means I avoid having to store a lot of big files locally on my computer.

The other side of that coin is that if WiFi is not working properly, it can cause a major problem in your schedule. Likewise, I’ve had several instances where the platform I was supposed to work on suddenly had unscheduled maintenance. The client has always been understanding when system disruptions like this happen, but that doesn’t necessarily help when it causes a domino effect on the timelines of other clients’ projects. And I have also had it written into project agreements that I cannot work on the material on unsecured networks, which is something to be mindful of (and also good practice in general).

Different checklists

Most editors are used to creating checklists and using them in various projects. But checklists for non-Word platforms may go beyond the stylistic choices we typically navigate. For example, when editing a CMS:

  • In which order should you check all the parts when it’s not in a typical top-down, left-right order layout?
  • Are there any functionalities that need to be tested, such as clicking to open fields or sliding a navigation bar to the side?
  • Do you need to add any steps, such as clicking ‘Save’ periodically if the platform doesn’t save automatically?

Having this order of operations clarified helps develop a rhythm for catching all the parts in design-heavy material. For example, for one retail client, I have to check marketing copy against internal product information and photos. There are a lot of different fields to review, and I have developed my own visual pathway to reviewing all the crucial spots. The order looks like this, starting with 1:


Communication with clients

Here are a few extra questions that I recommend asking your client before getting started on a project:

  • Do I have all the permissions to view and edit what I need for the job? Sending screenshots or looking at your screen together with the client might help. You might not realise that a field is hidden from your view.
  • Is it possible to test the functionality of the platform without making changes to the system? This could be in the form of a draft, test user account or what is sometimes called a ‘sandbox environment’.
  • How will I know when I should start editing, and how will I let others know that I am done with my review? Deciding on one means of communication is key here.
  • What exactly needs to be reviewed? There may be parts that don’t need to be reviewed, such as certain text fields or formatting.
  • How should you save your work? The platform might save automatically or you might need to save it manually when finished.
  • Do you need to document your changes? The client might not care about seeing your changes. Or maybe you need to export the copy when you’ve finished editing to have a record of your ‘version’.
  • How should you send feedback? There might be a field where you can add comments and queries, or maybe you send them separately in a message.

Ready to branch out?

I didn’t follow any formal training for specific platforms. The training that I took at the CIEP and PTC covered most of what I needed to know for working with common non-Word platforms, such as Adobe and WordPress. For the rest, I learned by doing. (That’s my preferred way to learn anyway.) Each time I began using a new-to-me platform, clients understood that there was a learning curve and that certain editing functions that editors are used to, such as making global changes, might not be possible.

It doesn’t hurt to get familiar with basic HTML (HyperText Markup Language) coding. This has come in handy when I’ve noticed funky formatting, such as a word in bold that shouldn’t be or a missing paragraph break. In such cases, I can go to the HTML view and change that. And that’s one less query for the client to deal with. Of course, you should only do that if you have the permission to do so. Some clients might not want you to touch the formatting in any case. The good news is that basic HTML formatting looks very similar to the editing markup that most people learn in editing courses.

But in my experience, the skills needed for this type of work have less to do with technical know-how and more to do with a few specific soft skills. Beyond your foundational editing training and experience, you will do well if you:

  • adapt to different systems easily
  • learn relatively quickly
  • communicate precisely.

Having worked in a variety of programs and platforms has enabled me to feel confident about approaching businesses, especially those unrelated to the publishing industry. After all, the saying goes: Everyone needs an editor. And I would like to add to that: But not everyone uses Word.

About Hannah Sapunor-Davis

Hannah is a freelance editor in Germany, originally from Northern California. She has degrees in History/Art History and Arts Management and now loves helping individuals and small businesses write clear communication for their passionate audiences. In her free time, she likes to sew, swim, listen to podcasts or tramp through the nearby forest with her dog, Frida.


About the CIEP

The Chartered Institute of Editing and Proofreading (CIEP) is a non-profit body promoting excellence in English language editing. We set and demonstrate editorial standards, and we are a community, training hub and support network for editorial professionals – the people who work to make text accurate, clear and fit for purpose.

Find out more about:


Photo credits: computer clocks by Gerd Altmann from Pixabay; bubbles by Willgard Krause from Pixabay.

Posted by Julia Sandford-Cooke, CIEP information commissioning editor.

The views expressed here do not necessarily reflect those of the CIEP

An interview with Paul Beverley: the man behind the macros

Paul Beverley is well known in the editing community as the ‘king of macros’. He has not only devised and developed such indispensable free tools as FRedit, but also provides training via Zoom, on YouTube and in person. Paul talked to the CIEP Information Team about his ‘total and utter obsession’ with macros, and his plans for the future.

How (and why) did you get started with macros?

I joined SfEP (as it was then) 17 years ago after editing and typesetting my own monthly computer magazine for 20 years. The magazine was dying and I was heavily in debt, so I had to find freelance editing work and needed to do that work fast.

For the previous 15 years, I had used a FRedit-like computer program with a Mac, so I got someone to write a version of it in Visual Basic for Word, and from there I set about learning to program my own macros. But I also had to learn to use Word, which I had never used before!

What are your favourite macros? (e.g. the ones you think are most helpful)

Number 1 has to be FRedit. You give it a list of words, phrases or punctuation that you want highlighting and/or changing globally, and FRedit does it in seconds. I simply wouldn’t bother editing without it.

Next it has to be analysis macros such as DocAlyse, ProperNounAlyse and HyphenAlyse, because I love spotting inconsistencies, even before I’ve read a word.

What’s motivated you to be so generous in putting together and sharing all your macros?

Putting together? See question 1 – a selfish desire to earn more quickly.

Sharing? Why not? What have I got to lose by letting others benefit?

Sharing for free? Easy! If I sold them I’d need to employ a team of technical support personnel (there are well over 1,100 macros to support). As it is, people are really grateful when I help them and, if I’m honest, I like it when people say they appreciate me.

Do you have any tips for overcoming a fear of using/reluctance to use macros?

It can all sound rather daunting but if you can get going with just two or three macros, or maybe half a dozen, you’ll save yourself time and that will motivate you to pick up a few more.

That’s the approach in our self-learning offering: ‘Macros from Square One’ (Mac or PC), where you learn how to install a macro into Visual Basic and then you use it, and then you load another one and so on.

Or another low-tech approach is that you can put a special Word file into a folder on your computer, and suddenly, without ever seeing the inside of a computer program, you will have a dozen or more macros ready to use. This is called ‘Macros Free Trial’.

Also, there’s Jennifer Yankopolus’s ‘Macro of the month’, with hints and tips as well as a suggested macro to try each month.

But to really get yourself launched there’s a paid six-session training course run by Jennifer Yankopolus for the EFA: ‘Macros A to Z’. It gets booked up quickly but if you sign up for ‘Macro of the month’ you’ll get the dates of the next course.

What question are you asked most often about macros (and what is the answer)?

Apart from ‘How do I get started?’ (see above), there’s ‘Are macros safe?’ If you are worried about viruses, there’s no need. In Word’s File–Options–Trust Center Settings, keep your setting as ‘Disable all macros without notification’.

If people are worried about messing up a document by using macros, then, yes, this can happen, but only if you misuse a given macro. Any tool needs to be used with care, so follow the instructions and don’t take on something too complicated too soon.

What is the most unusual/interesting request for a macro you’ve had?

Maybe checking, for a PR agency, the length of tweets – 140 characters max (they can be longer now).

Or, in a book about the card game bridge, changing all the special symbols (icons for clubs, diamonds, hearts and spades); the client wanted text: cx, dx, hx, sx.

In another example, someone had to check the totals at the bottoms of columns of figures in a document, and they didn’t fancy typing all the figures into a calculator. One click for each, and the macro checked the addition instantaneously.

Is there any request/need you’ve not been able to make a macro for?

Yes, occasionally, but it’s usually because the request would take too much of my limited available development time for what is perhaps a rather niche application.

The problem is more often the other way around. People want a specific macro, and within the 1,000 macros there is probably one already, but how do you find it? To help, we’ve provided an electronically searchable ‘Macro Menu’.

Have you ever tried to create macros in Google Docs? Would you?

My answers are ‘no’ and ‘no’, in that order. Again, it’s not a matter of pride or principle, just that I’ve got my work cut out trying to support the existing macros and develop new ones that people ask for.

Paul demonstrating his macros at the 2022 CIEP conference

You train people to use your macros. Where in the world has this taken you?

Physically, only to Spain and Canada, but the Spanish editors are so keen on using macros that they have translated some of the macros and some of the documentation for Spain and Central and South America.

When the pandemic hit, I discovered Zoom and so I have been able to train people all over the world. At one stage, I taught people in eight different countries inside five days. And I know of 56 different countries where my macros are being used – and not all for editing in English; there are specific macros on my website for editing in Dutch, German and Spanish, none of which I speak!

And (as a rough estimate) how many people do you think you’ve trained?

I’ve no way of knowing, actually. My YouTube channel has over 1,300 subscribers, if that’s any indication.

You’re now approaching retirement. Will you continue to create and explain macros?

As long as I can, I’ll keep creating macros – it’s a total and utter obsession. But training is not really my forte because I tend to bombard people with all the exciting and time-saving things they could do with macros. Not helpful!

When I’m gone, my macros will still be available, but I became concerned, a few years ago, that all the programming techniques I use to create new macros are locked in my brain. I managed to document many of them in my book’s Appendix 13 – ‘Word Macro Techniques’, and demonstrated some in YouTube videos.

However, in the past few years Word has become even more ‘feature-bloated’ and therefore VBA [Visual Basic for Applications, the programming language used for Word macros], has got slower. I have had to work out tricks to regain the lost speed of some of the more complex macros. These techniques are largely undocumented.

I get a kick from creating new macros but documenting the techniques is a real slog. So if anyone could offer help or inspiration on the documentation front, that would be much appreciated. It would be a shame to lose those tricks when I’m gone. Thanks.

How else will you spend your retirement?

I am now more or less retired from paid editing, but my lovely wife Sue has just been diagnosed with Alzheimer’s, so I’m guessing that I’ll have less and less time for macros (and documentation) as the years roll by, and we’re also involved in an Alzheimer’s drugs trial.

Also, please be warned that I’m planning to do another sponsored Land’s End to John O’Groats bike ride, but this time for the Alzheimer’s Society. It will have to be a local ride as I don’t like leaving Sue for too long. I can do the required 1,000 miles plus 38,000 feet of climb by cycling 200 times around Taverham, where I live outside Norwich – it’s actually quite hilly here.

I hope you’ll support me – you might say it’s 1,000 miles for 1,000 macros. Thank you, in advance.

Find Paul’s macro resources


About Paul Beverley

Starting in 2005, Paul Beverley’s freelance editing + SfEP + macros got him out of a massive financial hole. Now fully pensioned, he is very fortunate to be able to give the macros back to CIEP and the wider editing world. It’s great fun!


About the CIEP

The Chartered Institute of Editing and Proofreading (CIEP) is a non-profit body promoting excellence in English language editing. We set and demonstrate editorial standards, and we are a community, training hub and support network for editorial professionals – the people who work to make text accurate, clear and fit for purpose.

Find out more about:


Photo credit: Bicycle by Deniz Anttila from Pixabay

Posted by Julia Sandford-Cooke, CIEP information commissioning editor.

The views expressed here do not necessarily reflect those of the CIEP

Being open to editing in Google Docs

Are you considering taking on an editing project in Google Docs? Hetty Marx describes her experience of development editing in Google Docs and explains why, despite her initial doubts, it has opened up welcome opportunities.

Agreeing to edit in Google Docs

The first time I was offered a project that involved editing in Google Docs, my gut reaction was a clear ‘no’. I’d had a very busy few months, with a long and complex project, plus I’d been home-schooling my children through the first Covid lockdown. The idea of having to learn how to edit in a different program (one I’d not heard good things about) seemed too much.

But I was really intrigued by the project and was keen on the idea of working with this new client. I wondered if it would seem manageable once I was under less time pressure. The client agreed a later deadline, and a few weeks later I got started.

And … it really wasn’t that bad. Google Docs feels familiar to someone used to working in Word, so it was possible to get started editing and pick things up as I went along. There were some irritations but overall it wasn’t as dreadful as I’d feared. And the client and project were even better than I’d hoped. I continued working with them and edited around another 25 documents in Google Docs over the following two years. I’m now a third of the way through editing a 20-chapter, 400,000+-word textbook for the same client, again in Google Docs.

I still prefer editing in Word, but being open to editing in Google Docs has given me the opportunity to work with some wonderful authors and edit what have turned out to be some of my favourite projects to work on.

In this blog post, I’ll cover a few of the techniques that have helped me adapt to editing in Google Docs. Note that as I am a development editor, my edits involve a heavy use of comments, plus amending sentences using tracked changes/suggesting mode; copyeditors may face different challenges when editing in Google Docs.

1. Use Word alongside Google Docs

Consider using Word alongside Google Docs during your edit, to make use of the various features and functionality that are not available in Google Docs. I download the file as a Word document and keep it open on my second screen.

I find this invaluable for things like ‘Find’ (there are more extensive searching options), using macros (for analysing or finding things, rather than making changes), viewing changes and comments (I think some of the options in Word provide a clearer view) and checking word counts of a particular section.

2. Agree a workflow with authors

The biggest worry about editing in Google Docs for many editors is that the author can make changes while you are editing. There are solutions within Google Docs for this, like restricting others from editing the file during your edit (using the ‘Sharing’ options) but an upfront discussion about the workflow may be more appropriate.

Agree with the authors which of you will be working on the document at each point and make sure there are clear handovers. With Word, this is clear-cut as you need to send the file to the next person; in Google Docs you could tag someone in the document or email them so they know the file is ready.

Be open to a different workflow. Could the author finish the conclusion or work on a standalone aspect (like exercises) while you start editing the chapter? I’ve found this doesn’t cause any issues and it’s helped to keep to the schedule. But I also agree that other revisions during my edit would make the editing process significantly more complicated and less effective, so clear communication about what will work – and what won’t – is important.

3. Understand who can see your comments and edits and when

Some editors don’t like the feeling of having their editing watched in real time. While that doesn’t worry me, I do miss the chance for a final check-through of my comments before sending them to the author.

There are a few things to remember when commenting in Google Docs:

  • Once you click ‘Comment’, that comment is visible to anyone who has access to the document.
  • If a user has email notifications set up, they will receive the comment and may see it even if you delete it later.
  • If you or your client ‘Resolve’ comments (rather than delete them), they disappear from view but are still available and might be read by anyone who currently has access (or who is later given access) to the document.

In Google Docs, I only post comments that are ready for the authors to see. This means I need to spend a little longer during the edit to make sure my comments are clearly phrased and free of typos (a process I’d usually do at the end of an edit). But I still recommend that the authors wait until I’ve completed my edit before reading the comments, as I will sometimes amend or delete comments based on what I read later in the chapter.

4. Allow for more time

I find editing in Google Docs takes longer than editing in Word. I don’t have all my usual shortcuts, I spend time flipping between the Google Doc and Word document, some of the navigation is more clunky, etc. It doesn’t necessarily add a lot of time, but it certainly adds some (and it may be more for a copyeditor who uses more macros or programs like PerfectIt).

Wrapping up: Why I’m open to editing in Google Docs

I would still choose Word over Google Docs for development editing. But I’m glad I took on that first project. Being open to editing in Google Docs has led to two years of a steady stream of interesting work from a delightful client.

About Hetty Marx

Hetty Marx is a textbook development editor. She has nearly 20 years of publishing experience, including in-house as a commissioning editor at Cambridge University Press and as a development editor at Pearson. She is an Advanced Professional Member of the CIEP and author of the forthcoming CIEP guide Editing Textbooks.


About the CIEP

The Chartered Institute of Editing and Proofreading (CIEP) is a non-profit body promoting excellence in English language editing. We set and demonstrate editorial standards, and we are a community, training hub and support network for editorial professionals – the people who work to make text accurate, clear and fit for purpose.

Find out more about:


Photo credits: Lights by Enrique from Pixabay; desk by Olena Sergienko on Unsplash.

Posted by Julia Sandford-Cooke, CIEP information commissioning editor.

The views expressed here do not necessarily reflect those of the CIEP

Two editors introduce their favourite macros

Back in May 2022, Ben Dare wrote a handy beginner’s guide to macros that explains how to start using them. In this follow-up post, Ben introduces some of the macros he finds the most helpful when editing text. Fiction editor Katherine Kirk also talks about some of her favourite macros, and how she’s improved her efficiency by mapping macros to her gaming mouse.

Photo of water droplets on a leaf as a background image to the blog post title and authors: Two editors introduce their favourite macros by Ben Dare and Katherine Kirk

Ben Dare

When I begin with a Word document, I like to analyse it for style and consistency issues. Handily, there are macros to look for all sorts of things, without altering my document at all: spellings of names (ProperNounAlyse); hyphenation of words (HyphenAlyse); consistency of a whole selection of style choices (DocAlyse). Each gives a report in a separate Word document, helping me to understand where possible issues are and highlighting hard-to-spot errors.

But running each of those (and others) is a bit of a faff. So my first favourite macro is MegAlyse (yes, in my head it sounds like Megatron). This macro allows me to list the macros I’d like to analyse the document with and then runs them in an organised way (as long as I’ve installed them!), and it saves the results.

At this point I’ve got an idea of systematic things that I want to change or check individually, and I want to make those changes quickly and highlight things I know I’ll want to check. To do that, the second macro I use is FRedit. This macro has many abilities (there’s a manual!), but at its most basic it runs a list of global find and replace searches that I list in a separate document. It’s easy to experiment with – you can start with a small list and get to know this macro at your own pace – but it is important to know already what you can do with find and replace, including wildcards (and there’s a recent CIEP blog on that here).

Here’s a screenshot of a basic FRedit list, each line showing a find and replace with a vertical bar | separating them:

Screenshot showing the following five pieces of text each separated by a short vertical line: EM dash and EN dash; Navratilova with and without accents; amongst and among (highlighted yellow); Parliamentarians and ^& (highlighted green); ~[A-Za-z0-9]^13 and ^& (highlighted blue).

So with FRedit, in one go I can:

  1. Change all em dashes to spaced en dashes.
  2. Make a name always have the accents it needs.
  3. Change all ‘amongst’ to ‘among’ (the ¬ means it will do upper or lower case); it will also apply yellow highlighting, which is my note to self: ‘I’ve changed this but check it’ – I noticed some ‘amongst’ were in quotations and will need changing back.
  4. Retain ‘Parliamentarians’ (the ^& means replace with what you found, i.e. no change) but highlight in green, which tells me: ‘Not changed but needs checking for client’ – here the client wants lower case, but there were lots beginning sentences, so I’ve just marked them to check.
  5. Find any paragraph that ends in a letter or number, not punctuation (the ~ tells FRedit it’s a wildcard find to search for that range of characters in square brackets). It also adds blue highlight, which is my note to self: ‘Generic issue to check’.

This mixture of changes and highlighting makes things to do or check helpfully visible, but the highlighting does need to be removed. Cue the macro: HighlightMinus. Have the cursor on the appropriate line, or select some text, and the macro removes the highlighting. (Bonus mention: HighlightPlus is great for adding highlighting, to flag something for the client or that you want to come back to.)

Working through a text, some edits take a few mouse clicks/keyboard strokes to do. There are macros to do these tasks more quickly, saving seconds each time, adding up to many minutes over a project. An example is SwapWords: if the document has ‘it badly fell’ and I want ‘it fell badly’, I place the cursor in the first of the words to be swapped, run the macro, and it swaps the two words. It saves the time of manually moving or retyping text, and prevents those little slips of human error. (Bonus mention: SwapCharacters does the same for adjacent characters, handy for swapping quote marks with full stops and commas.)

I’m always reminded there’s stuff I don’t know. GoogleFetch takes the word by the cursor, or a selected phrase, and switches to a browser and searches Google (other providers are available!). It’s quick, easy and less clicking. (Bonus mention: DictionaryFetch does the same but searches an online dictionary.)

The above macros are written by Paul Beverley and are freely available to all. But many useful macros can’t be downloaded – I record them, or alter a pre-existing one, to suit my particular needs. Recording is great for repetitive, simple jobs. Altering doesn’t have to be scary: find a macro that does nearly what you want, tweak it and see what happens (on a spare doc!). For example, a client wanted me to follow the ‘Guardian and Observer style guide’ – so I changed GoogleFetch to open the appropriate Guardian style page for a word instead. It took a bit of learning, but it saved oodles of time in the end. You can even share your attempts and ask for advice on the CIEP macro forum. (Bonus mention: DictionaryFetchByLanguage came from such a process.)

Photo of a water droplet creating ripples on a lake

Katherine Kirk

Like Ben, I use a combination of analysis macros and look-up macros, like MerriamFetch, which searches the term I’m pointing at in the Merriam-Webster online dictionary. But my absolute favourites are the ones that cut down on key combinations that I use all the time. If I can reduce a repetitive set of button pushes to a single click, then it adds up to hours of time saved, and it also reduces repetitive strain on my fingers. Even better, it frees up convenient key combinations for less frequently used macros!

The best thing I did for my efficiency this year was to get a gaming mouse. I use a Logitech G502, and as well as the scroll wheel and left and right-click buttons, it has five extra programmable buttons. I can also push the scroll wheel right or left to trigger more macros. This means I can have seven macros right there without moving my hand to my keyboard. Other editors swear by the Wacom tablet, which gives you much more functionality, but I personally love the satisfying click of the mouse buttons. Also, doing it this way eased the learning curve, which made it much less intimidating. And don’t tell my boss,* but outside of work, I use the mouse for playing games too!

I decided to set the programmable mouse buttons up to improve my workflow. I thought about the routine button pushes I use in every job and settled on the ones that I use most often. These are the macros that have made it onto the mouse:

  • StartSession does a simple search for ‘[]’ in the text, which is a kind of shorthand bookmark I’ve been using since my early days. I find Word’s built-in ‘pick up where you left off’ is a little deficient. I also use this when I need to pause my line-by-line editing to jump around for a global consistency check, so I can find my way back and carry on. I used Word’s macro recording tools to create the Start and End Session macros.
  • VisibleTrackOff4 toggles Track Changes on and off, and it changes the background to yellow when it’s off so I don’t make accidentally untracked changes.
  • GoogleFetch makes fact-checking quicker, since it saves me having to tab over to my browser.
  • MerriamUnabridgedFetch lets me stay on top of hyphenation, capitalisation and spelling much more easily. I mostly work with US texts.
  • Sliding my scroll wheel to the left finds the next instance of something I just searched for in the text. I matched it to the built-in shortcut in Word, Shift+F4, so I didn’t have to create a macro for it.
  • Sliding my scroll wheel to the right scrolls down five lines and moves the cursor back up four, which keeps the text I’m working on comfortably in the middle of the screen. I don’t remember who gave me the macro for that, possibly on the CIEP forums, but they called it TestScroll.
  • Finally, EndSession types my handy little ‘[]’ bookmark and saves the document, ready for the next work sprint.

Here’s how that all looks mapped to the mouse buttons. The labels with an M are macros I’ve assigned.

Diagram of a gaming mouse showing macros mapped to mouse buttons or the scroll wheel Diagram of the side of a gaming mouse showing macros mapped to mouse buttons

Besides the ones mapped to my mouse, the macros I use the most often are the ones that trim down the button pushes needed to make common changes. I work with fiction, so for me, that’s mostly things like changing ‘Yes.She said to ‘Yes, she said. I use Paul Beverley’s CommaInDialogue macro to change that full stop and capital letter into a comma and lowercase letter with a single key combination (CTRL+ALT+,).

As I explore more macros, I want to spend a little more time practising with Paul’s ‘speed editing’ macros. Minimising the time spent on repetitive little tasks means I work faster, and that makes my hourly rate go up without it costing my clients more and without sacrificing accuracy. But really, what I love most about using efficiency-boosting macros like these is that they make me feel like I’m the captain of my own spaceship. The control panel is only as complicated as I want it to be, and I can always add new magic buttons as I discover the need for them.


*I’m a freelancer. The boss is me.

About Ben Dare

Ben Dare is a Professional Member of the CIEP and copyedits/proofreads for projects on sustainable food systems and sustainable living (and almost anything else when asked nicely). Otherwise, he’s probably playing with Lego or Gravitrax, cooking, running, swimming or (regrettably) doing chores.

About Katherine Kirk

Katherine Kirk is a fiction editor who has lived all over the world, including China, South Korea, Ecuador, and Morocco, and she’s not done yet. She works on all types of fiction for adults, especially Science Fiction, Fantasy and Literary Fiction. She is a Professional Member of the CIEP.


About the CIEP

The Chartered Institute of Editing and Proofreading (CIEP) is a non-profit body promoting excellence in English language editing. We set and demonstrate editorial standards, and we are a community, training hub and support network for editorial professionals – the people who work to make text accurate, clear and fit for purpose.

Find out more about:


Photo credits: purple leaf and water droplet both by Pixabay on Pexels.

Posted by Harriet Power, CIEP information commissioning editor.

The views expressed here do not necessarily reflect those of the CIEP

Making time for marketing and CPD

One of those age-old questions for freelance editors and proofreaders is how to find time for marketing and continuing professional development (CPD) when other work keeps getting in the way. In this post, Philippa Lewis brings together some approaches that have helped her and other CIEP members.

When I started freelancing, I had no idea how much extra work would be involved on top of actual editing work. Words are my love and joy, and I’m more than happy to spend hours deliberating over every tiny aspect of punctuation, but I found myself completely unprepared for how much time marketing and CPD would take up.

Marketing in particular has been a challenge for me; I find the thought of promoting myself very uncomfortable, and marketing takes up time which I could be spending editing. And I would much, much rather be editing. It’s easy to convince myself that marketing is a waste of time when I could be spending that time completing paid work instead, so most of my attempts at marketing have been squeezed in out of slight desperation when I haven’t had any work booked in.

At the recent CIEP conference, Kia Thomas did an excellent talk about marketing. I really appreciated how matter-of-fact she was about it: as a freelancer, you have no choice but to market your business, so you might as well get on with it. Whether or not you enjoy doing marketing isn’t really relevant, because you still have to do it.

This was a bit of a wake-up call for me, and since then I’ve tried to come up with a system for regularly building marketing and CPD into my working week.

Find what works for you

Editors often talk about setting aside one morning or day a week for CPD and marketing. Having a specific slot for these tasks sounds like an excellent approach, but I always find that when I reach the time I’ve set aside, my latest editing deadline inevitably feels like a higher priority.

I’ve finally realised that a more flexible approach works better for me. I start my week by identifying the CPD and marketing tasks that I want to accomplish. These get written on a post-it and stuck onto my computer monitor; keeping them visible means I can’t forget to do them. I try to identify a mix of quick jobs (like sending a CV to a publisher) and longer ones (like drafting a blog post) for each week. I try to break tasks into smaller units where needed: ‘check pricing page on website’ feels more manageable than ‘re-do website’.

These tasks then got slotted in throughout the week. I find it useful to do them whenever I need a break from editing – often at the end of a work day, or before lunch. I might not have the mental capacity to edit another paragraph, but I can still manage to do a marketing task or read a blog post. Cycling through tasks like this means I’m more productive, as I’m ticking something off my list despite not feeling up to completing work for a client.

At the moment, this approach is working really well and allowing me to consistently complete CPD and marketing goals. But it’s freeing to remember that this might not be a strategy that works for me long term – I’ve found it really helpful to keep an open mind rather than trying to stick to a set routine that doesn’t feel like it’s working any more. We all work in different ways; don’t be afraid to try different approaches until you find a method that works for you.

Prioritise

Marketing and CPD both sometimes feel overwhelming: the list of things I could be doing can feel endless, and when the list is so long, sometimes it’s difficult to get started on working through it.

I’ve now got a list of CPD and marketing tasks that I want to complete, with the more pressing ones near the top, and I use this list to help me identify my tasks for each week.

CIEP member Eleanor Bolton has found it helpful to think about her long-term goals, then select CPD options that relate to this. She says ‘I had quite a long list of courses that all sounded interesting and potentially useful, but there was no way I could fit them all in. Over the summer I spent some time thinking about who my preferred clients were and ended up niching quite considerably. As a result, quite a few of those courses were no longer relevant.’

Be flexible

I’m currently doing a developmental editing course, and it wouldn’t be possible to complete the assignments for this in short bursts of time, or at the end of a day when I’m already tired. Likewise, if I’ve got a complex edit booked in, sometimes setting aside a chunk of time for CPD and marketing is more effective than trying to slot in extra tasks each day. On a different week with a different workload, a different approach might work better. It’s important to stay flexible, and to work with whatever your current circumstances are.

Anything is better than nothing

I’m aware that I could improve my editing speed if I improved my knowledge of using Word. I don’t have time to do a full course on it at the moment, so instead I’ve bought a book on the subject and I’m taking ten minutes every couple of days to work through a few pages. I’m not learning as much (or as quickly) as I would on a course, but I’m still learning something. Each tip I pick up is improving my editing speed.

Maybe you don’t have time to do a course at the moment, but could you listen to a podcast while doing the washing up or when you’re in the car? Again, this comes down to taking a step back and being willing to be flexible: what would be achievable with how your working week looks right now?

I regularly have to remind myself that anything is better than nothing. It’s really easy to get caught up in thinking all your marketing materials have to be perfect, which can lead to never finishing anything – but an imperfect website will reach more clients than a non-existent one.

Get something finished and sent off or published, even if you’re not completely happy with it: send a CV out to publishers even if you’re still completing a training course that you wanted to add to it; publish that blog post even though you’re not completely happy with one paragraph in it.

Reflect

And finally, set a moment aside to think about whether your current approach is working for you.

CIEP member Anna Baildon finds monthly reflections helpful to keep her CPD and marketing on track: ‘Each month I think about what’s gone well, what’s been more challenging and what I’ve learned. A brief look through my diary and my Trello board is usually enough to prompt my thoughts and form some analysis. It’s surprising how much insight this simple task provides. It’s like having a monthly meeting with my boss to bring clarity and focus to my work.’

There’s no ‘right’ way to tackle CPD and marketing; it’s just about finding an approach that works for you, sticking to it when you’re able to, and taking small but consistent steps forward.

About Philippa LewisHeadshot of Philippa Lewis

Philippa Lewis is a freelance developmental editor, copyeditor and proofreader. She works on a mix of speculative fiction and outdoors literature, and lives in North Wales.


About the CIEP

The Chartered Institute of Editing and Proofreading (CIEP) is a non-profit body promoting excellence in English language editing. We set and demonstrate editorial standards, and we are a community, training hub and support network for editorial professionals – the people who work to make text accurate, clear and fit for purpose.

Find out more about:


Photo credits: unfocused lights and coffee both by Pixabay on Pexels.

Posted by Harriet Power, CIEP information commissioning editor.

The views expressed here do not necessarily reflect those of the CIEP

A week in the life of a puzzle editor

Sudokus, crosswords, wordsearches … they all need editing. In this post, Vanessa Souris describes a typical week in her work as a puzzle editor.

I work part-time for Puzzler. I am the editor of six puzzle magazines, proofread three of my colleagues’ titles, and am also currently working on a one-off British-themed puzzle magazine that will be released next year.

My background as a puzzle editor

Although I am British, I went to university in Australia and lived there for six years, followed by 13 years in Abu Dhabi in the UAE. Moving back to England in 2020 was a real culture shock for me and my children, who were both born in the Middle East.

I used to teach English as a second language to university level, but never really went back to it after my children were born as the hours just didn’t work for me and my young family. I fell into editing when a former teaching colleague asked if I would be interested in copyediting textbooks, as the publishing company he worked for required editors with Middle Eastern teaching experience. I completed training with the CIEP, and have worked part-time as an ELT copyeditor, proofreader and assessment item writer ever since.

I applied for the role with Puzzler last year, and when they found out I had lived in Australia, I was recruited to edit primarily Australian titles.

The database

The majority of the puzzles I work on are generated on a special program and then edited individually. We produce crosswords, arrowords, code words, kriss krosses, wordsearches, logic puzzles, sudokus – you name it, we edit it!

We have a huge database made up of tens of thousands of clues, but the computer doesn’t always select the best one for the job. We have different readerships for different magazines, and we have to take them into consideration when editing puzzles. For example, one magazine might be very celebrity-focused, whereas another might take itself a bit more seriously.

A lot of the editing work I do is on the database itself, where we can tag clues as being suitable for British audiences, Australian or both. Because I work on Australian titles, I have to remove clues that Australian readers won’t recognise and add Australian clues and cultural references. Some recent examples have been removing PLIMSOLL (the shoe) from the Australian database as this word is simply not used in Australia, and adding DROP BEAR as an Australian clue (that carnivorous native animal that preys on unsuspecting tourists).

The database is a constant work in progress, and we are always trying to make sure the content is relevant and interesting. It has been compiled over the last 40 years, so some of the clues and words can be outdated or occasionally considered offensive today, and I am part of the Diversity and Inclusion team that identifies and amends clues on an ongoing basis.

A crossword being filled in

The puzzles

Throughout, I have to consider what makes a good puzzle. For example, the computer may generate a crossword which contains seven words ending in -ed or -ing, so I will change most of the words in the software to add variation. We also have to be aware of rude words that may be inadvertently spelt out; for example, if I input REDRUTH in a list of words for a wordsearch about Cornwall, the program will alert me that the word TURD will show up in the grid!

I really enjoy setting the starter letters on a code word puzzle. After I have edited the words on the grid itself, I have to play around to find the best combination of letters that will provide a route for the reader to solve the puzzle. It’s a tricky balance to give enough clues to make it solvable, but not so that it gives away all of the remaining words without a challenge. And the readers will write in and let me know if I get that balance wrong!

After I have compiled an issue, I edit our magazine template including the editorial page and competition details in InDesign, and the puzzle files are sent off to the designers. They return a flatplan of the magazine, where I proofread any text, then go through and make sure the grids, clues and solutions all match up, and that there are no anomalies in the design. I also proofread three other titles for my colleagues in this way.

An ideal job for a word nerd

I really enjoy the work with Puzzler. It’s varied, fun and interesting, and I am part of a super-supportive team. Earlier this year it also led to a really enjoyable side project, where I edited a 10,000-question pub quiz book (you know who to call if you’re ever looking for a quiz teammate!).

I think my ELT experience comes in really useful, as a lot of language teaching is about guiding people towards working things out for themselves. And of course, a basic love of and interest in words and language runs through all of ELT, editing and puzzles.

About Vanessa Souris

Vanessa is a copyeditor and proofreader who spends half her week editing for Puzzler magazines, and the other half editing and writing ELT materials. She has recently moved back to the UK after 20 years living in Australia and the UAE, and specialises in editing teaching materials for Middle Eastern markets. She is an Intermediate Member of the CIEP and can be found on LinkedIn.


About the CIEP

The Chartered Institute of Editing and Proofreading (CIEP) is a non-profit body promoting excellence in English language editing. We set and demonstrate editorial standards, and we are a community, training hub and support network for editorial professionals – the people who work to make text accurate, clear and fit for purpose.

Find out more about:


Photo credits: sudoku by blende12, crossword by stevepb, both from Pixabay.

Posted by Harriet Power, CIEP information commissioning editor.

The views expressed here do not necessarily reflect those of the CIEP

Talking tech: Web editors – WYSIWYG or code?

In this Talking tech column, Andy Coulson discusses two types of web editing tools – WYSIWYG and code-based – designed for editing HTML (HyperText Markup Language) content on websites.

The October 2022 issue of member newsletter The Edit is about web editing, so I’m going to look at two types of web editing tools that are well suited to editing content on sites where the content is mainly in HTML (HyperText Markup Language). The content of a webpage is generally held as an HTML file. This is an unformatted (plain text) file that contains the text content and tags describing the function of the text (heading, paragraph, etc), which can then be used to format the text or potentially manipulate it. The tags appear in angle brackets, eg <H1>title</H1>.

However, the web has changed drastically over the last ten years or so and many websites don’t only use HTML. Most sites now separate out a lot of formatting information using CSS (cascading style sheets) files. Many sites also include JavaScript and other programming code to create interactive and dynamic elements on the page. When you are focusing on the content, not only can this be a distraction, but there is potentially a lot of scope to create problems. This is why, broadly, I am focusing on tools with good HTML support, although they can also deal with other files, such as CSS and active elements like JavaScript.

Many smaller websites are created using online website creator systems such as WordPress, Squarespace and Wix. These give you direct access to the content text, making for a simpler editing experience without losing access to the advanced features described above. They make extensive use of templates that can mask a lot of complexity. They will often offer the features I’ll describe in reviewing the two types of editor below. So it is worth checking if those have been used and if you can access the content through those systems.

Text or visual editing?

The two types of tool I am going to look at are code editors and WYSIWIG (what you see is what you get). I have picked two editors, one of each type, both of which are free. Most web developers will use commercial packages, such as Adobe’s Dreamweaver WYSIWYG editor, and code editors such as Eclipse and Microsoft’s Visual Studio, but for some basic text editing the following should provide sufficient tools to let you get started.

The code editor displays the HTML code, and to preview the webpage you need to view it in a browser. In contrast, a WYSIWYG editor gives you a live preview of the page as you edit. Many of these will provide templates to help you create a professional-looking website with minimal coding. Online web creators like WordPress and Wix also tend to offer these features. WYSIWYG editors often let you work directly on the graphical screen. For example, you can drag and drop an image onto a webpage and the editor will generate the appropriate code.

So, you might wonder, why would you use a code editor, particularly as WYSIWYG editors often incorporate a code editor? For me the answer is simplicity. Most code editors are smaller, simpler programs. There are fewer features, but that also means there are fewer to sort through to find what you want, and the learning curve can be less steep. The code editor, generally, uses less memory, which can still be an advantage even with today’s big memory machines. If you need to test the HTML files, you can do this with your web browser (or more probably web browsers, as things may work differently in Chrome and Firefox). Ultimately though, this will come down to personal choice.

None of the webpage editing tools (as far as I am aware) have features like Track Changes or comments. This means you will need to keep track of these separately. While you can add comments to HTML by enclosing them in ‘<!–’ and ‘–>’ tags, they are not that easy to see within the HTML file. Using these will depend on what your client needs.

Code: Notepad++

For this review I am going to use Notepad++, which is a very flexible general code editor with good HTML support. While this is not aimed purely at web editing, I think it is a clear and well-written program that is simply nice to use. It can be downloaded from here.

Screenshot from Notepad++

Notepad++ provides a relatively familiar interface to anyone who has used older versions (pre-ribbon) of Word. Much of the left-hand side of the menu and many of the buttons will be familiar too. The real strengths of a code editor are the features to help you read through the HTML (or other code) easily, such as code completion (where the editor recognises commands or tags as you type and completes them for you, reducing missed closing tags) and syntax highlighting (where tag names and the values associated with them are highlighted in different colours, allowing you to more easily read the text). Here I’ve used the Style Configurator in the Settings menu to tell the program this is HTML and select a colour scheme – for example, blue for tags and pale brown for text.

WYSIWYG: BlueGriffon

For this review I am using BlueGriffon, which you can download from here. It is based on the same rendering engine (the bit of software that turns the HTML and other code into a webpage) as the Firefox web browser.

BlueGriffon has a nice clean interface and typically opens with the webpage in WYSIWYG view. In the screenshot below, I have used the dual view that opens a code editor with the webpage view. You can work directly in the webpage view, so correcting spelling mistakes like ‘servive’ in the last line of ‘About Me’ is straightforward. As you move around the webpage view on the left, the elements are highlighted in the code editor.

Screenshot from BlueGriffon

Many of the basic formatting features are shown down the left-hand side of the screen and help you to add neatly formatted (and hence coded) content. Compared to Dreamweaver, BlueGriffon has a relatively simple interface and limited feature set. This can be an advantage, as in editing the content you will only need a small proportion of the features available.

I mentioned testing in different web browsers earlier, and one nice feature in BlueGriffon is the globe button on the toolbar. If you click on this it allows you to open the file using another application, typically a web browser. If you have maths or foreign language characters this is worth doing, as these are examples of things that will render differently on different browsers.

Summary

BlueGriffon is available on Windows, Mac and Linux, but Notepad++ is only available on Windows and Linux. There is an alternative, CotEditor, for Mac that offers similar features to Notepad++. All three of these are free to download, which makes them very practical for occasional use, but they also have sufficient features for more intensive use.

Quick tip: Site maps

Here’s a quick tip that may be useful when you are working with websites. If you need to check what pages a website contains you can create a site map. A site map can be used to help search engines understand your website, or for you to visualise the website’s structure. Essentially, it is a list of all the pages.

There are a number of site map generators on the internet; I have used xml-sitemaps.com. Here you enter the name of the homepage of the site and the system goes off and searches through all the branches of the website (or ‘crawls’ it, to use the technical term), generating a list of pages. You can then use this to check you have all the pages that need editing.

About Andy Coulson

Andy Coulson is a reformed engineer and primary teacher, and a Professional Member of the CIEP. He is a copyeditor and proofreader specialising In STEM subjects and odd formats like LaTeX.


About the CIEP

The Chartered Institute of Editing and Proofreading (CIEP) is a non-profit body promoting excellence in English language editing. We set and demonstrate editorial standards, and we are a community, training hub and support network for editorial professionals – the people who work to make text accurate, clear and fit for purpose.

Find out more about:


Photo credits: header image by publicarray on Pixabay, Notepad and BlueGriffon screenshots by Andy Coulson.

Posted by Harriet Power, CIEP information commissioning editor.

The views expressed here do not necessarily reflect those of the CIEP.

Flying solo: Focusing your website on your ideal client

In this Flying Solo column, Sue Littleford gets deep into the business of editing text for your website.

When it comes to the content of your website, there are four stages: the initial content creation of the text, editing it down to do the job efficiently, making it accessible and keeping your content fresh. Let’s take those in turn. (I’m not going to talk about using images in this article – but keep ’em relevant, keep ’em in small file sizes for faster page loading, use alt text for accessibility and be aware of copyright issues.)

Creating the initial content

To paraphrase Malini Devadas, of the recently (and, I hope, temporarily) mothballed Edit Boost, marketing boils down to (1) understanding what you do and (2) who you do it for, then (3) telling them about it.

Your website (alongside the CIEP Directory, for Professional and Advanced Professional Members), is the easiest place to demonstrate the first two, and do the third.

It’s clear that people don’t give your website much time to make a good first impression. I learned at the 2022 CIEP conference that websites have 50 milliseconds in which to do it.

Your content should therefore be attractive and engaging (how I hate that word ‘compelling’ in this context!), be easy to access in terms of language, layout and colours, and focus on the potential client.

So here’s the biggest piece of advice today: create an avatar of your ideal client, then write for them, specifically.

How can you help them? What problems do you solve? Why should they hire you?

It’s always about them, not about you. That should steer your writing.

Think not about what you offer, but about what your client needs.

Keywords are a big thing

These are the search terms that people use in browsers to find what they need. And as search engines have been developed to work with more natural language, so they now reward keywords that appear in natural writing, rather than being crammed in artificially.

Keywords come in three flavours, depending on their length. The shortest are short-tail keywords, and are a word or two long. Long-tail keywords are little phrases – five words or more in length. Medium-tail keywords fit snugly in between, at three or four words long. This flexibility means that using keywords of different lengths can still make the writing appear natural while getting good search engine optimisation – the SEO you hear bandied about.

Short-tail keywords are necessarily more generic: ‘proofreader’, ‘editing’ and so on. The longer the keyword, the more specific it becomes, which is why you need to know the keywords that people type into their search engines.

How do you find out the keywords people use?

There are a number of services available, some paid for, some not. If your website is live, Google’s Search Console will show you the keywords that people already use when finding your site.

Or you can simply search for your service in your browser (like most of the world, I use Google as my search engine, most of the time, anyway) and see what comes up at the bottom of the screen under the heading Related Searches or People Also Ask.

Google screenshot showing related searches

Google screenshot showing what people also ask

There you’ll see what people are typing into Google, which is what you want to incorporate into your content – somehow – so that you are found, too.

For instance, I’m a copyeditor. I don’t proofread – proofreading and I just do not get along. But I know that ‘proofreader’ is the catch-all term for what I do, and people outside the publishing industry will be searching for that, in all probability, or maybe for ‘editor’ far more than ‘copyeditor’. So, I lob ‘proofreader/​proofreading’ into my text whenever I can, even though I don’t offer that service. Google doesn’t read the negative!

Editing the content into shape

Once you’ve created your content (which you can, of course, tweak endlessly even after it’s live) you now need to make it look the part.

I buck the trend, as about 70% of my traffic is on computers, and only 30% on mobile devices (of the mobile devices, tablets barely get a look in. Most weeks, it’s just computers and phones). In most cases, those figures are reversed, I understand (I suspect it’s because I market to publishers and packagers, and people are searching during work hours at their desk; if you market to indie authors, I’d guess those figures flip over in favour of phones).

It’s therefore essential to think of how your content will look on a teensy-tiny phone screen, not just how it looks on your 33-inch monitor.

So that means subheadings (keyword magnets) for ease of navigation, short sentences and short paragraphs.

We editorial professionals do like our words. We use far too many of them (guilty as charged) so here’s a chance to practise your word-cutting on your own text.

Ask yourself what that ideal client of yours wants to know, and will be willing to read. It’s not necessarily what you want to say …

Aside from being visually accessible in terms of paragraph and sentence length, structured around those easy-to-navigate subheadings, you’ll want to make sure the language itself is also accessible. Take a look at a couple of ‘Flying solo’ articles on just this topic: Good communication is accessible and Conscious language and the business-conscious editor or proofreader for some guidance on this.

Then pare away at your text until every word earns its keep – but don’t be so concise that reading it is hard going.

When you’ve finished, your text should be doing a shining job of demonstrating your editorial skills (showing, as much as telling) and speak directly to your ideal client.

Shaping the edited content

When it comes to importing your text to your website, think about possible formatting issues, as you would with any text that is to be published.

Incorporate white space, avoid walls of text and make sure it is easy to find the bit you want. Choose an easy-to-read font, that’s big enough to read comfortably, even on a phone.

If you have things you want your reader to click on, have a button if you can, rather than an in-line link. On my site, the button to email me is pretty visible – different colour, big but not ridiculous.

Accessibility

In 2021 I completely renewed my website, including an entirely new colour palette. One of the hardest parts of the build was to make sure that there was sufficient contrast between text colour and background colour on links and buttons.

The Web Content Accessibility Guidelines are supported by many websites offering to check a page and give instant feedback. My web guy and I spent a couple of hours going back and forth making sure we found colours that worked with the palette I’d chosen (I’d already had my logo redrawn – no going back! But the Coolors site helped us find compatible shades) and passed all the accessibility tests. I see that new colour contrast guidelines are on their way.

Keeping the content fresh

Search engines much prefer sites that don’t look neglected. That means periodically updating your text, whether that’s small tweaks, complete rewrites of a page, adding items to a resources page, posting a blog article regularly, adding new testimonials or adding whole new pages.

Throughout all your updates, do keep that avatar of your ideal client in mind.

But every now and again, as your business grows and you develop as an editor or proofreader, do ask yourself whether your ideal client has also changed. If so, work out a new avatar and then review all your content with that paragon at the forefront of your mind.

If you are getting more firmly established in a niche, you may want to trim your offer to reflect that, and stop targeting the type of client who is no longer a good fit for where you’re taking your business.

If you are adding services – maybe you’re a proofreader who now also copyedits, or now offers manuscript evaluation or developmental editing – then you have a new ideal client. Or one ideal client per service. Again, keep your text under review with that or those ideal clients front and centre of your thinking.


Buy a print copy or download the second edition of Going Solo: Creating your freelance editorial business from here.

About Sue Littleford

Sue Littleford is the author of the CIEP guide Going Solo, now in its second edition. She went solo with her own freelance copyediting business, Apt Words, in March 2007 and specialises in scholarly humanities and social sciences.


About the CIEP

The Chartered Institute of Editing and Proofreading (CIEP) is a non-profit body promoting excellence in English language editing. We set and demonstrate editorial standards, and we are a community, training hub and support network for editorial professionals – the people who work to make text accurate, clear and fit for purpose.

Find out more about:


Photo credits: header image by JESHOOTS.com, person on a computer by Andrea Piacquadio, both on Pexels, screenshots from Google.

Posted by Harriet Power, CIEP information commissioning editor.

The views expressed here do not necessarily reflect those of the CIEP.